Pages

Saturday, July 30, 2022

Bohemian Background hot foil Take 2 - Simon Says Stamp Dream Big Release

Hello! I'm back to share a couple more cards using the BRAND NEW Simon Says Stamp Dream Big Release! Do these look slightly familiar? Well, they are another take on a similar card I shared last week, so they should! You can find those cards HERE if you want to compare them! But while these cards use the same main items, they have a twist or two different to them!

While the other cards I shared used Aura foil for a softer look, for these I used Polished Brass for a more bold and shiny gold foiling look.


Much the same as last week, I foiled the new Bohemian Background on white cardstock, then used the Pinkfresh Studio Solid Hot Foil plate to foil the reverse image with the leftover foil.


I trimmed both panels down, and then used a Basic Rectangle to die cut the center out. Now, originally, I only planned to use the center portion, but I started looking at the outer frame, and figured there was no reason to waste it! It might be fun to pair them together!


So, I reversed the frames on each of these cards to get a fun inset look. I popped the frames up on foam adhesive strips around the edges of my white cardbase, then tucked the die cut portion on the inside. This created a fun shadowbox effect!


Once I had the bases done, I used the same Big Friend shadow wafer die as the previous cards, and different sentiments from the Reverse All Things Happy sentiment strips.


The friend word was die cut from black cardstock, then white cardstock for the shadow layer, and popped up with foam on the cards. Also added the sentiment strips with foam adhesive.


And, to round out all the sparkle, a few Pretty Pink Posh Sparkling Clear sequins!


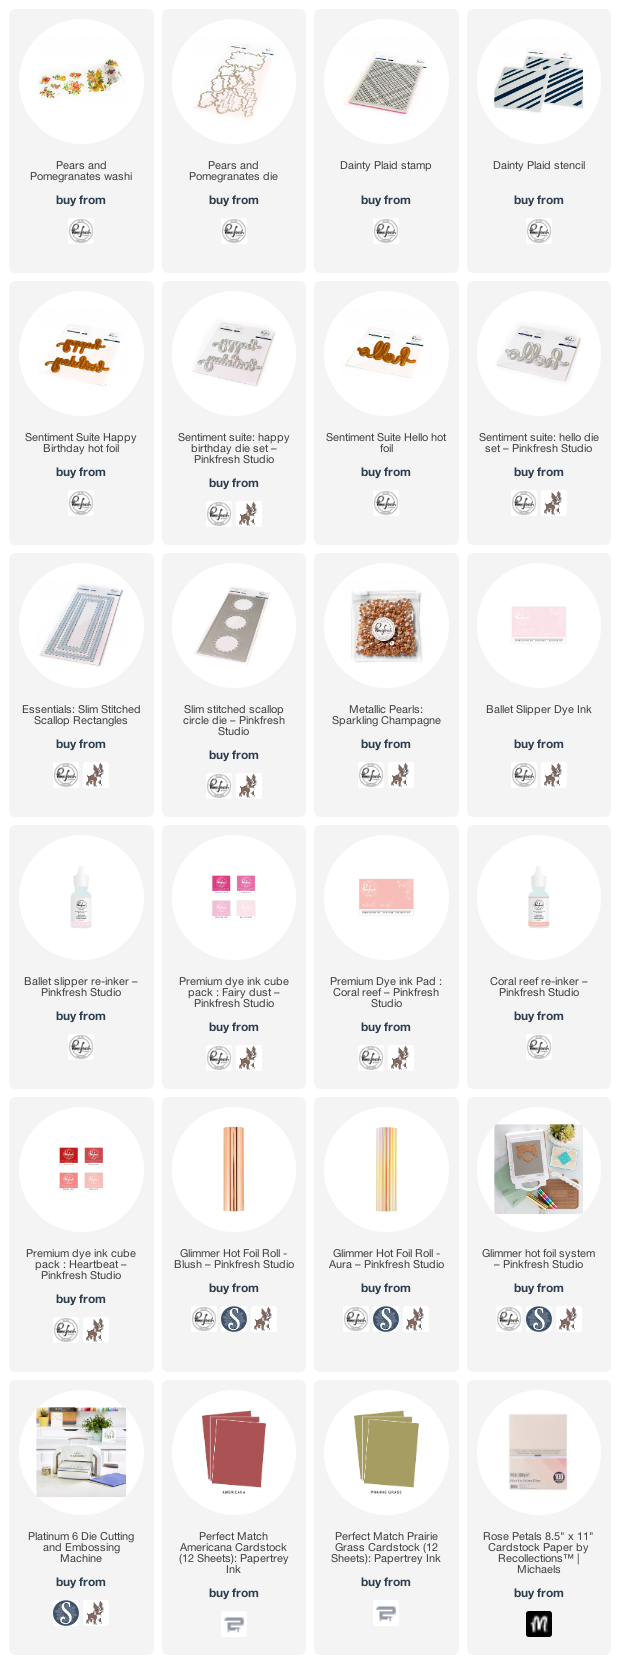
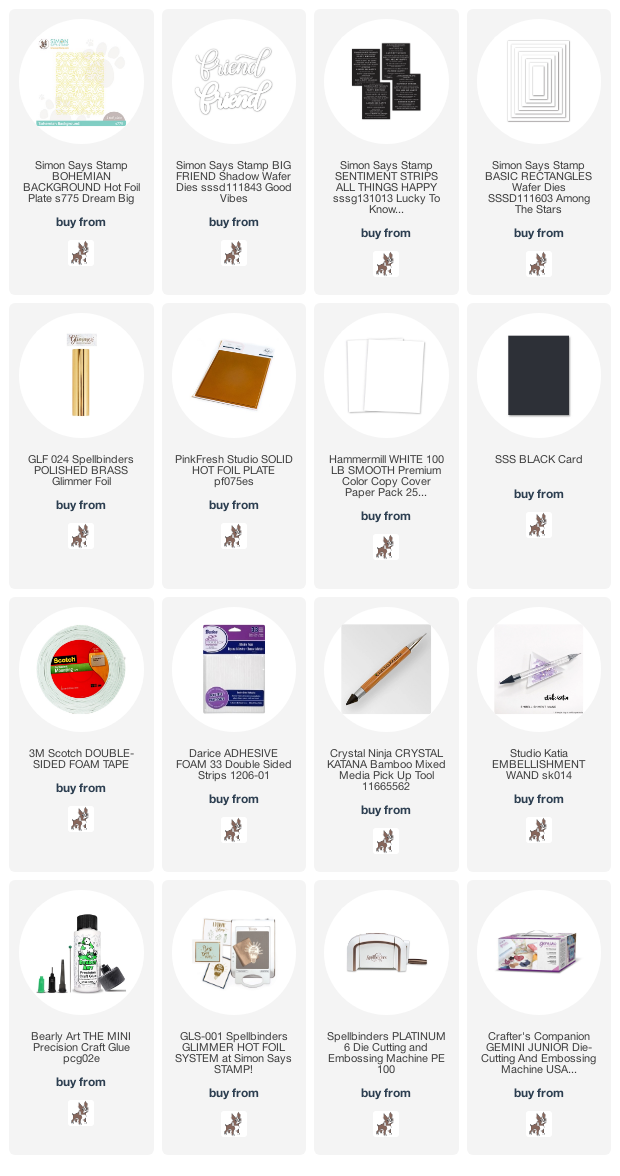
Product links are all below - including affiliate links where possible, which simply means if you use one of the links below that I receive a small commission at no additional cost to you. Thanks so much for stopping by! Have a wonderful day!!!

Friday, July 29, 2022

Diamonds, Washi, and Birthday Wishes Cards - Pinkfresh Studio

Good morning! I'm sharing some cards today that I actually made several months ago when the Sparkling Diamonds coverplate die first came out at Pinkfresh Studio. I paired it with some older washi tapes, as well as the Brushed Sentiments hot foil and stamp set to create some needed birthday cards. I took some photos, and some of the items went out of stock, so I waited to share. And then things slipped by and I forgot to share! 

And...since this week's promo at Pinkfresh Studio is the original 5 designs of washi tape at 25% off, I remembered these cards, and figured it was a good time to share! You can find the discount information at the end of my post today!


For this first card, I used the English Garden washi tape - one of my favorites! As with all of Pinkfresh's washi tapes, I also love that it has coordinating dies. Makes for super quick and easy cards!


I arranged them over the Sparkling Diamonds coverplate, and used a sentiment from Brushed Sentiments hot foil plate - this is actually the reverse image foiled with the Solid Hot Foil plate.


I finished off with a few Sparkling Champagne pearls. This was such a quick and easy card to make!


Next up, I have a slightly more masculine version - or at least, a bit less girly! :)


This second card uses the Indigo Vines washi tape. Such a pretty and subtle blue - this one doesn't have any foil on it, but is so pretty.


I added a sentiment to this one from Brushed Sentiment stamp set, stamped in Detail Black. A totally different and beautiful look!


Finished this one off with some Matte Silver Metallic Pearls - the perfect slight bit of sparkle for this washi. :)


Isn't it so pretty together?!?


Here is a peek at the items on sale - click HERE to check them all out!


Product links are all below - including affiliate links where possible, which simply means if you use one of the links below that I receive a small commission at no additional cost to you. Thanks so much for stopping by! Have a wonderful day!!!


Thursday, July 28, 2022

Warm Fall Washi Cards - Pinkfresh Studio Instagram Release Hop

 Hello! Today I am part of a fun Instagram hop to celebrate the new Pinkfresh Studio release! I have had so much fun creating with this release - yesterday was the blog hop, and I shared several cards for that! I'm sharing a slimline card I created on last week's Facebook Live for Pinkfresh Studio as a sneak peek as well as a second card I made with some leftover bits after the live. You can watch that video HERE if you want to see more details!  


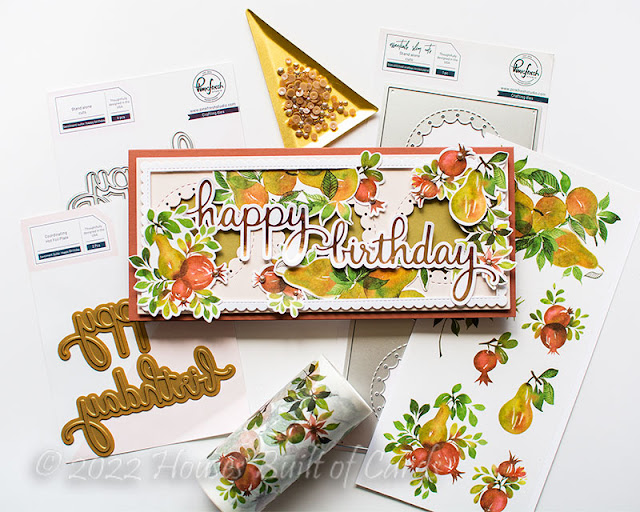
For this first card, I matched my cardstock to the warm cozy tones in the Pears and Pomegranates washi that I used. I die cut the Slim Stitched Scallop Circle die from soft pink cardstock, added some olive green cardstock behind those circles, and then a white Slim Stitched Scallop around the front of the panel.


I die cut all the washi, trimmed the largest piece in half, then just tucked and arranged all the pieces around the frame using a mix of liquid glue and foam adhesive where needed. So fun to play with it!


I used one of the new hot foil sentiments - Sentiment Suite: Happy Birthday, foiled in Blush hot foil, and then die cut with the coordinating and previously released dies. I tucked that on there with a bit of foam adhesive, just on the spots it needed it.


I finished off with just a few Sparkling Champagne Pearls tucked around parts of the washi. It had the perfect color tones to match this card!


And then...I had an extra panel of this washi that I had prepared in advance for the sneak peek photo, as well as some other leftover bits and pieces, so I just had to create one more card!


I used the other part of the Slim Stitched Rectangle leftover from the previous card, and then used the center negative space as well. But I added something to that center negative space first! I used the new Dainty Plaid stamp and stencil set, heat embossing the stamp image in whit on each end of the panel. There is a bit where it doesn't connect in the middle, but not a problem! I then ink blended with the coordinating stencils in Ballet Slipper and Coral Reef, using only two of the stencil layers, and leaving part of the space white. And I only blended on the outer edges, fading it in as I moved towards the center portion. A fun way to mix things up!


I tucked all those fun washi pieces in, added another of the new hot foil words, Sentiment Suite: Hello, hot foiled in Aura foil. I popped that up with foam adhesive, and added a few more of the Sparkling Champagne pearls, and mounting it all on a soft pink cardbase!


Product links are all below - including affiliate links where possible, which simply means if you use one of the links below that I receive a small commission at no additional cost to you. Thanks so much for stopping by! Have a wonderful day!!!


Wednesday, July 27, 2022

Pinkfresh Studio July 2022 Stamp, Die, Stencil, Washi, and Hot Foil Release

 Good morning! Today is the blog hop to celebrate Pinkfresh Studio's July 2022 Stamp, Die, Stencil, Washi, and Hot Foil Release! One of the items in this month's release was part of the Create and Connect event we did in May - and there are lots of new surprises as well! You aren't going to want to miss a stop along the way - TONS of inspiration and prizes up for grabs! YAY! You can find links to all of the new release items I used on today's cards at the bottom of this post! 


I have several cards to share as usual! But, I'm going to start with this card that is probably my favorite that I've made in quite a long time - you know those ones that just end up working out so perfectly?!? And, it's a shaker as well! :)


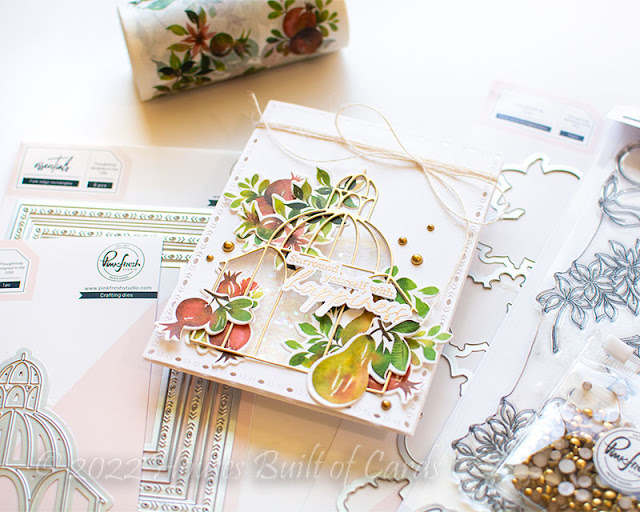
This card uses both the new Gazebo die (which was part of the May Create and Connect Virtual event, and now releasing in full), and the new Pears and Pomegranates washi tape.


I die cut a rectangle using Folk Edge Rectangles, and then die cut the window with the Gazebo die. I saved that die cut Gazebo as well, and die cut it again from white cardstock, and then Matte Gold cardstock, and layered together. It is a very dainty and delicate die, but die cut great for me with a metal shim.


I created the shaker element, and filled it with my favorite tiny star confetti from Pretty Pink Posh. Once the shaker element was created, I tucked the die cut pieces of washi around the Gazebo, adhering the inner ones first, then adding the Gazebo with liquid glue over the top, before adding the last couple pieces on the outside of the gazebo.


Sentiment is from the Pears and Pomegranates stamp set, and I love that the larger sentiments have their own coordinating dies as well! I head embossed it in Antique Gold embossing powder. Finally, a few Matte Gold Metallic Pearls sprinkled around, and a nice jute string bow at the top finish this card off!


Now...I used most of the washi pieces from one panel on the card above, but I did have this large piece left, so I had to turn it into a card as well!


For this card, I also used one of the new hot foil Sentiment Suite sets - Happy Birthday. These are new releases that coordinate with the older Sentiment Suite die sets, and turn that beautiful font from the dies into a hot foil plate. I love that we are breathing new life into an older release - and updating it to hot foil! I only used the "happy" word for this card - which is another fun thing, the words are separate pieces, so you can choose which one you want to do. You can even hot foil directly onto a panel - so fun!


I used the Floral & Diamond Tiles coverplate die for the background on some very soft blush cardstock, trimming it down to leave a bit of a border around the edges. I then mounted the pears over top with foam adhesive, then the sentiment - the additional sentiment is from the Go For It stamp set.


I layered in some Curvy Foliage cut from white cardstock, and then finished off with a few sparkly Iridescent Clear Drops - love those things so much!


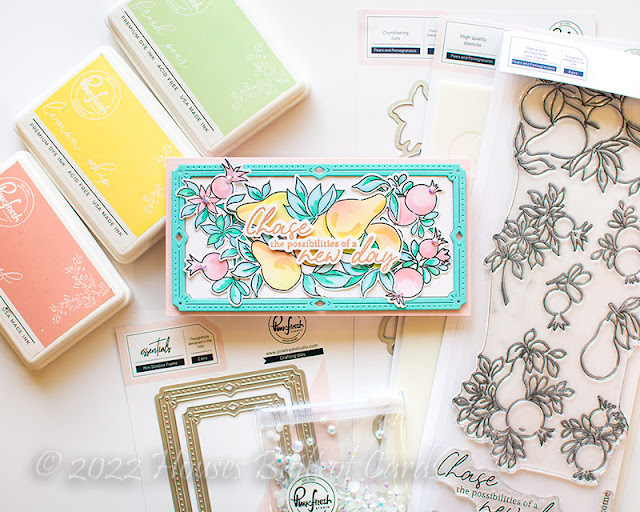
Moving on - but as different as this next card is, we aren't moving too far! This next card uses the stamp and layering stencils for the Pears and Pomegranates set - and don't you love the entirely different look you can get, just from switching out the colors?!?


I mixed and matched ink colors - mainly on the pears. I blended a mix of Fresh Pear (of course!), Lemon Whip, and Coral Reef to go for what I see as a sort of realistic pear color. I used Coral Reef and Lilac to blend on the pomegranates. For both of those parts of the stencil, I used the same colors, just deeper for the detail layer on them. I've loved mixing blues and aquas together lately - so for the greenery, I used Summer Shower for the base layer, then the second layer aquamarine. So perfect! Then I die cut all the layers out to arrange on my card - using nearly every piece!


I used a pink cardbase, die cut an aqua frame using Mini Slimline Frames die and popping it up with foam adhesive, then tucked a white die cut using the center of that same frame die in the middle - this gave me the perfect place to arrange my pretty pieces.


I finished off with another sentiment from the stamp set that has a coordinating die - heat embossed in Rose Gold embossing powder for a soft and perfect color coordination. Finally, a few Glacier jewels finish this off!


Okay - moving on to a new layering stencil set, that is perfect for the fall season! And while it is perfect in traditional fall colors, it is so fun to switch up the color combo as well!


I used gray, yellows, and aquas with the Fall Leaf Border stencil to create my stenciled layers, and I love how it turned out! It also has some word stencils on the side, and you can grab a coordinating die set to cut those words out!


I die cut it with a Diagonal Stitched Rectangle, and popped it up with foam on a coordinating yellow cardbase. I added another of those fun hot foiled words - Sentiment Suite: You, foiled in Matte Gold foil.


Secondary sentiment is from another coordinating older release - Simply Sentiments: You, stamped in Detail Black ink. Then I added some Sunshine, Ocean Breeze, and Glacier crystals to finish off!


Remember earlier this year we released a beautiful Sunflower set - washi, stamp, die, layering stencils? Well, we are adding a roll of Fall Sunflower washi to that line-up that will work with the current releases, just in warmer fall tones with a coppery gold foil. Another great option, and I love that it will work with the other dies, stretching your supplies even more!


I had that Blanket Stitched Oval with texture from the Hexagon Tiles coverplate sitting on my desk, leftover from some other project, so I decided to use that to cluster my sunflower pieces around. 


I also added a matte gold frame die cut with Slim Scallop Rectangles, popped up with foam, and a soft bit of ink blending in the background with some Olive ink - just to help everything pop.


And another of the new hot foil words - Sentiment Suite: Hello. I also foiled this one in Matte Gold hot foil. The secondary sentiment on this one is from Pears and Pomegranates stamp set, hand trimmed down to a small banner shape on a strip of cardstock.


Finally, a few Metallic Gold Pearls finish this card off!


I love the rich colors and deep hues of this washi - so warm and cozy!


GIVEAWAY INFO:

Make sure and leave a comment before you leave for a chance to win one of 10 $25 gift certificate to Pinkfresh Studio chosen from comments left across the hop! All winners will be chosen and posted on the Pinkfresh Blog on Friday, August 5, 2022 - so make sure and check back to see if you were a winner! Winners must check that page and claim their prize within 2 weeks.

Here is the entire blog hop line-up so you don't miss a single stop - and product links are below - including affiliate links where possible, which simply means if you use one of the links below that I receive a small commission at no additional cost to you. Thanks so much for stopping by! Have a wonderful day!!!

You are invited to the Inlinkz link party!

Click here to enter