Showing posts with label American Crafts Paper. Show all posts

Saturday, October 14, 2023

Fall Label Notecards - Simon Says Stamp November Card Kit

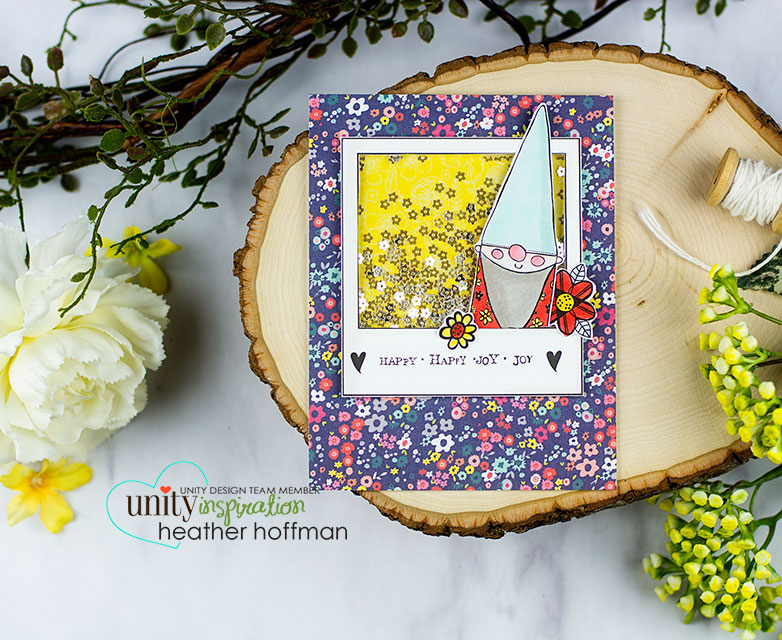
 Hello! I'm popping in to share my first cards using the new November 2023 Simon Says Stamp Card Kit -  Cozy Autumn Hugs! This month's kit has a great autumn feel, and lots of fun cozy elements! The included stamp set by the same name has some fun images to stamp as well as some great sentiments, there is a fun embossing folder, a versatile label tag die, a fun layering stencil, pretty pattern paper...that's all not to mention the cardstock, tools, and more!


Not surprisingly, I love the pattern paper in the kit - and it paired up so well with the Label Tag die in the kit with stamped sentiments from the stamp set. I mixed heat embossing and black stamping for the sentiments - and love the look it gave! I trimmed down some of the Burnt Orange cardstock in the kit into strips, and arranged those diagonally across each of the pattern paper panels, before mounting the tags over the top. I also tied a fluffy white bow on each one, and then embellished with some Matte Gold Pearls from Pinkfresh to finish them off! Here are more photos of these finished cards:


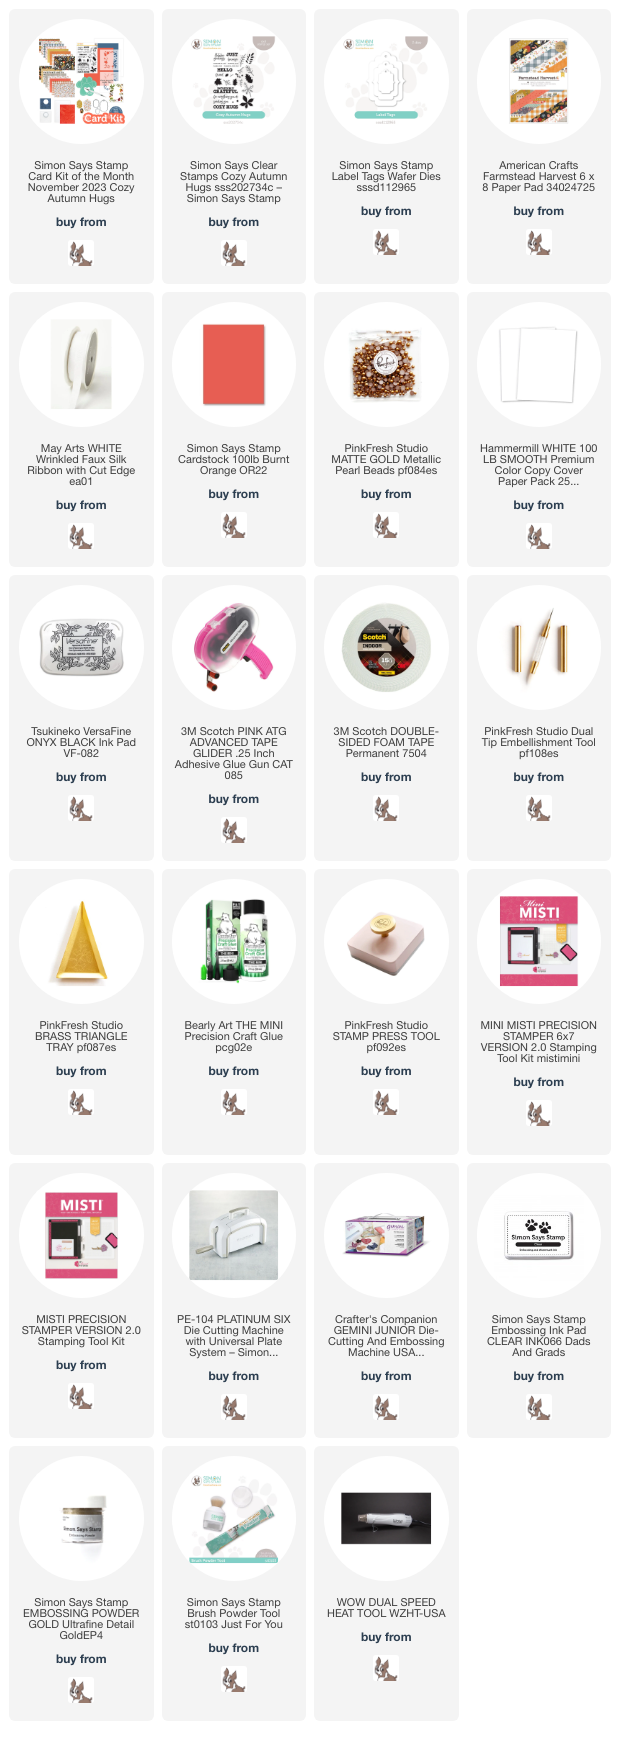
Here is a closer look at the entire kit contents - you can see it all HERE:


Product links are all below - including affiliate links where possible, which simply means if you use one of the links below that I receive a small commission at no additional cost to you. Thanks so much for stopping by! Have a wonderful day!!!


Saturday, November 30, 2019

Obsessed Penguin - Simon Says Stamp Card

Good morning! I'm stopping by today with anther funny sentiment card, using the same stamp set I used on the funny gnome card from a couple days ago from Simon Says Stamp. This time I used a simple stamped penguin from the Snow Much stamp set!


I thought this funny little penguin was so super cute - and adding wiggly eyes was such a cute touch with that hilarious sentiment from Playful Messages stamp set!


I added some simple Copic coloring just to the nose, and stamped the heart in red ink and colored it in with Copics as well for a solid heart image.


Some pattern paper at the top and bottom of the panel - the top end die cut with Wavy Scallop Stitches - and then that front panel popped up on a kraft cardbase with foam adhesive!


Product links (or similar equivalents) are all below - including affiliate links where possible, which simply means that if you use one of the links below, I receive a small commission at no additional cost to you. Thanks so much for supporting my blog, and stopping by! Have a wonderful day!!!


Sunday, June 10, 2018

LID June Release Day 1 - Coffee Cup Gift Cards Galore

Hello! The day is finally here to start sharing projects with the BRAND NEW June release at Lil' Inker Designs! There are SOOOO many incredible new stamps and dies in this release - and if you like coffee, kitties, or babies - you are going to LOVE this release!!! You can find the entire new release HERE!


You should have arrived here from Chrissy Larson - if you stopped by here you can refer to the entire blog hop at the bottom so you don't miss a stop or a chance to win the amazing giveaway. I also have links to all the new products I used on today's cards!

Today, I went a little crazy with my favorite new die from the release - a perfect gift card holder called To Go Coffee Cup Gift Holder Die! Because, who doesn't love to give or receive coffee gift cards, right?!?!?


It really is SOOO completely genius! You slide the cover off... (random fact - did you know they are called paper "zarfs?" You can Google it! Kind of fun to say to your barista and see if they know or not! Haha!)...and then...


It opens up to reveal the gift card inside! Eek! The brilliance of it gets me every time!


I made these 4 that are more girly verions - love that this is a fabulous way to use up some of your pattern paper stash as well!


And then I made these additional 5 all in more manly colors. Notice those fabulous sentiments on all of them as well? Those are from another of my favorites from this new release - Coffee Talk 2 Stamp Set - the PERFECT accompaniment to this fabulous new die!


For each of these, I die cut the main panel from white cardstock, then the lid and "zarf" from pattern paper. To add pattern paper to the front of these, I did some partial die cutting - super simple - then trimmed off the extra with scissors to make it fit just the front of these. I made 7 of these in about an hour, while simultaneously being interrupted by my daughters as they were doing their homeschool work and needed my help. They really were just that easy!


Your next stop along the blog hop is Jennifer Carter - head over there next to finish the hop before you go shopping. See you tomorrow with more projects and fun!

Now...how would you like to win the ENTIRE new release?!?!?!? WOW - some lucky winner is going to be VERY happy! Make sure and leave a comment here before hopping along to the next stop - and leave comments at each stop for a chance to win!


Here is the entire Blog Hop line-up - make sure and check out each stop and leave your comments:

Heather Hoffman (you are HERE)

Product links are all below - including affiliate links where possible, which simply means if you use one of the links below that I receive a small commission at no additional cost to you. Thanks so much for stopping by! Have a wonderful day!!!


Tuesday, September 26, 2017

Rustic Happy Birthday for my Daughter's 13th

Hello! Today was my youngest daughter's 13th birthday! Naturally, being last minute as usual, I sat down in the morning to put together a card for her! (I hope I'm not the only one who does that!) I always find it hardest to make cards specifically for a person - for some reason I feel like I have to get it just right to fit them - especially when it is one of my kids. I ended up pulling out a new paper pad that I hadn't used and some Reverse Confetti stamps and dies - and couldn't be happier with how it ended up! Fits her to perfection! She is not your typical girly girl - so no pink or glitter. She loves the outdoors, trees, natural colors, and archery - so this is what I put together:


I started off with my pattern paper actually - a new one I hadn't yet broken into to use but loved - American Crafts Creekside. I used Boho Vibes and coordinating Confetti Cuts to stamp and die cut a couple of arrows and colored the feathers with a Copic marker and added some white gel pen accents. I stamped and die cut the sentiment using Circle Wishes and coordinating Confetti Cuts on some of the pattern paper from the pad. I also used more pattern paper to die cut the Sunburst Tag Layer.


I added some white paint splatters to my background pattern paper, then once it dried a bit, layered everything else on it adding foam adhesive behind the circle, and some clear foam adhesive to pop up the arrows. I added a white frame from All Framed Up, some jute twine on the tag, and a wood veneer star from my stash on the center of the arrows. As a final embellishment, I added a few Gold Confetti from Pretty Pink Posh and filled in the center with white Nuvo Drops (which gave me a touch of gold shimmer, but without too much to offend the non-girly birthday girl!).


Links to the Reverse Confetti products I used on this card are below - click on any of the photos for a closer look:


Also linking up with a couple challenges - first up Word Art Wednesday's Anything Goes Challenge:


Product links are all below - including affiliate links where possible, which simply means if you use one of the links below that I receive a small commission at no additional cost to you. Thanks so much for stopping by! Have a wonderful day!!!


Tuesday, July 18, 2017

Peekaboo Gnome Shaker Card

Good morning! Dropping by with another card and Quick Tip video using another new Unity Stamp Company release! This time I'm using one of the super fun new Susan K Weckesser sets to make a shaker card - no dies required which is perfect!


Here is the video for making the shaker card:


I chose bright happy papers to go with the feel of this stamp set - and it was super fun to be able to fill the shaker with sparkly flower confetti from Pretty Pink Posh!


Product links are all below - including affiliate links where possible, which simply means if you use one of the links below that I receive a small commission at no additional cost to you. Thanks so much for stopping by! Have a wonderful day!!!


Thursday, June 29, 2017

Winnie and Walter June Release - Day 3 - You Deserve a Parade

Good morning! Welcome to Day 3 of sneak peeks for the brand new Winnie and Walter release! This is a FABULOUS release full of lots of fun new goodies! Today's sneak peeks are some more of the ever so popular Evelin T Designs stamp sets! There is one set premiering today on the Winnie and Walter Blog - and another one coming tomorrow as well!


Oh how I adore these sweet critters! I tore the top and bottom edges of my white cardstock, then did some distress ink blending to create a background for them - masking off the bottom over the sentiment to create a crisp line. Since my background paper was pretty busy, I colored the critters in gray tones for a black and white vintage feel, then attached them with foam adhesive. A few of the musical notes from the set help finish off the background around them! Isn't that the cutest parade you ever did see?!?!?!?


Product links are all below - including affiliate links where possible, which simply means if you use one of the links below that I receive a small commission at no additional cost to you. Thanks so much for stopping by! Have a wonderful day!!!