Here is the photo inspiration we have to play with this time around:
Have I mentioned lately how much I LOVE watercolors? Because I do! I heat embossed the flowers and then added the watercolors over the top with lots of water, and a few flicks of deeper color. All supplies linked below!
I hope you will join in and play along! Looking forward to seeing your creations! Have a wonderful day!!!
Good morning! I'm so exciting to be joining Pretty Pink Posh again as a guest to designer to celebrate the release of 3 new die sets, and some fun new sequins! There are also some prizes to be won, so make sure and check out the bottom of this post to see more about that! (And...I happen to have a separate little Pretty Pink Posh giveaway posted HERE as well if you are interested in that!)
I had so much fun playing with the new dies, sequins, and those amazing dew drops! First up - I actually made a set of two cards, by inlaying the dies from the Decorative Tag 1 Die set:
This is the first one - I also used a darling stamp set I had been dying to get inky from Lawn Fawn called Winter Alpaca. So totally cracks me up!!! The background was cut with Stitched Duo 2 Die around it, then I used a Wplus9 die for the scallop edges.
Here is the second color combo - see how I reversed the colors? Since I was inlaying different colors, and had enough for two cards, it was super simple to make them both at the same time!
Used that same Wplus9 die for the scallop edge, and some Simple Stories pattern paper - nice and elegant! Sentiment is from a Mama Elephant stamp set, heat embossed on vellum.
I love mixing different things into my shaker card - don't you?!?!?
I also used those amazing new Droplets on this card - you can read more of the details HERE if you are interested! :)
Thanks so much for stopping by today! There are TWO $25 Gift Certificates up for grabs today for comments left along the hop - so make sure and hit every stop, and leave some love!
Good evening!!! So - this little blog is celebrating FIVE years this month - on October 20th!!! I can hardly believe it has been that long, and yet in some ways I don't remember not doing this. I have been SOOOO incredibly blessed by all the amazing people I have met through this hobby - and so incredibly lucky to work with some AMAZING products and companies. To celebrate I have lined up TONS of giveaways from some of these amazing places. HUGE thanks to each of them for their generous donations of prizes - I'm super excited to be able to share them with you!
Big drumroll tonight...the giveaway I have for you is pretty HUGE!!! I am SOOO excited that Iliana at My Sweet Petunia - the inventor of the MISTI (Most Incredible Stamping Tool Invented) has so sweetly agreed to provide a MISTI for one lucky winner of tonight's giveaway! Anyone else excited about this?!?!? If you've never heard of this tool, I have a couple cards to share below, including a video on how to use it to make these cards super easy! I also have a video HERE and HERE on my Youtube channel (with coordinating blog posts) showing two different techniques using it. While the MISTI is incredibly for making lots of cards - like for Christmas cards and such, I actually find I use it far more for special techniques like the ones I share on my videos. I know some people find the price a bit high - but I feel like it has been so worth it for me with some of the fun things I have been able to do with it!
Here is that video showing how I put these cards together:
Here is a close up view - see how PERFECTLY the sentiments match up? I know there are probably more ways to do that with other methods - but this makes it SOOO incredibly easy! When I was finished, I used Lil' Inker's Stitched Rectangle Mats to emboss the frame around the edges, using embossing pads and the embossing sandwich on my Cuttlebug so it didn't actually try to cut all the way through. This added the perfect amount of interest to the front of my card!
Because I had all those extra pieces, I went ahead and made 2 other cards using the rest - total of 3 cards, and you saw how fast they went together! Super fun!
And the other color:
You can enter the giveaway below using Rafflecopter - this is my first time using this method for a giveaway, but since I have so many to do this month I thought it might help make it easier! So - if there are any bumps along the way, please forgive me as I figure them out?
All giveaways will stay open until the 20th (the official birthday date!) and I will announce all winners that day! If you already follow on Pinterest, Youtube, or Facebook - feel free to leave your name for each day of giveaways, no need to be a new follower only!
Good morning! Excited today to be hopping along as one of the guest designers with Pretty Pink Posh to celebrate the release of 3 new die sets, and some fun new sequins! There are also some prizes to be won, so make sure and check out the bottom of this post to see more about that!
There are 3 new die sets, and some fun new iridescent sequins, as well as some fun new packs of sequins releasing. For my first project, I used both Storybook 1, and the bow part of Twine and Bows:
I used both the negative, and the inside of the dies - notice how there is stitching on both parts? I stamped a city skyline on the inside using an Altenew stamp set, and turned it into a shaker card with some of the new iridescent Blue Lagoon sequins and some Sparkling Clear 4mm sequins.
I used an ADORABLE Mama Elephant stamp set to create my scene, stamping my sentiments on the fun speech bubbles. Added a few fun iridescent sequins to finish off - Peacock Feathers, Sunshine Glow, and Blue Lagoon again. Each little girls dress is covered in Wink of Stella too - hard to see the sparkle, but it goes so fun with the iridescent sequins!
Finally, I wanted to used Twine and bows all on it's own to create a "gift package" on a card:
I used a simple rectangle of solid cardstock, and wrapped two sets of the twine around. Layered two bows on top of each other, then stamped some florals from Altenew around it, together with the simple sentiment. Layered it on a doily, and some Crate Paper pattern paper, then finished off with some more iridescent sequins, this time in Strawberry Burst - and a few more Sparkling Clear 4mm sequins - probably one of my all time favorites! :)
There are two $25 gift certificates up for grabs along the hop - winners will be picked randomly from comments along the hop, so the more comments you leave, the better your chances! Comments are open until 11:59 PM PDT on 8/9/15, and winners will be announced on the Pretty Pink Posh blog. Here is the entire blog hop line up:
Good morning! YAY for a new challenge at the Sparkle and Shine Challenge Blog - this week we have a beautiful photo inspiration, and a prize sponsored by Pretty Pink Posh! I pulled out some new Mama Elephant goodies I had been dying to play with to make a cute little scene on my card:
Here is the photo inspiration we have to play with this time around - fun to use for something fitting for Fourth of July, or use the colors, or find some other inspiration!
I die cut an oval panel with Lil' Inker's Stitched Oval Mats out of watercolor paper, then stamped my scene using Mama Elephants Chance of Rain. I used Zig Clean Color Brush Tip Pens and a waterbrush to color my scene, then added some woodgrain paper from MME, a sprinkle of sequins from Pretty Pink Posh, and splash of white Mister Huey's Mist, then adhered everything together with foam adhesive for dimension.
I hope you will join in and play along! Looking forward to seeing your creations! Have a wonderful day!!!
Good afternoon! I took a little time between this morning and this afternoon to make this cute card for my sweet little niece whose very first birthday is today! Something special like that just calls for a special card, right? I also hadn't had much opportunity to play along with the 30 Day Coloring Challenge that ends today, due to traveling and being busy working ahead for DT projects, so I thought I'd try to play along for the last day as well:
I used a bunch of fun Mama Elephant goodies on this card - starting with Landscape Trio dies to use as a mask to ink up the background with MFT dye ink. I used Sunday Stroll to create the scene, and built the cute sentiment from Sunday Sentiments and Three Amigos. Lots of foam dimension for adhesive, and strip of Lawn Fawn pattern paper on the side, and lots of sparkling clear sequins from Pretty Pink Posh to add a fun finishing touch!
Hello! I'm posting an extra card today that I made over the weekend - I have been super busily working on DT stuff, and this new set from Mama Elephant had been sitting on my desk waiting for some love - so I thought I would make a card just for fun! Always nice to do! :) I also have wanted to play a bit more with distress inks and making a background - something I don't feel that good at, even yet, but it sure was fun on this card! I will definitely be playing more with it in the future!
I also plan on playing along with Mama Elephant's April Challenge - Make Me Laugh (I know this one isn't exactly "funny" - but it makes me smile every time I look at it - who can resist those sweet bears?):
I first created my background by blending distress inks together, adding some droplets of water, and a few flicks of shimmer mist. I die cut that panel using Index Card Dies, added a black mat, and then a die cut scallop in white from the same die set. The black border on the bottom was cut with Landscape Trio Die. I stamped the sentiment from Bear Hugs and heat embossed it, stamped the bears and moon, colored with Copics, and fussy cut out before adhering. Added some tiny stars from the set stamped in white pigment ink over the background to add to the starry sky feeling.
Thanks for stopping by today! Have a wonderful day!!!
Good morning! Just dropping by with a card I made a while back and hadn't had a chance to share! This was actually for my older brother, whose birthday happens to be on Valentine's Day! This definitely caused him no end of grief growing up, and I was a good little sister and tormented him lots over it! ;)
I used Mama Elephant's Party Kit to stamp all the balloons in some fun colors of MFT dye ink - I used the heart ones since it was Valentine's Day, but used masculine colors. I used Altenew's Label Love for the sentiment, heat embossed with white on black cardstock, then mounted with foam adhesive. Finished off with a bit of washi tape on the bottom.
Good evening! Today I decided to take on a 30 day coloring challenge - coloring something up every day - I posted a sneak of the image on Instagram earlier today, and thought I would pop in with the finished card this evening:
As I mentioned above, this is my first day joining in with the 30 Day Coloring Challenge over at the Daily Marker - I felt like I learned a lot watching her video, and tried to incorporate that in to my coloring I did today:
I used a Purrfect Pair from Mama Elephant, a set I got last fall actually, and am ashamed to admit I hadn't used yet! Seemed like a good opportunity to pull them out! I used Copic markers, some white gel pen, and a touch of Wink of Stella on my images. See that doily back there? I went to Olive Garden last weekend with my daughters, and those came under our desserts! One of them was dirty, but I brought home a couple and was excited to actually use it on a card a swell! A little Simon Says Gray cardstock, some Pebbles pattern paper, a flick or two of Heidi Swapp Color Shine, a few Pretty Pink Posh sequins, and a bit of jute twine finish it all off!
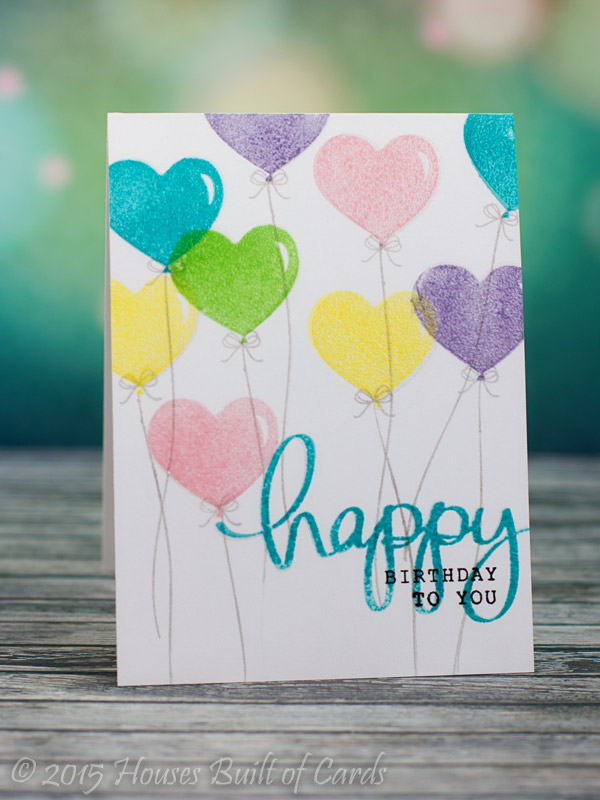
Good morning! Just thought I would pop in a share a couple of one-layer birthday cards I made recently, using clear embossing powder to add a little texture!
I used the cute Mama Elephant stamp set called Party Kit to stamp the balloons - stamping in a rainbow of MFT inks, then stamping over again with Versamark Ink and embossing with clear powder. Love the slightly offset look I ended up with, and the beautiful shine!