Showing posts with label Jolee's Heat Set tool. Show all posts

Thursday, June 14, 2012

New Peachy Keen Challenge - it's a sketch challenge!


Hello! It time for another Friday challenge over at Peachy Keen Stamps! This week we have a super fun sketch for you to try out! Here is what I made this week:
And here is our fun sketch:


Here are the sets I used this week:


I haven't used that cloud background stamp nearly enough, so I started with that.
Stamped the rainbow and cloud, colored with Copics, then fussy cut them out. Added a small layer of stickles over the rainbow for some sparkle, and a bit around the edges of the cloud - and of course stamped a cute face!
When I stuck the rainbow down, I put foam adhesive under the cloud and that side of the rainbow, but not the other side. I wanted it to look as if the rainbow was coming off the card at you!
Added some ribbon from cotton twill Ribbon Carousel for the banners, and the sentiment with a rainbow of bling attached with my Jolee's heat set tool. 
I couldn't believe how difficult it was to get a good picture of this with the glitter. In the last picture, it looks like the rainbow is curled all over the place, and I promise it really isn't in real life!!!

Now hop on over to the Peachy Keen blog to link up your creations! Can't wait to see them!


Tuesday, March 20, 2012

Rainbow and Made it Myself Challenge


Just popping in with a real quick card I made for the Paptertrey Ink Make it Monday #58 Challenge, and the Paper Crafts Magazine March Gallery Contest - Rainbows.
I used the technique from the Make it Monday challenge for gradient backgrounds (click HERE for the video), and my Copic markers to create the rainbow background. 
I then pulled out my PTI letter dies to cut the "smile" out of the center. Mounted it with foam adhesive on white paper, then matted it with black before adhering to the card base. LOTS of dimension! 
Finished off by stamping a sentiment from a PTI set, and stuck a few gems on with my Jolee's heat set tool. 
Pretty fun! I'm happy with how it came out - and I love this technique with the Copics. Will probably be doing it a bit more in the future! Thanks for visiting!


Thursday, March 15, 2012

Unity Friends with Flair - 2 cards - Giveaway - and spreading my wings...


Good morning! It is Friday and time for Unity Friends with Flair! I have two cards today - so it is a long post! Be warned! I also have a giveaway at the bottom if you make it all the way through!!!

I am using these cards to also put in for the Unity Design Team Call. I know I'm probably dreaming to think I have a chance of making it (what with all the amazing talent I see out there all the time!) - but that is kind of what Unity is about. Dreams. Wishes. Spreading your wings to fly. So...with a deep breath...here I go! And even if I don't make it, I will at least know that I gave it my best! And I will keep using and LOVING all my Unity stamps - and wish whoever makes the team the best of luck! 

I decided to do a card that I spent a lot of time on, and then do one that I put together on a quick whim. Just because, I like to do both! This first one I made for the recent Papercrafts Magazine Stamping publication call. It wasn't picked, so I decided to share it here. Because I love it! Seriously one of my favorite cards ever I think! Here it is: 
I used the Unity Stamp "Sweetest Day" itty bitty for the strawberry, and the sentiment was from the June 2011 KOTM. The pattern paper is from a couple of Basic Grey 6x6 paper pads. 
I paper-pieced the strawberry, cutting an extra layer of the stem portion, then only sticking the center of that one down, and curling up the ends slightly for dimension! Then put bling on all the "seeds" using my Jolee's heat set tool. Finally popped it off the background with foam adhesive. 
Inked the edges of the white cardstock with Time Holtz distress ink in Antique Linen (my FAV!), stamped the sentiment, tied some PTI twine and a PTI button across the top, and made some tabs with some October Afternoon trim from the Sidewalks wrap pack. Attached that with foam adhesive to the next layer.
The white ruffle along the sides is from some Tim Holtz trim. I cut it in half lengthwise, then glued it behind the second layer. The edges of that layer, and the base layer were inked with Tim Holtz distress ink in Vintage Photo.
That's it. A card I love and spent a lot of time on. 
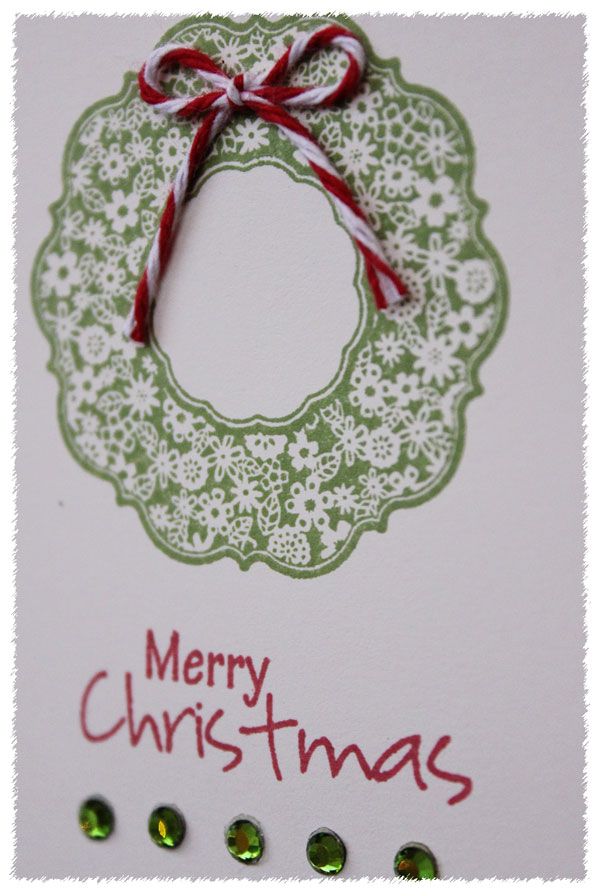
My second card was put together quite quickly. I was mailing some Cricut cuts to someone as samples for a special order, and wanted to put it in something to protect it. An opportunity to make something beautiful? Yep...I was on it! So this is what I pulled together. Took me seriously like 30 minutes from start to finished (counting photographing and editing pictures!) - I usually find that I work better under pressure oddly enough! 
I used some Cosmo Cricket paper from one of their 6x6 paper pads, tucked a doily behind one layer, and stamped 3 images from the Unity February 2012 KOTM. Used some PTI inkpads for the green and blue ink. Then inked the edges of those strips with some more Tim Holtz distress ink in Antique Linen. 
Finished off with a little white trim from my stash, and some Baker's Twine from the Twinery.  
Okay...now assuming you made it all the way through - I also have a giveaway!!! At the time I am writing this, I am at 499 followers - ALMOST 500!!! I was going to wait until I hit 500 - but I couldn't stand it any longer! The other thing I wanted to accomplish was completing building a second house for a widow and I recently got a special order that puts me over that amount (click on the "About Me" tab above to read more about that if you're interested!) So, I have this to giveaway to one person who leaves a comment for me today:


This is one of my favorite sets! It is so big and beautiful! I was seriously so amazed and excited when I first got this set, and I have had this extra set stashed for a special occasion like this. 

So, to win - just leave me a comment here! Anything you want to say at all! 

And thanks so much for being part of my life in this way!  I would love to giveaway something to each and everyone of you...but since I can't, I'll settle for one for now! Have a wonderful day!!!


Wednesday, February 29, 2012

Moxie Fab Tuesday Trigger - Home Sweet Home


Good morning! When I saw the current Tuesday Trigger over on Moxie Fab World - I instantly thought of the newly released Peachy Keen KOTM! This is what I came up with:
And here is the trigger photo - cute, huh?


I used some older papers from my stash, embossed the yellow using my Paptertrey Ink Impression plate, then paper-pieced the image from the Peachy Keen March kit. 
I did a little highlighting with some Copic Markers, and then stamped the grass from the kit all over in a couple different shades of green. 
Stamped the sentiment over the top, added a couple of PTI buttons and some PTI twine, and a touch of bling with my Jolee's heat set tool. 
Finished off with some random ribbons from my stash, some Baker's Twine from the Twinery. 
Finally, I rounded the top two corners off, and inked the edges with Tim Holtz Distress ink in Tea Dye.
Thanks for stopping by! And just for fun, here is a photo of the March Peachy Keen Kit that I used for this project!!!


Thursday, February 16, 2012

Unity Pinterest Winter CHA 2012 Challenge


Good morning! It's Friday, so time for Unity Friends with Flair, but I also made this card for the Unity Pinterest Winter CHA 2012 Challenge (this link will take you to all the info). The picture probably won't be posted on the Pinterest board for another day or so, but here is the LINK to the where it will be posted. On March 15th, the pin with the most votes gets 6 months free Stamp of the Week!!! (So...if you felt inspired to vote - I wouldn't complain at all...) Anyway, here is my card:
I used the Itty Bitty, It's a Party - isn't that one of the cutest elephants ever?!?!?!?!? I paper pieced him on pattern paper, then stacked and stitched a couple of circles together, inking the edges with Tim Holtz distress ink. 
I also put a bit of Diamond Glaze on the hat and stand, and curved the sentiment by stamping it without applying to a clear block - that way it would actually curve! I then put loops of crinkle ribbon all the way around the edges. 
And...just because it is FUN - I put it on an Action Wobble!!! These things totally make a card so much fun! Here is a couple shots of it in action:

All the paper I used is from Basic Grey's Picadilly Collection, and I did lots of machine stitching and inking on the edges.
Finished off with just a bit of bling, using my Jolee's heat set tool.  
Thanks so much for looking! And if you didn't already come over from the Unity Stamp Co. Blog, make sure and check out how to win some free stamps by joining in with Friends with Flair!


Monday, February 6, 2012

Think Happy Thoughts!


I made it! Got a couple of challenge done this afternoon! This is the first one, for the MFT Getting Sketchy #57 over on Splitcoast Stampers. Here is my take:
And here is the sketch:

I used one of my Pure Innocence stamps, and just did a simple outline on pattern paper.  
All the papers are from Crate Paper's Paper Heart 6x6 paper pad, and all the edges are inked with Tim Holtz distress ink in Barn Door. 
The little lace rosette I made with some American Crafts lace trim - sewed and gathered the center with a needle and thread. Added a Baker's Twine bow and a little Papertrey Ink button. 
Added some machine stitching around the edges! 
Finished off with a bit of bling using my Jolee's heat set tool. 
Thanks for stopping by! Stand by for another post in a few minutes hopefully!

I am also entering this in the Inspired By Challenge using this inspiration photo:


Sunday, January 1, 2012

I know it's New Years...but one last Christmas card?

Sorry! I know that Christmas is over, but I never got a chance to post this card for the Play Date Cafe color challenge! Here is my take:
And here is the inspiration photo:


I used one of my Unity Stamp Company Blossom Stackers to make the "wreath" and added a Baker's Twine bow. The sentiment is from Pink by Design, with a bit of bling added under it with my Jolee's heat set tool.  
Mounted it on kraft paper, inked the edges of everything with Tim Holtz distress ink in Vintage Photo, and added some faux stitching. The pictures don't show it very well, but the green of the wreath is darker than the bling, so I did get both shades of green in there! 
Thanks for visiting! Happy New Year!