Showing posts with label Elegant Edges. Show all posts

Wednesday, October 3, 2012

Peachy Keen October Sneak Peeks

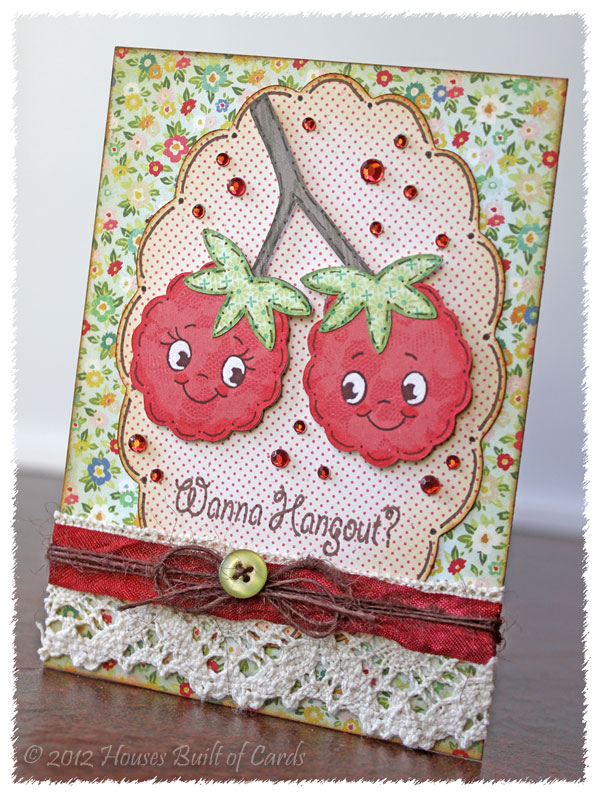
I am so excited this morning to share some of the ADORABLE new sneak peeks for the new Peachy Keen October Kit of the Month! This is SUCH an ADORABLE new kit - as always! I have two cards to share with you - here is the first one:
Isn't that little squirrel ADORABLE?!?!?! I just wanna give it a squeeze! 
I colored her up a bit on kraft paper with Copic markers, then stamped again and cut out her head, and attached it on the original piece with pop-dots to give her a little cute and fun dimension.
I also stamped and cut out the acorns from kraft paper, also lightly colored with Copic markers. My pattern paper is from Authentique, and I also added a doily. Isn't that sentiment cute too? That is also from the new stamp kit - I just stamped it 3 times...one for each nut! :-)
Finished off with a bit of jute twine from Ribbon Carousel - my favorite!
And here is my second sneak peek:
Obviously I was on a bit of kraft paper kick! For this one I went with a more elegant and pretty effect. I cut the frames out with my Cricut and Elegant Edges cartridge, and used some pattern paper from October Afternoon.
Again, colored the image with Copic Markers, and also added some jute twine from Ribbon Carousel, finished off with a stick on pearl in the center of the bow.
That's it! Make sure and check out the rest of the peeks by the Design Team on the Peachy Keen blog! So much fun to look at! And be sure to attend the release party on the Peachy Keen Connection this Friday at 6 PM Central time for fun chat time, challenges, and prizes!!! Hope to see you there!

Friday, August 24, 2012

Friends with Flair - Adoption wall art


I have a very special Unity Friends with Flair post for today! A few weeks ago I was lucky enough to get a fun prize pack from Unity Stamp company, and in it was the new set - Born in my Heart - full of adoption sentiments! I was so excited about this, because my older brother and his wife are in the process of adopting a little girl from Ethiopia. The process has been long and trying, but they are getting lower on the wait list, and beginning to feel the anticipation more and more as the day grows closer.

(Edited to add: in the past week or two things have taken a turn...my brother has been out of work, and since he hasn't yet gotten full time employment, they have been dropped by their adoption agency. They are appealing the decision, but also know that the Lord has called them to adopt, so one way or the other, adoption is in their future. I know they would appreciate your prayers in this time of heartbreak!) 

So...I wanted to make a little gift for my sis-in-law, and my new someday niece! Even though I had the idea in my head for a long time, it took me a while to actually accomplish it, but here is the result of that effort:
I used my Cricut and Elegant Edges cartridge to cut the frame, embossed the top of it with my Cuttlebug, and inked the edges with Tim Holtz distress ink. Stamped the sentiment on the bottom, added some stick on pearls, and tied some jute twine from Ribbon Carousel around it, topped off with a PTI button. 
The silhouette was then cut with A Child's Year, and I inked the edges of that as well, before attaching it with foam adhesive to the frame. Finished off by inking the edges of the pink background paper with matching Tim Holtz distress ink to finish it off. 
I just love this beautiful sentiment! Soooo true...can't wait to meet my new little niece (Chloe) when she arrives - and praying for her now until the time comes! 


Friday, July 20, 2012

Peachy Keen Post Day - Peachy Raspberries!


Yum...now I'm hungry! I love Peaches and Raspberries together - they make an awesome fruit crisp! Especially with vanilla ice cream...Mmmm! Oops! Sorry for wandering for a minute there - back to the point! So if they go together in real life, then what could be cuter than raspberries with a cute Peachy face?!??! It's my day to post over on the Peachy Keen blog, so here is the card I have to share today:
Here is the set I used for the faces and sentiments - it is the brand new July Kit of the Month - I say this every month - but I really think this is the cutest one EVER!!!


All my papers are from a brand new paper pad I just got - Crate Paper Pretty Party, and I am in LOVE with them! They are so feminine and girly, which I love, since I have two little girls!  
I cut the raspberries using my Cricut and the older cartridge, Preserves. I used my Copic markers to highlight and add some shadows, then stamped on the cute Peachy faces. I just LOVE how much character you get when you add a Peachy face to something!
The background frame is cut using Elegant Edges, and I inked the edges of that and my background paper using Tim Holtz distress ink. Did some doodling on the frame, and also on the parts of the raspberry.
Attached the raspberries with foam adhesive, and added some bling - something I have noticed myself being addicted to lately! 
Finished off with some lace and jute twine from Ribbon Carousel, and a bit of crinkle ribbon that I had in my stash for a while. Added a Papertrey Ink button for the perfect finishing touch!
Thanks for popping in to see me today! Hope you have a wonderful day!!!


Wednesday, April 25, 2012

Let's Go!


Hi there! Back once more with my second card for the next couple of challenges! It was fun to see a similar challenge for Fantabulous Cricut and My Craft Spot this week - on the go, and things that go - so I combined them by using my Cricut, and some stamps I won from My Craft Spot recently and hadn't inked up! They stamped PERFECTLY - and I am so happy with them!
I started off by grabbing some paper from my Crate Paper 6x6 Paper Heart collection. Think these are some of my favorite papers ever! Trying not to hoard them though... 
I cut the silhouette out with my Cricut and Sweethearts cartridge, and cut the heart out of a different color so it would pop a bit. 
The frame shape is cut using Elegant Edges, and I stamped the sentiment above and below my Cricut cut. Added a bit of bling in the corners to finish it off. 
Thanks so much for stopping by today! Hope to see you again soon!


Saturday, March 24, 2012

MCT - Imagine That Color Challenge


Hello! Almost missed the deadline for this! This is for the My Creative Time Monday Madness Imagine That Color Challenge! Whew! That's a mouthful! I don't have an Imagine, so I used pattern paper. Here is what I made:
And here is the color inspiration:


I used some My Mind's Eye papers, and my Elegant Edges cartridge to cut out the frame shape. 
Inked the edges with Tim Holtz distress ink, and added a black silhouette from the Botanical cartridge. 
The sentiment is (of course!) from My Creative Time. And I added a bit of Tim Holtz rose trim, some inking with gray Versamark, and a couple of stick on gems. 
Thanks for stopping by! See you back soon!


Wednesday, March 14, 2012

Market Street Stamps Paint the Town Color Challenge


Hello! I managed to get this made for both the Market Street Stamps Paint the Town Color Challenge, and the Mojo Monday Sketch challenge. I was a bit too late to enter it for that - but still thought I would share the sketch here! Here is what I got made:
And here is the color combo - so pretty isn't it?


Here is the sketch I based it on:

I used Market Street Stamps Compass, and Here Come's the Sun for the background. I stamped that with Papertrey Ink White ink - the only white I can stand using for stamping! 
I used my Cricut Elegant Edges cartridge to cut out the circle layers. The tag is just a rectangle with the top two corners rounded, and some PTI button twine tied on the top. 
The banner along the bottom is hand cut, and I added some stick on pearls. 
Most of the layers are pop-dotted - not sure if it shoes in the picture - but there is LOTS of dimension! This is another one of the cards I hid in my hubby's suitcase to open while he is gone!

Friday, January 13, 2012

Peachy Keen Link-Up Party!!!

Good morning!!! It's linky party time at Peachy Keen Stamps! They are easing back into the challenge routine by starting off with the opportunity for you to link up whatever you have recently been working on with your Peachy stamps! Today I am sharing some inspiration from the new Peachy Kit of the Month for January! LOVE it! Here is what I made:
(And I just have to point out the wonderful watermark that my sweet husband made for me! I'm so excited!) Anyway, I stamped the sweet little cherub from the kit on some light gray paper from Crate Paper's "Random" 6x6 paper pad. Used some Copics to color in just the eyes, lips, cheeks, and halo, and a white gel pen to color the wings. Then topped the halo and wings with Glossy Accents. The oval and background was cut on my Cricut using Elegant Edges,
The sentiment is also from this kit, and the frame shape on that was cut from Theresa Collins Sophisticated cartridge. I also colored the heart with Copics, and covered it with Glossy Accents. The trim behind it is from the October Afternoon trim pack with the Holiday Style Collection. 
The edges of everything were distressed with my Tim Holtz distress tool, and inked heavily with Time Holtz distress ink. I found the cute little heart-shaped doily at Michaels the other day and just HAD to get a pack of those! I splashed a little October Afternoon Sprinklers on the doily, and on the sentiment frame to make it look a little more vintage.
The framed image, and sentiment frame, are both pop-dotted from the card for some dimension. You can see it a little better here: 
And there you go! My little vintage cherub Valentine card!!! I LOVE how it came out!!! 

So here is the Kit I used - you can check it out by clicking the link under it to go to the Peachy Keen website:


Now make sure and head over to the Peachy Keen Challenge Blog to link-up your creation! Can't wait to see what you come up with!!!!


Saturday, December 31, 2011

I think my favorite card of all time!

Good morning! I made this card for the January My Favorite Things Guest Designer Contest over at Splitcoast Stampers to use paper-piecing - and can I just say, that I think this is my favorite card I have EVER made?!?!? I LOVE the Pure Innocence line of stamps - ADORE the Picadilly collection of paper from Basic Grey - and SOOO enjoy paper piecing with stamps! Here it is:
The background frame is cut on my Cricut using Elegant Edges, then Plantin Schoolbook for the center oval. I used LOTS of different papers to do the piecing with, then my Copics for the face, arms, legs, hair, and tiny heart flip in the hair. Used a white gel pen to color in the sprinkles on the cupcake.
When I did my piecing, I did a couple extra layers for the sleeve - so it looks like it is popped out from the rest of her dress. Not sure if you can see it in the pictures or not.  
All the edges are inked with Tim Holtz distress ink in Antique Linen, and Vintage Photo for the base piece of cardstock. Finished off with a bit of Papertrey Ink Twine and one of their buttons, and pop-dotted the framed image off the background for a little extra dimension.  
Thanks for stopping by! And once again - in case this really IS the last thing I post today - wishing you a very happy and blessed New Year!!!

And...if you care to check it out, I have a new blog started, to chronicle my efforts at a "Project 365" - basically a picture for every day of the year focused on one of the ways I am blessed or what I am thankful for. (My hubby got me an awesome camera for Christmas, so I want to challenge myself to learn how to use it better throughout the year as well!) It is called Seeing the Blessings Around Me if you want to check it out and let me know what you think! Blessings to you!


Thursday, December 22, 2011

You're the Cat's Meow!

Good morning! I took some time last night to make something - just for me and for fun! Not for Christmas, a challenge, or a contest. Sometime I get bogged down by all of those, and last night I just felt like playing for the fun of it! So I made something happy and fun - with lots of spring colors!
All the pattern papers are from Echo Park's Country Drive 6x6 paper pad. The center frame part is a piece of white cardstock cut out from Elegant Edges cartridge (the book feature), that I stamped Market Street Stamps Pretty Perfect Grid Background on in pale green, then inked the edges with Tim Holtz Distress ink in Antique Linen. The Kitty is cut out on my Circut using Cindy Loo, with a Peachy Keen Face from the Tear Kitty Face parts added. I colored the eyes with a green Copic Marker.   
The sentiment is from Unity Stamp Co - stamped on a tag cut from Sentimentals, and tied on with a bit of Baker's Twine from the Twinery. 
I also inked the edge of the pattern paper a bit - and added some rosy cheeks with some soft pink ink and a make-up applicator.
Thanks for stopping by today! Can you believe that it is only 3 days until Christmas?!?!? I am about to brave town for a few last minute things - I'm afraid it will be crazy - so wish me luck!!!


Monday, December 19, 2011

A simple Christmas Card

Good morning! Whew...I feel like I have been neglecting this blog through this busy season!!! I usually post nearly every day...and not so much lately! Anyway, here is another quick Christmas Card I made recently:


I used my Cricut and Elegant Edges to cut out the two colored frames, my Lil' Inker dies to cut out the cute banner, Papertrey Ink Impression plates to add texture, Tim Holtz distress ink on the edges of everything, a sentiment from Pumpkin Patch stamps, and a bit of Baker's Twine.