Friday, February 28, 2025

Spring Bunny Shaker Cards YT Live - Simon Says Stamp

 Good morning! Yesterday I did another YouTube live on my YouTube channel, using some supplies from Simon Says Stamp. This time I shared some fun spring shaker cards using the BRAND NEW Favorite Things Release from Simon Says Stamp!


Here is the live video if you want to see this technique in action, or you can watch it directly on YouTube HERE:


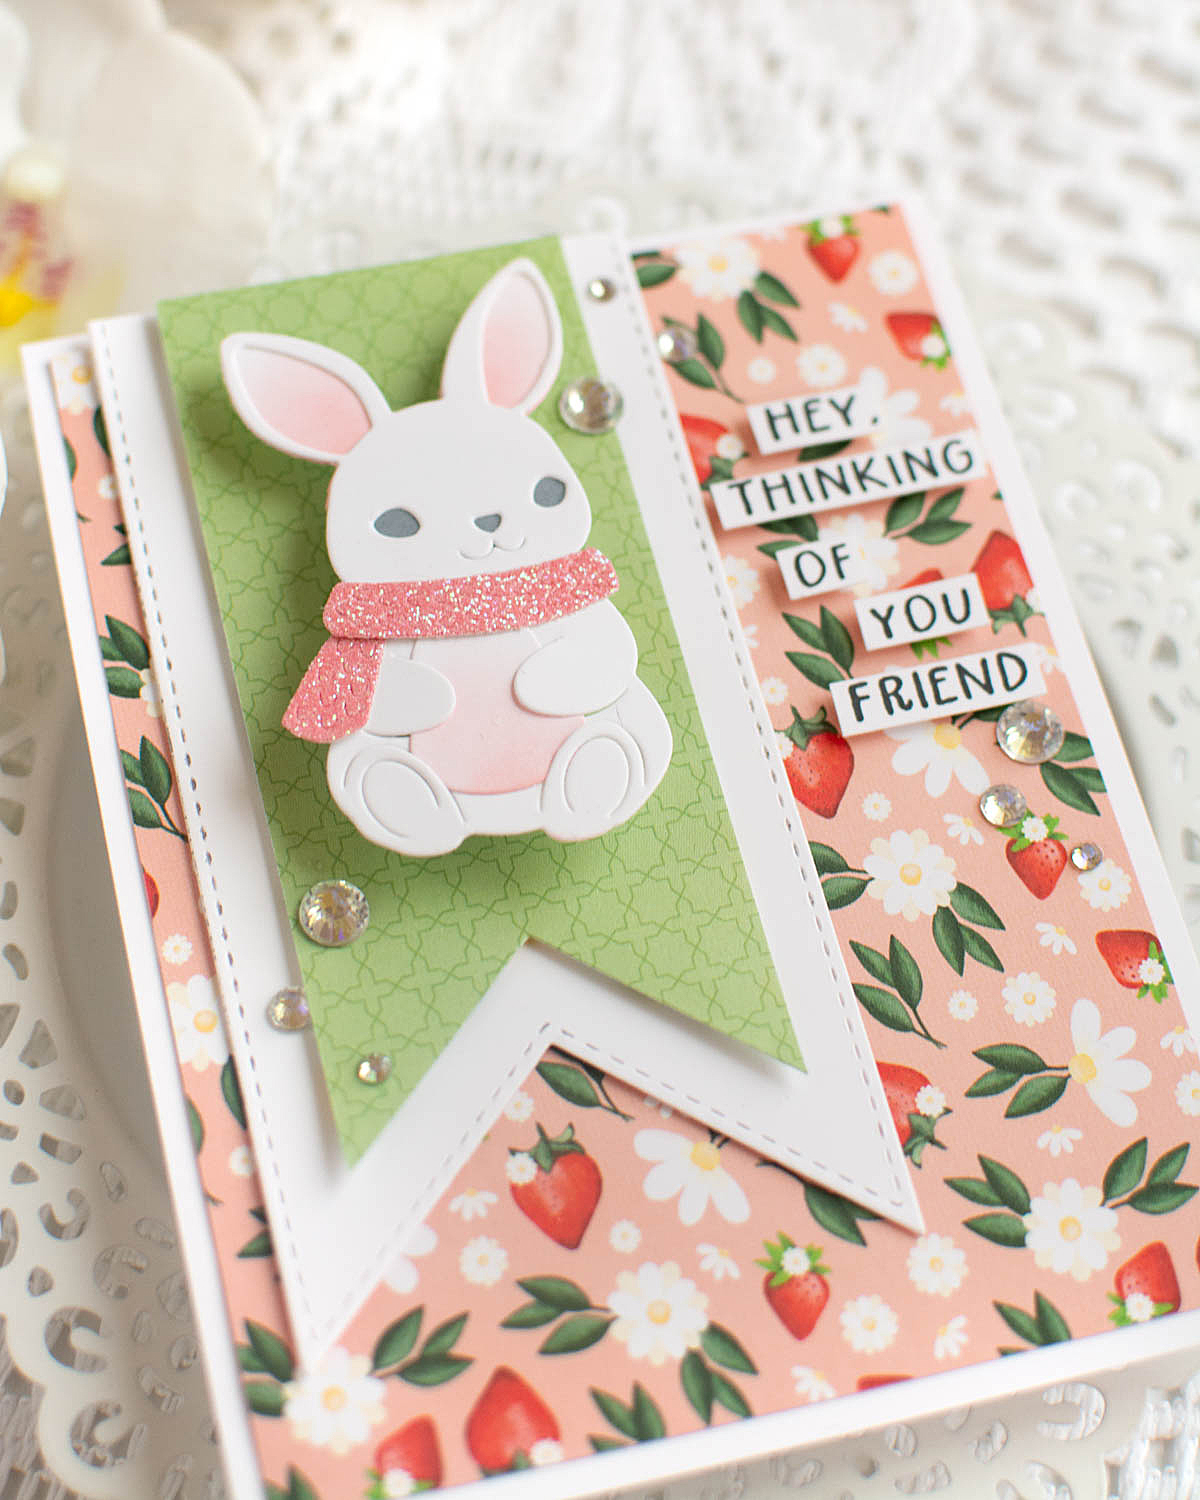
I decided to use the cute new Blessings at Easter stamp and die set, and pair it up with pattern paper to create shakers with the new Pastel Ice and Pale Green embellishment mixes. I stamped the images in Buttercream ink for a subtle bit of color behind the window, and then added cute little bows on the bunnies using Pretty Bows dies as well. The sentiments are heat embossed in white on black cardstock, and secondary sentiments are from the Reverse Thank You EZ Strips Sentiment Strips, die cut with the coordinating die. I also used the new Floral Butterfly Bouquet embossing folder to add some fun texture to the background! Here are more photos of the finished cards:


Product links are all below - including affiliate links where possible, which simply means if you use one of the links below that I receive a small commission at no additional cost to you. Thanks so much for stopping by! Have a wonderful day!!!


Wednesday, February 26, 2025

Wobble Bunny Card - Simon Says Stamp Favorite Things Release

 Hello! The BRAND NEW Favorite Things Release from Simon Says Stamp just went live - and I have so many fun projects to share with you! I'm kicking off tonight with this adorable little bunny - I just love it! And as cute as it is, putting it on an action wobble just bumps the cuteness factor up even more, don't you think?!?!?


For this card, I used the brand new Bundled Bunny wafer die, cutting it out mostly from white cardstock, then blending on ink in Cheeky and Charcoal to color those layers. I die cut the scarf from the pretty new Bubblegum Pink glitter cardstock (sooo pretty!), and assembled it together. I used some pattern paper from Carta Bella Fruit Stand paper pad to layer together, using Stitched Banners and Basic Banners to layer together. I mounted the bunny with a Mini Action Wobble over the banner, and added sentiments from the new Bunny Blessings stamp set, trimming each word apart to pop up with foam adhesive strips for a different arrangement. Finished off with a few Prism Dazzling Gems for sparkle! Here are some more photos of this finished card, including some action shots:


Product links are all below - including affiliate links where possible, which simply means if you use one of the links below that I receive a small commission at no additional cost to you. Thanks so much for stopping by! Have a wonderful day!!!


Reverse Houses - Simon Says Stamp

 Good morning! Remember the trio of cards I shared yesterday using some items from my recent Simon Says Stamp order? Well...you know how much I love to use leftovers, right? So - I put a few of them to use to create another card using some of the same supplies, and a few additions!


For this card, I used the nicest of the negative space leftover from cutting one of the panels for yesterday's cards HERE. I used the leftover scraps of the pattern paper from all 3 of yesterday's cards, and pieced it together behind the panel. I had a little scrap of the background panel from THIS card that I tucked at the bottom, and wrapped around some Lawn Fawn white twine a few times and tied in a bow. I stamped a sentiment at the top from Hi There Greetings, rounded off one corner, and added a sprinkle of Dazzling Clear gems to finish off! I seriously love not wasting things - and it was fun to combine leftovers from two different projects on one card! Here is a closer look at this finished card:


Product links are all below - including affiliate links where possible, which simply means if you use one of the links below that I receive a small commission at no additional cost to you. Thanks so much for stopping by! Have a wonderful day!!!


Tuesday, February 25, 2025

Houses and Banners Trio - Simon Says Stamp

 Good morning! Yesterday I pulled out a few more items from my recent Simon Says Stamp order, and had a blast putting them to use on this trio of cards! Sigh...I just love pattern paper and die cutting!


For this trio of cards, I started with the Neighborhood wafer die - I just loved the cute little row of houses with all those cute windows - so intricate, and yet simple at the same time! I chose some pattern paper from a new Echo Park Blossoms & Bees paper pad, choose simple monochromatic patterns for each card. The houses I die cut from white cardstock, leaving a small border along the bottom edge. I adhered those with foam adhesive, using small pieces of foam strips behind the solid areas on the houses to keep them stable. I used the new-to-me Small Folded Banner dies (LOVE these!) with sentiments from Silhouette Sentiments stamp set - curving the sentiment to fit the curved banner on each of those cards. Finished off with some white hemp twine, a few Dazzling Gems in clear, and a rounded off corner in the upper right edge. Here are more photos of these finished cards!


Product links are all below - including affiliate links where possible, which simply means if you use one of the links below that I receive a small commission at no additional cost to you. Thanks so much for stopping by! Have a wonderful day!!!


Monday, February 24, 2025

Welcome Baby Boy Card - Simon Says Stamp

 Good morning! This past weekend I needed a baby card, so I pulled out some cute pattern paper and other supplies from Simon Says Stamp - this one was aimed for a baby boy, but I think this design would be easy to switch up for a baby girl card as well with different colors and pattern paper!


For this card, I used pattern paper from Echo Part Baby on Board Boy 6x6 paper pad. I used the Lace Heart wafer die for the focal point, die cutting the outer layer from white cardstock, and the inner layer from some of my pattern paper. I layered over that the stamped and die cut "welcome" using Welcoming stamp and dies, and stamping it in Allspice ink. The baby was die cut using Baby Words wafer die, cutting one layer from more pattern paper, and then two additional layers from white to layer up for dimension. I layered everything up on a white panel that I embossed with Swiss Dots embossing folder, then layered another strip of pattern paper down the center. I used Perfect Bow wafer die from white cardstock for the perfect little embellishment, adding a tiny dot from Spellbinders Woodland Tales gold flecked gems to the center of the bow. Sooo cute! Here are more photos of this finished card:


Product links are all below - including affiliate links where possible, which simply means if you use one of the links below that I receive a small commission at no additional cost to you. Thanks so much for stopping by! Have a wonderful day!!!