Showing posts with label Wood Veneer. Show all posts

Friday, October 18, 2019

Birthday Map Card - Simon Says Stamp

Good morning! Today I'm stopping by to share the card I made for my daughter's 15th birthday in September - I know, a bit late, but I had it done in time for her, just hadn't had a chance to get a post written up and shared here! :)

This might seem like an unusual card for a teen girl, but there is kind of a story behind it - not to mention she is generally not into pink and sparkly girly things! I got back from my trip to Italy 3 days before her birthday, and since she is very much into medieval and ancient history, she wanted me to bring her back a birthday gift from Rome and/or Italy. I was only too happy to do that! She also loves travel - this summer we went as a family to Iceland/Norway/Sweden - and she would love to visit Scotland, Ireland, and England someday as well!


 So, right in the middle of this pattern paper from Carta Bella's 6x6 Cartography paper pad is Italy, where all of her birthday gifts came from this year. In the top left corner is somewhere she would also love to travel, and the very tip of Norway is just off the edge of the map at the top.


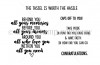
The sentiment was easy - she also has a fabulous sense of humor, and since she was little has kept us smiling and laughing all the time! So I enjoyed this dry humor sentiment from Simon Says Stamp Big Birthday stamp set, and thought it would be perfect! Heat embossed it in Antique Gold on some vellum, then attached it to the map paper my sewing machine and a simple line of machine stitching.


Finished off by distressing the edges of the paper a bit, layering some solid cardstocks underneath, and finished off with a few wood veneer stars - like sequins, but less sparkly!


Product links are all below - including affiliate links where possible, which simply means that if you use one of the links below, I receive a small commission at no additional cost to you. Thanks so much for supporting my blog, and stopping by! Have a wonderful day!!!


Wednesday, January 24, 2018

More Beautiful than Cinderella...


Good morning! Dropping by this morning with a super quick and simple card featuring a gorgeous sentiment from a newly released Lil' Inker Designs Stamp set called Galentine's Day. I fell in love with it and realized that it was perfect for this pattern paper as well!


I heat embossed it on a piece of vellum die cut with Anytime Tags, and die cut my pattern paper using Stitched Mats: Rectangles. I attached them together at the top with a line of machine stitching, then added a few wood veneer shapes to hide a bit more adhesive to hold the banner in place. Super easy!  


Product links are all below - including affiliate links where possible, which simply means if you use one of the links below that I receive a small commission at no additional cost to you. Thanks so much for stopping by! Have a wonderful day!!!


Wednesday, November 8, 2017

Happy Days Elf - Reverse Confetti Release Hop


Good morning! Today is the day! The new holiday release at Reverse Confetti is live and ready for you to go shopping! :)

The DT and this month's 'Fetti Friend are hopping today with more fun projects using the new release!


These new elves from Christmas Cheer are A-DOR-A-BLE!!! I had fun coloring this little girl elf in, and adding some sparkly Nuvo Drops to parts of her outfit for some sparkle and shine!


I die cut the new Small Diamond Tiles Cover panel from white cardstock, trimmed it down a bit, then backed it with some Flamingo Cardstock. I used a tag die cut with Pierced Round Top Layers Confetti Cuts, and added another versatile sentiment from Kitchen Love to the tag. Finished off with some jute twine, some wood veneer stars from my stash, and mounted the entire thing on an Avocado Cardbase.


Here is a peek at the new products I used that just released!


Here is the entire order of everyone participating today:


Product links are all below - including affiliate links where possible, which simply means if you use one of the links below that I receive a small commission at no additional cost to you. Thanks so much for stopping by! Have a wonderful day!!!


Friday, October 27, 2017

Uniquely Unity - Vintage Kraft

Good morning! Dropping by to share a quick peek of a card I have up on the Unity Blog this morning - you can find it HERE if you want to check out any of the details! 


Thanks so much for stopping by! Have a beautiful day!

Tuesday, September 26, 2017

Rustic Happy Birthday for my Daughter's 13th

Hello! Today was my youngest daughter's 13th birthday! Naturally, being last minute as usual, I sat down in the morning to put together a card for her! (I hope I'm not the only one who does that!) I always find it hardest to make cards specifically for a person - for some reason I feel like I have to get it just right to fit them - especially when it is one of my kids. I ended up pulling out a new paper pad that I hadn't used and some Reverse Confetti stamps and dies - and couldn't be happier with how it ended up! Fits her to perfection! She is not your typical girly girl - so no pink or glitter. She loves the outdoors, trees, natural colors, and archery - so this is what I put together:


I started off with my pattern paper actually - a new one I hadn't yet broken into to use but loved - American Crafts Creekside. I used Boho Vibes and coordinating Confetti Cuts to stamp and die cut a couple of arrows and colored the feathers with a Copic marker and added some white gel pen accents. I stamped and die cut the sentiment using Circle Wishes and coordinating Confetti Cuts on some of the pattern paper from the pad. I also used more pattern paper to die cut the Sunburst Tag Layer.


I added some white paint splatters to my background pattern paper, then once it dried a bit, layered everything else on it adding foam adhesive behind the circle, and some clear foam adhesive to pop up the arrows. I added a white frame from All Framed Up, some jute twine on the tag, and a wood veneer star from my stash on the center of the arrows. As a final embellishment, I added a few Gold Confetti from Pretty Pink Posh and filled in the center with white Nuvo Drops (which gave me a touch of gold shimmer, but without too much to offend the non-girly birthday girl!).


Links to the Reverse Confetti products I used on this card are below - click on any of the photos for a closer look:


Also linking up with a couple challenges - first up Word Art Wednesday's Anything Goes Challenge:


Product links are all below - including affiliate links where possible, which simply means if you use one of the links below that I receive a small commission at no additional cost to you. Thanks so much for stopping by! Have a wonderful day!!!


Wednesday, April 12, 2017

Fringe Bow Graduation Card

Good morning! Dropping by with another graduation card this morning using another one of the newly released sets from Unity Stamps. Sometimes, the perfect sentiment is all you need!


I also have a Quick Tip video showing how I created this bow:


Some pretty Lawn Fawn pattern paper, a wood veneer heart, and a tiny bit of white gel pen on the heart finish this one off.


Product links are all below - including affiliate links where possible, which simply means if you use one of the links below that I receive a small commission at no additional cost to you. Thanks so much for stopping by! Have a wonderful day!!!


Wednesday, April 5, 2017

Love Ewe

Good morning! Dropping by to share the birthday card I made for my mom this year! She collects sheep, so usually there is a sheep somewhere on her birthday card each year. This Love Ewe from Unity Stamp Company is probably one of the first Unity stamps I purchased, and I have used it before, but I was inspired by THIS card I saw first in the Unity {Show and Tell} Group. I loved how she used the image going off the edge of the paper. I added some of my own twists of course - but that card totally inspired me!


For mine, I stamped and heat embossed my image and sentiment on some soft green cardstock, then did some ink blending over to make those pop a little more. Added some Copic pink cheeks to the sheep, and some water and white paint splatters. A scallop frame, some jute twine, and a wood veneer heart finish this off!


Product links are all below - including affiliate links where possible, which simply means if you use one of the links below that I receive a small commission at no additional cost to you. Thanks so much for stopping by! Have a wonderful day!!!