Showing posts with label PTI texture plate. Show all posts

Monday, April 11, 2016

Blooming Fantastic

Good morning! Yep...my eyelids are telling me that it is Monday morning - don't know about you! Thought I would pop in and share yet another card and Quick Tip video with you - again featuring a recent release from Unity Stamps:


Here is the Quick Tip video:


I really like the texture from this Impression Plate from Papertrey Ink - subtle but fun! I also loved leaving the little owl only partly colored in - I think it makes him pop more with the bright colors!


Here are links to the products I used on this including affiliate links where possible. Thanks for stopping by! Have a wonderful day!!!


Tuesday, March 10, 2015

Guest Designing at Virginia's View Challenge - Embossing!

Good morning! I’m super excited and honored to be guest designing today over at Virginia’s View Challenge! Virginia is always inspiring, kind, and ever so encouraging to everyone that plays along! 

I made 3 cards today using this month’s technique – embossing! There are SOOOO many different ways to incorporate this on your cards, so I decided to hit on several! :)

First up, one fun technique I came up with – embossing on vellum in black, then coloring with Copic Markers to give a stained glass effect:


I used a Unity Stamp Company image from the February Kit of the Month – images with dark solid lines work best for this. Color quickly with your Copics for this technique, or the color will show lines – I think this is because the ink dries so quickly on the vellum! Here is a close up of the butterfly:


I also used one of my other favorite techniques combined with embossing – watercolors! I heat embossed my sentiment from the same kit on watercolor paper, then used watercolor paints to color around it. Finally, I also debossed the solid cardstock with a couple of Papertrey Ink Impression Plates


Linking this first one up with the current Simon Says Monday Challenge - B is for...(butterfly):


Next up, I started thinking about different ways to incorporate embossing, and it hit me – Embossing Paste! Since embossing is all about adding dimension and texture, embossing paste is a perfect medium!


For this one, I used distress ink to blend a roughly shaped square on the front of my white cardstock, then used white embossing paste and a Hero Arts stencil. I also love heat embossing my sentiments on black cardstock – makes them pop so well, and adds a great grounding to the cute little Lawn Fawn image from Let's Play that I colored with Copics and fussy cut out before adhering with foam adhesive.


Finally, I thought I would try one with good old fashioned dry embossing!


I used an older embossing folder from my stash that is just so classic. Polka dots go with EVERYTHING! Matted it with a pinked edge die from Avery Elle, added another adorable Lawn Fawn image with a bit of vellum at the bottom to ground it, then again, heat embossed my sentiment on black cardstock and hand trimmed a banner.


Also linking up this last one to the current Lawnscaping Challenge - Dots and Stripes:


Thanks for stopping by – and thanks SOOOO much Virginia for inviting me! I am truly honored! And I hope you will join along and play this month with whatever form of embossing is your favorite – or stretch yourself and try something new! :) 

Friday, February 20, 2015

Hardships...

Good morning! Dropping by with a catch up card this morning, and linking up with this weeks Unity Friends with Flair as well. This was a card I made last year during my term on Splitcoast Stampers Dirty Dozen:


I used a Simon Says Stamp metal die to cut the feathers, cover with distress inks, then mist with sparkly Mister Huey's to get that lovely effect. The sentiment is from the November 2013 KOTM - I stamped it and then washed over with some Tim Holtz distress stain. Lots of enamel dots, some My Mind's Eye pattern paper, a bit of jute twine, and some texture with PTI's Linen Impression Plate finish this one off.

Thanks for stopping by! Have a wonderful Friday!

Saturday, August 23, 2014

Winnie and Walter - Leading Lady Post 4 - and Giveaway!!!

Good Saturday morning! I'm excited to be back on the 
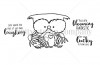
Winnie and Walter Blog again this morning to share some more fun projects with my Winnie and Walter stamps! Today I broke out the fun triangles from Scenery: It's a Wonderful Pennant and again made a variety of cards with the one main set - this time I made 3 completely different styles of cards!

First up, I went with a very clean and graphic card using the solid triangles. I used 3 different colors of My Favorite Things dye inks - so super juicy and perfect for inking up solid stamp images. 


I started in the center to build my shape - starting with the largest solid triangle. The second triangle on each side of the large one was made by just partially inking up the large one - I needed something a little more in between the large and medium size, and that did the trick! Added a sentiment from The Big, the Bold, and the Happy heat embossed in white and a row of stitched sequins, die cut with Lil' Inker's Stitched Rectangle Die, and mounted on some soft gray Simon Says Stamp Cardstock.


Next up, I decided to play with a watercolor effect. I stamped some of the pattern triangles in a random pattern on watercolor paper, also using MFT dye ink. Once I was happy with the arrangement, I just misted a few times with water, then dried it with a heat gun. Perfect watercolor - and so easy! 


Finished off with a sentiment from The Big, the Bold, and the You and a few clear sequins from Pretty Pink Posh, and mounted on a gray card base made with Simon Says Stamp Cardstock. One note: I have found that after you watercolor, the paper tends to curl up when you mount it on your card unless you use REALLY strong adhesive. I use Score-Tape and have found it to work GREAT! 


And lastly, I started trying to think of things that were in a triangle shape. I thought of Christmas trees, and then all of a sudden I thought of making a teepee! 


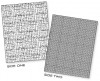
This was fun to build - this time I used Hero Arts shadow inks. The solid triangle stamp for the background in pale yellow, the chevron over the top in a deeper yellow, the tiny outline in that same deep yellow but only partially inked for the top, then gray with the tiny solid for the door. And the sentiment? That *might* be a tiny sneaky peek of the new release coming next week (wink-wink)! I softened the edges of that panel with some distress ink to blend it in a little better, then added a panel behind cut with an Avery Elle die and debossed with PTI's Pure Linen Impression Plate, and some pattern paper from Studio Calico.


Thanks so much for stopping by today! Don't forget you have a chance throughout the month to win a $30 gift card to Winnie and Walter just for leaving a comment! 

Thanks so much Shay and Julie for giving me this fun opportunity! Have a wonderful day everyone!

Friday, January 3, 2014

Strength and Dignity...

Good morning! I'm excited to be playing along with the first Unity Friends With Flair of 2014! WOW! Where did 2013 go? I absolutely LOVE this sentiment from the November 2013 KOTM - could it be better for the new year?!?!?!


I am also linking this up with the new CAS-ual Friday's Challenge - In a Word. The challenge is to use a word that is something you hope for in the New Year. I kind of like strength...I have had lots of opportunities in the last year to learn how strong I can be when I lean on the Lord - and want to continue to grow in that area this year as well!


I stamped my sentiment with MFT ink on a rectangle cut with my Lil' Inker's Rectangle Dies, then flicked some Martha Stewart blue pearl paint on it. The edges are also inked with distress ink.


The background is pattern paper from Basic Grey's 6x6 Persimmon paper pad, and a diagonal strip of Avery Elle kraft cardstock, with some glitter washi tape along the border. 


I tucked a doily behind the sentiment panel, then die cut a few feathers with a MFT die. I debossed with PTI's Linen Impression Plate, then spritzed with a bit of Gold Heidi Swapp Color Shine. The white one also has a bit of Glossy Accents and Tim Holtz Rock Candy Distress Glitter on it. Finished off with some natural jute twine wrapped and tied around. 


Thanks for stopping by! Have a wonderful first weekend of 2014!!!

Wednesday, October 23, 2013

Old Fashioned Christmas Greetings

Good morning! Popping in with the details on a card I'm sharing over at My Craft Spot this morning:


I love how Kimberly designs stamps that can be used for cute and fun cards, as well as vintage and elegant cards! For this card, I used a sentiment from the stamp set "Joy to the World." I also used some Cherry Red Traditional Baker's Twine and some Natural Jute twine for my bow. My pattern paper is some older Webster's Pages Christmas paper, and I made a window with a Spellbinders Die in some kraft paper, then debossed with my PTI woodgrain Impression Plate. Used some distress ink on the edges, and my pretty button is by Basic Grey


Thanks for stopping by! Have a wonderful day!!!

Wednesday, October 9, 2013

My Creative Time New Release - Day 3

Good morning! Welcome to the 3rd day of sneak peeks of the new release at My Creative Time, where I am joining in for the week as a guest designer! Today we are sharing sneak peeks of "Medium Bow Die" and "Small Bow Die" - and boy are they CUTE!!! I made a project with each one today - first up, a gift bag with the larger one:


I used a pre-made kraft gift bag as my base, then used Emma's "Stitched 4x6 Journal Die" for my background. I then cut the girl and frame using my Silhouette Cameo. I embossed the frame with PTI's Woodgrain Impression plate, then used a little distress ink on the edges for some depth. I attached it with foam adhesive for a tiny bit of dimension.


I cut the large bow die using some Crate Paper pattern paper scraps and used some distress ink on the edges of that as well. Next, I glued it over the bow that was included in the cut file, added a sentiment from "Wow So Many Candles" and finished off with a bit of bling that I found at Michael's recently. 


Next up, I made a coordinating little treat box:


For this, I used the "Small Bow Die" and the same pattern paper, then used some coordinating pattern paper to cut out Emma's "Bubblegum Treat Box." I tied it closed with some Ivory Jute Twine, then attached my little bow on top! SUPER simple and quick!


Sneak Peek giveaway!
We will be giving away the set we are showcasing each day to ONE lucky winner! For example, the set we are showcasing on Monday, we will announce the winner of that on Tuesday & so on......
ALL you have to do is leave a comment on each of our blogs! You are NOT required to comment on EVERY SINGLE blog, but the more you comment on, the better chance you have for winning! 
For EXTRA entries, you can spread the word about this release on Facebook, tweet about it OR even instagram it! #mycreativetime!
GOOD LUCK EVERYONE & let's start spreading the word! ;)

Good luck to everyone! Thanks so much for visiting today! Have a wonderful day - and I will see you again tomorrow with more sneak peeks!

Wednesday, August 14, 2013

Because of the Cherry...

{{{If you are looking for my 1,001 Post and Giveaway click HERE or just scroll down}}}

Hello! Just a quick evening post with the card I whipped out quickly tonight for Day 3 of the Unity Itty Bitty a Day Facebook challenge:


I found this picture on Pinterest and used it as my inspiration:

{Can't find image credit for this one - otherwise I would share!}

I used the itty bitty Counts as Fruit, colored in a bit with Copic markers on a oval cut with a Spellbinders Die. Inked the edges of that and the card base with distress ink, and misted the background with Heidi Swapp color shine and Mister Huey's mists.


Hand trimmed my own banner for the sentiment, and added a bow with a bit of raffia from May Arts tied around.


Can't say it's my favorite ever...kind of had a long and busy day today and was just worn out. So...this is the best it was going to get! Oh well! Have a great evening!!!