Showing posts with label Tim Holtz distress ink. Show all posts

Wednesday, November 30, 2022

Birch Tree Backgrounds - Simon Says Stamp DieCember Release

Hello! It's time to kick off the fun month of DieCember at Simon Says Stamp - a month devoted to celebrating die cutting. It is kicking off with a fun big DieCember Release. And.. the irony isn't lost on me that the first two cards I'm sharing tonight have NO die cutting on them! They do, however, use some of the BRAND NEW release, so there is that!

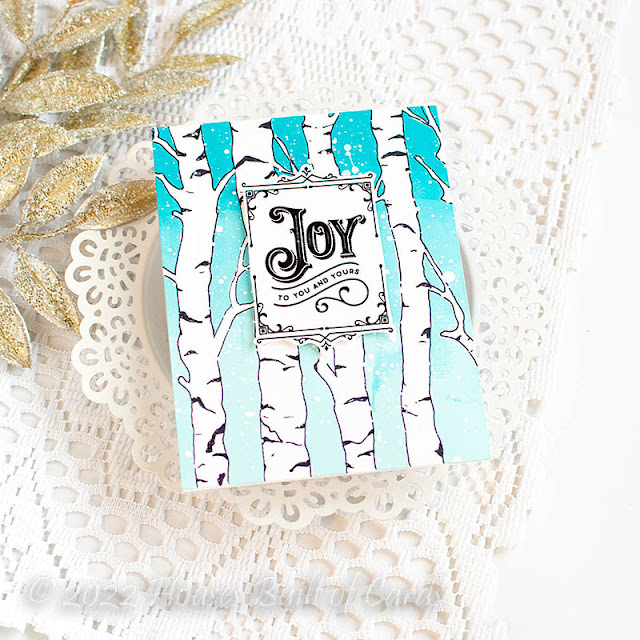
This first card I owe credit to my artistic daughter for the doodling added on the birch trees!


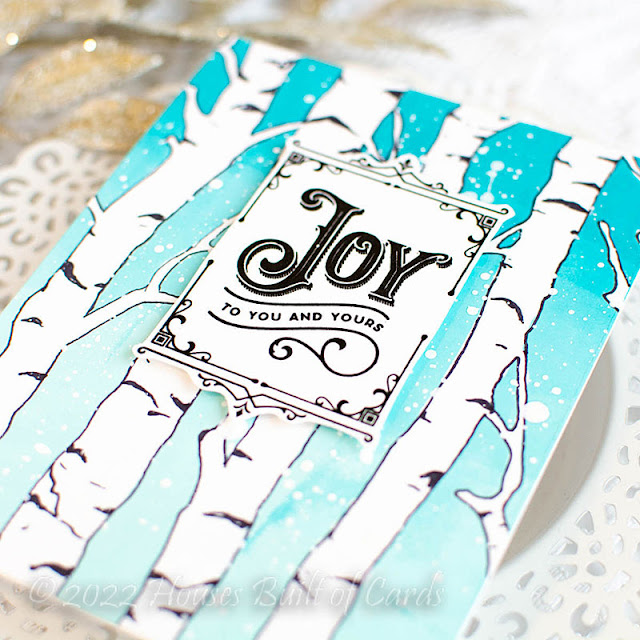
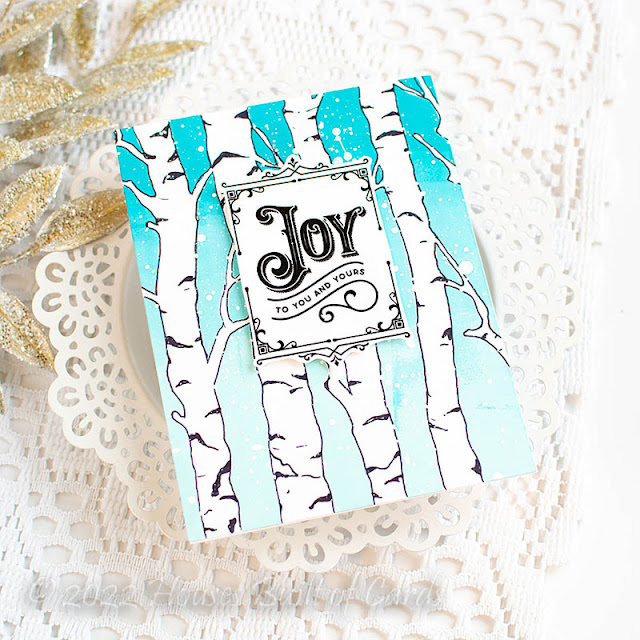
I'm sharing two cards today using the fun Birch Tree cling background stamp. This card is actually the second card I created, once I figured out how it worked - haha! I mixed up the part that stamped, thinking it was the trees that stamped, not the background. On this one, I clearly figured it out.


I lined the stamp up in my MISTI, then stamped it multiple times. I started by inking it up with Seafoam Pawsitively Saturated inks, then moved on to the next darkest color - Surf. I finished off with Ocean at the top. I just kept adding ink and stamping to get a bit of a gradiated image.


At that point, the birch trees looked a bit boring to me, so I used a fine line Sharpie to outline the trees. It still felt like it needed a little something - but my artistic skills are sorely lacking! So my daughter did the honors - and I think she did fabulous! I actually think I could look at this and re-create it with hers as a guide.


Of course we needed a snowy background - so I added some white splatters to mimic snow, and set that aside to dry.


While that dried, I worked on a sentiment. I used Joy to You and Yours - the stamp set from the December Card Kit. I stamped it with black Versafine ink, then heat embossed it with clear embossing powder. This is my favorite way to get a black heat embossed image - so much easier than messing with black embossing powder! And it gives great shine!


I fussy cut that image out, then mounted it on my background with foam adhesive for a touch of simple dimension!


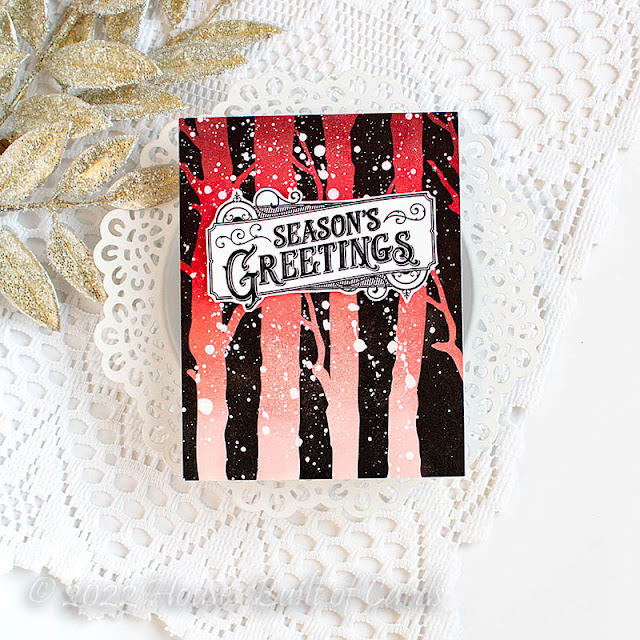
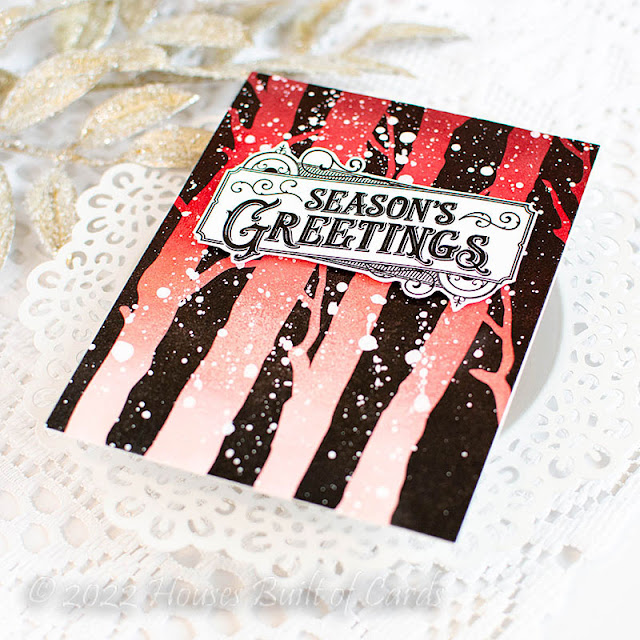
And...second card, which is actually the first one I made. My plan was to create a striking sunset sky, then stamp the trees over the front in black to create a silhouette. Once I stamped it - I quickly realized my mistake. I almost tossed it - but, I spent a long time creating the background, and couldn't bring myself to waste it! So I decided it could be a night sky, with red Christmas lights reflecting on crisp white and snowy birch trees. Right?!?


For this one, I used Distress ink in Tattered Rose, Abandoned Coral, Lumberjack Red, and Aged Mahogany.


I stamped over with Versafine black ink, then heat embossed it with clear embossing powder. Lots of the clear powder actually stuck to the distress ink, which gave some added texture on there for fun!


I added some white splatters for snow on this one, and then left it to dry overnight, since some of the splatters were over the shiny heat embossing, and I wanted to make sure they were nice and dry and wouldn't rub off before they were dry.


Sentiment was created with the same stamp set, and heat embossed the same way. I also fussy cut it out, and mounted with foam adhesive on the panel.


Hard to capture the texture and shine on this card - but here is a little closer look:


Product links are all below - including affiliate links where possible, which simply means if you use one of the links below that I receive a small commission at no additional cost to you. Thanks so much for stopping by! Have a wonderful day!!!


Friday, February 25, 2022

Praying for Ukraine - Simon Says Stamp

Hello friends. Yesterday I woke up with the beginnings of a migraine - first one I've had in a long time, and it took a while for the worst to wear off. And as the day wore on and I watched the news, all I felt was heaviness. I'm sure many of you felt the same way - watching in horror the events unfolding in Eastern Europe, and feeling helpless. Many of us were thinking of our beautiful friend Yana Smakula - a very real person and face of someone living through these events. Her story HERE is such a small, real, and raw window into what it is like over there right now. I just can't even imagine. At all.

Between the migraine hangover, and the heaviness on my heart, praying for Yana and all of the Ukraine, as I finally was able to get to my craft desk, it seemed fitting to let those emotions flow out onto my cardmaking. First of all - the colors, obviously inspired by the colors of the Ukrainian flag. Then the heart and sentiments reflecting what I wish I could communicate to Yana and others. And finally, even the technique with this 3D embossing folder is something I learned from Yana recently, misting the paper with water on both sides before embossing to get a more detailed image (you can see her post about this HERE). This yellow panel is one I had tested out shortly after seeing her genius in action. I caught my eye in my pile of projects to be finished, and the rest just came together so perfectly for today.


As I often do, I was able to use leftovers from my first planned card for a second version. Oddly enough, I may even like the second version best. But I really almost feel like these go together as a set.


As I mentioned, that yellow panel was created with the Exotic Vines embossing folder. I die cut a window in it, and then added a panel behind on which I had blended Blueprint Sketch distress ink and added some white splatters. I added some white splatters to the yellow panel as well, then popped it up with foam adhesive, and I also added the detail die cut from Deco Heart die on white cardstock.


The piece I die cut out, I wanted to use for another card - you can get a slim white heart frame if you die cut the outer heart from Deco Heart, and then the inner from the center of it. I adhered that around the yellow heart to help it pop, then added it with foam on a blue background die cut with Stitched Rectangles die.


Sentiments for both cards were added with the new CZ Design Well Wishes stamp set. The first card I stamped it simply in black on a thin strip of white cardstock. 


The second card I heat embossed the main sentiment on the blue background, then stamped and trimmed the smaller sentiment down by hand into a banner shape.


I finished off both cards with a few Sparkling Clear sequins from Pretty Pink Posh.


Product links are all below - including affiliate links where possible, which simply means if you use one of the links below that I receive a small commission at no additional cost to you. Thanks so much for stopping by! Have a wonderful day!!!


Tuesday, September 21, 2021

Autumn Thanks - Pretty Pink Posh September Release Instagram Hop

Good morning! Today I'm celebrating the new September Release from Pretty Pink Posh by joining Day 2 of the Instagram Release Hop! You can head over to Instagram to join that hop, and enter to win today's giveaways, and you can find the new release HERE. I thought I would share more details here on my blog on my card - since it is always tough to put enough info in an Instagram post!  

I love all the fall goodness in this release - and couldn't resist putting together two cards with all the warm cozy colors of fall!


For this first card, I used the new Elegant Pumpkin die, layered over the frame portion from the coordinating dies for Fall Circles stamp set. I added a subtle background to my card base using the new Leaves Background stencil and some Antique Linen Distress ink.


I mounted the frame with foam adhesive on the background, added a sentiment using the new Woodland Thanks stamp set and Coordinating die, and a bit of sparkle with a few Metallic Gold jewels that were released previously. Love that the larger sentiment has a coordinating die, so you can pop it up with foam for dimension!


Next up, you know I couldn't resist a shaker card with some of the fun new clay embellishments! I used that same cardstock as the last card for my cardbase, and then used the new Leaf Frame die to create the shaker element.


I filled it with the new Autumn Days clay embellishment mix, and added a sentiment from the new Falling Leaves stamp set and Coordinating dies.


Which kind of card do you prefer? Lots of stenciled and die cut layers, or a fun shaker card?


Product links are all below - including affiliate links where possible, which simply means that if you use one of the links below, I receive a small commission at no additional cost to you. Thanks so much for supporting my blog, and stopping by! Have a wonderful day!!!

Wednesday, July 28, 2021

Tropical Leaf Duo - Simon Says Stamp Make Magic Release

 Good morning! I'm back today to share two more cards using the FABULOUS NEW Make Magic release from Simon Says Stamp - today I'm sharing two cards that I created from one panel of the beautiful new Suzy's watercolor prints: Tropical Foliage!


For both cards, I used the one panel, and did a random series of ink smooshing with lots of mini distress ink cubes. I let all the colors mix and blend to get this beautiful background, added some white paint splatters, then die cut a rectangle out of the center, making sure to center it and save the frame for the second card below.


For this card, I popped that panel up with foam adhesive on a white cardbase, and added a sentiment from the fabulous Just Because Word Mix 2 stamp and die combo. I adhered it with a bit of liquid glue behind the top of the banner, allowing the lower portion to curl up for a touch of extra dimension.


Finished off with a few coordinating Pinkfresh Studio jewels in opposite corners - love the added sparkle that gives!


Now, onto that second card with the frame we saved! I trimmed down the outer edges a bit so it would leave a border around the outer edge to show off my colored cardstock.


In the center, I die cut the fun new Flipped Like You die, and backed it with gold glitter cardstock. I added a sentiment over the top from CZ Design Reverse Sentiment Strips: Happy - I foiled it with gold foil since it is printed with toner ink and will foil with toner-reactive foil. Fun!


I popped that extra sentiment up with foam adhesive, and the frame with more foam adhesive. Fun dimension, isn't it? And that finishes off these two simple cards!


Product links are all below - including affiliate links where possible, which simply means that if you use one of the links below, I receive a small commission at no additional cost to you. Thanks so much for supporting my blog, and stopping by! Have a wonderful day!!!


Friday, July 23, 2021

Sun, Moon, and Stars - Simon Says Stamp Make Magic Release Blog Hop

 Good morning! Excited today to be joining in on Day 1 of an incredible blog hop to celebrate the BRAND NEW Make Magic Release from Simon Says Stamp! Make sure and check out all the inspiration with this new release AND link up your creations as you receive your orders HERE in the Gallery created just for this release! And check out the graphic below to receive a FREE Art Supplies die set with the coupon code below through July 25, 2021 as well - while supplies last (code expires at 11:59 PM EDT)!!!


Today I'm sharing a card that is out of my usual creative zone - lots of layering and interesting things happening, and oddly enough, I am super thrilled with how it came out!


I started off using the new Mod Layering Leaves stencil to create a background. I used 3 colors of distress ink for the first layer - Rusty Hinge, Mustard Seed, and Speckled Egg. I then added the second layer of the stencil, and used the coordinating oxide inks over the top! Love mixing these together - and they both have a different look and tone and texture, so it made the background super fun!


Next, I used the new Sun and Moon Mandala stamp set. This is a fun red rubber set, that separates into separate pieces. I stamped the outer portion directly over my stenciled backgroundI stamped and heat embossed the moon in gold on black cardstock, then carefully fussy cut that image out to mount with foam tape on the background. I then stamped the sentiment directly on the cardbase as well.


To add some more interest to the design, I added some pretty Metallic Gold Pearls in two sizes around the edges of the circle, lining up with the pattern on the background. Love the extra dimension, and how it pulls out the gold heat embossing on the moon as well!


While I usually tend more toward clean and simple cards, it was fun using so many layers all together on this one card!


GIVEAWAY INFO:
Simon Says will be giving a $25 gift certificate to their online store at each stop along the hop - so make sure and leave a comment before you leave for a chance to win! Winners will be announced next Wednesday on the Simon Says Stamp Blog.

Simon Says Stamp Blog   

Nina-Marie Trapani

Caly Person

Nichol Spohr

Jennifer McGuire

Cathy Zielske

Lisa Addesa

Amy Rysavy

Sidnie Des Jardins

Amanda Korotkova

Heather Ruwe

Suzy Plantamura

Yana Smakula

Heather Hoffman (you are here)

Lea Lawson

Product links are all below - including affiliate links where possible, which simply means that if you use one of the links below, I receive a small commission at no additional cost to you. Thanks so much for supporting my blog, and stopping by! Have a wonderful day!!!


Wednesday, June 30, 2021

Bright Floral Get Well Soon - Simon Says Stamp

 Good morning! Stopping by with a simple stenciled get well card using a fabulous stencil and sentiment set from Simon Says Stamp. I had never used this stencil, and was super excited to put it to use - and thought it would be extra fun to use extra colors on my stenciling!


I stenciled directly on my white cardbase, and used 3 different colors of distress inks to blend over each of the roses in the Rose Trio stencil - keeping my colors and blends nice and soft, and really not going entirely to the edges - trying to avoid the leaves without taking time to mask them off.


I added color on the leaves with two shades of ink, keeping the same effect as the roses. Once I pulled the stencil off, I blended more inks around the same areas and corners. I love how this softens the lines on the stenciling, and draws the color out to all the edges a bit as well.


Finished off with a few black splatters, a sentiment from the super fun Word Mix 2 stamp and die set popped up on foam adhesive, and a few simple silver pearl embellishments that recently released from Pinkfresh Studio!


Product links are all below - including affiliate links where possible, which simply means that if you use one of the links below, I receive a small commission at no additional cost to you. Thanks so much for supporting my blog, and stopping by! Have a wonderful day!!!