Good morning! Dropping by today to share a couple cards I made last week for Pinkfresh Studio's Facebook Live. Actually, I created the first card live, and then used some of the leftover elements for the second card that I finished off camera and after the live. But they were kind of a combined effort, so I figured I'd share them both together! You can watch the replay HERE if you want to see more details.
You can watch the replay here as well if you want to see it come together:
In this live video, I showed how you can not only die cut with the new Jeff Alpha dies, but they are also fabulous for hot foiling! You get a more dainty and detailed line with them than with normal hot foil plates, because the lines are designed to cut, not foil. But since they are metal, they work! And the fact that there is a coordinating die for cutting out the shadow layer works perfectly to cut out the foiled words.
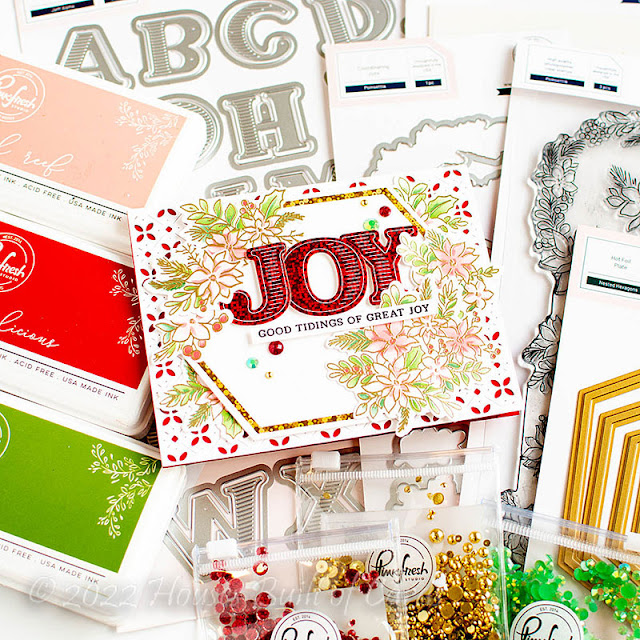
In the live, I foiled the letters for "JOY", and then used the Solid Hot Foil plate to foil the reverse of the letters. The reverse foiled ones are what I ended up using on my card created live - the others I used on my second cards that I'm sharing further down in this post. I used some of the foil from the Christmas Sparkle variety pack.
I also foiled and reverse foiled the largest Nested Hexagon from more of that foil in the same pack - this time the gold one. I used the original foil for this one, and the reverse on the next card below. I love mixing and matching foiling and reverse foiling on projects!
I used Floral & Diamond Tiles coverplate for my background, and if you watch the live video, I shared an awesome trick for die cutting intricate dies using bubble mailers cut to size. A great way to recycle those envelopes that we all have laying around! I mounted that over a bright red cardbase to help my focal point word pop a bit more.
Lots of florals on this card - all created with the Poinsettia stamp, layering stencils, and die. These coordinated with the holiday washi that released last year. I heat embossed the stamp set, then used the layering stencils to color them in with soft reds and greens and a pop of red.
Assembled everything together, then added a secondary sentiment from Ornaments stamp set, and some trios of bling created with Ruby Glitter Drops, Emerald City jewels, and Metallic Gold pearls!
And here is the second card that I created, pretty much using leftovers from the first card, with a couple little additions!
As I mentioned above, I used the reverse foil image from the Nested Hexagons, only on this one I die cut the outer edge and the center to create a frame. I also used the original foiled letters from the first card.
I also had the wreath leftover from the stamped, stenciled, and die cut images on the first card, and I was surprised at how fun it was tucked into that hexagon frame! I didn't expect them to work so well together, but I love that they did!
I added some background detail using the Stitched Diamonds coverplate die, and of course mounted things with some foam adhesive.
Don't you love how dainty the foiling on those letters is? It is subtle, but still has that foiled effect that is so fun!
I also added a secondary sentiment on here from the Ornaments stamp set, stamped in Detail Black ink, and trimmed to fit the edges of the hexagon shape.
Finished this one off with a few Gold Glitter Drops sprinkled around the edges!
Product links are all below - including affiliate links where possible, which simply means that if you use one of the links below, I receive a small commission at no additional cost to you. Thanks so much for supporting my blog, and stopping by! Have a wonderful day!!!


No comments:
Post a Comment