Showing posts with label Martha Stewart Corner Rounder. Show all posts

Sunday, May 26, 2013

SPS Inspiration: Jar of Love

Good morning! I get to post today over at the Shop Pumpkin Spice Blog, and I had fun with some more Crate Paper, as well as a Unity Stamp set and a bunch of fun embellishments that you can find over at Shop Pumpkin Spice! You can find them all linked at the bottom of this post:
I stamped this fun Unity Stamp jar on pattern paper, then fussy cut it out to adhere to my card. I stamped the hearts inside the jar, and spread a light layer of Stickles over the hearts to add a touch of sparkle. Also added a few enamel dots in the jar. 
My pattern papers are all from Crate Paper's Bo Bunny 6x6 paper pad, and I used a coordinating epoxy brad from the same collection on my jute twine bow. 
There is a bit of washi tape on there, as well as a doily tucked behind the center panel. I used Bazzil white cardstock for my cardbase - it is PERFECT for making card bases with!
Here are all the supplies used on this card, linked to the SPS store:


Thanks for stopping by! Hope you are having a wonderful Memorial Day Weekend! 


Monday, March 18, 2013

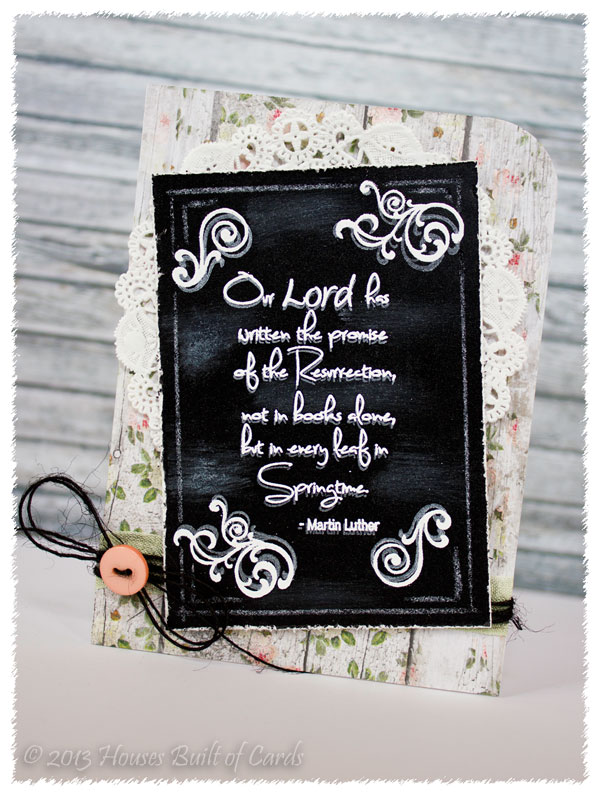
MCS Embossing Challenge - Chalkboard Easter Card

Good morning! I'm a little late getting this posted (oops!) but wanted to share my card for this weeks new challenge over at My Craft Spot - Embossing:
I decided to go for a chalkboard look card using a sentiment from Happy Easter and the flourishes from Tiny Tags 2: 


I used Chalkboard paper, heat embossed my sentiment and flourishes with white embossing powder, then re-stamped them slightly offset with white pigment ink.
I added some smudges of white pigment ink with my finger and some paper towel for the "chalk dust", the added some lines around the edges with one of my daughter's white colored pencils.
Used some MME pattern paper for the background, with a doily tucked behind, and rounded one corner of my card. 
Finished off with some Spring Moss Crinkle Ribbon, and Black Jute Twine from My Craft Spot, tied with a coordinating October Afternoon button.
Thanks for stopping by today! Hope you will come over and join the challenge with us at My Craft Spot - any kind of embossing, dry, heat, or Glossy Accents!

Thursday, March 7, 2013

Dreaming of the Sea...

 Hello again today! LOVE those days when homeschooling goes just right and I can sneak a card or two in! I had been eyeing this weeks Runway Inspired Challenge, and as I looked at some of the papers on my desk - the perfect ones jumped out at me!
Here is the inspiration photo:


I pulled out the stripes and the yellow with my pattern paper - the yellow is from Glitz Designs Uncharted Waters 6x6 paper pad, and the black and white stripe is from Crate Paper's DIY 6x6 paper pad.
As I looked at that nautical paper, I instantly thought of the Market Street Stamps set, Dreaming of the Sea. I used my Paper Smooches Notebook Basic die, then stamped the mermaid image in simple black ink. Added the sentiment with PTI ink - in bright pink, to pull the bit of pink out of the inspiration photo. 
Inked the edges with distress ink in Antique Linen, then tied some jute twine and a coordinating button from my stash on, before attaching it to the pattern paper with foam adhesive. 
Rounded a couple corners of the pattern paper, as well as the card base - and inked the cardbase with the same distress ink, then attached the front panel with more foam adhesive to the cardbase.
Thanks for stopping by today! Hope you are having a wonderful day!

Tuesday, March 5, 2013

SPS Daily Inspiration - Crate Paper Pretties!

Good morning! Today is my day to share some inspiration over on the Shop Pumpkin Spice Blog. Today I decided to pull out some product from one of my favorite paper companies - Crate Paper. Here is what I made:
The paper and die cut embellishments came from Crate Paper's Pretty Party collection.
My pattern papers are from the 6x6 paper pad - I layered them up, and used an edge punch on the brown wood grain paper before attaching it behind the gingham strip.
The flowers (aren't they GORGEOUS?) are from the die cut elements sheet, as well as the tiny sentiment. I attached the flowers with foam adhesive, punched a hole in the little sentiment piece, then tied it on with some jute twine, anchoring it in place with a pop-dot. 
Finished by rounding a couple of corners, then attached the entire front panel with foam adhesive to the card base.

Thanks so much for stopping by today! Hope you are having a beautiful week! 

Wednesday, January 23, 2013

Stamped Lace Card

Okay - I know I used it for one other card, but I just have to say, isn't this stamp from the Unity December Kit of the Month amazing?!?!?! I LOVE how intricate it is - and it is a perfect image to emboss! 
I made this card for a challenge I happened upon at KandRdesigns called the 100 Weeks of Inspiration Challenge. The challenge was to look through her Pinterest Inspiration board and pick a card to case. (You can see the one I picked HERE) I loved the colors, and some of the general layout themes, rounded corners, etc...
I started off with some Bazzil Cardstock - which is the blue. I stamped the lace three times and heat embossed it, then the sentiment which is one I got in a random set. I also heat embossed it. 
Here is a close up of that lace - cool, huh? 
I tied a bow with some white twill ribbon, then added a couple of heart stick pins.
Finished off with a couple of rounded corners, a bit of bling, and attached it with foam adhesive to the card base.
That's it for this one! Have a wonderful day!!!

Sunday, January 20, 2013

Another Chalkboard Card - 10th Birthday

Happy Sunday afternoon! I got home today and was feeling a little cold - so I thought it was a perfect opportunity to sit in the sunshine that happened to be shining in my crafty area and have some fun! I had been thinking about the Paper Crafts January Gallery Challenge - to make a card celebrating milestone birthdays. Since my daughter will be turning 10 this year (YIKES! Double digits already!) I decided to make a 10th birthday card - using one of my favorite techniques, the chalkboard effect. Here is what I came up with:
I used a Spellbinder's Die to cut a frame shape with some green DCWV Chalkboard paper. I stamped several different parts of the Papertrey Ink Movers and Shakers Sentiments on it, and heat embossed with white powder.  
Added some smudges with white pigment ink, then re-stamped each part of the images again slightly offset with the white pigment ink for a shadow effect.  
Added some doodles with a white colored pencil to finish that part off. 
My pattern papers are from Crate Paper's 6x6 Pretty Party paper pad (which you can still find HERE at Shop Pumpkin Spice for a great price too). I rounded the top corners, and inked the edges of it all with Tim Holtz distress ink.  
Tucked a doily and some green jute twine (available HERE at My Craft Spot) behind the frame which I mounted on foam adhesive. Tied the jute twine in a bow, added another strip of pattern paper from the same paper pad, and a piece of lace trim.
Thanks for stopping by to visit! I hope you have a wonderful rest of your weekend!

Friday, December 14, 2012

PK Sketch Challenge - and Happy Birthday Kathy!

(((If you're looking for my Day 5 Growing in Unity Post - click HERE or just scroll down)))

Hello! It's time for the usual weekly challenge over on the Peachy Keen Challenge Blog - but this week we have a special twist! Sunday happens to be the Peachy Queen's BIRTHDAY! So...this weeks challenge will also be a linky party to allow anyone who wants too wish Kathy a Happy Birthday the opportunity! So...Happy Birthday Kathy!!! Thanks so much for an amazing year - it has been a wonderful Design Team to be on - due in a huge part to your ADORABLE artwork! So...what better than some of that amazing artwork to honor her birthday? Here is what I made: 
Here is the sketch we are following this week:

And here are the sets I used on my project:


All my paper is from a Basic Grey "What's Up" 6x6 paper pad. I started by stamping the Celebrations Background on the center square using some PTI ink, then stamped and colored the candle with Copics, and cut it out by hand.
I trimmed my background pieces, rounding some of the edges with my Martha Stewart corner rounder. I inked the edges of everything with Tim Holtz distress ink in Antique Linen.
Tucked some crinkle ribbon and Baker's twine under the center panel, then tied the crinkle ribbon in a bow. Added a PTI button with some jute twine. 
Attached some self adhesive pearls under the sentiment, then attached that panel with foam adhesive, then attached the entire thing to the card base. Finished off with a tiny bit of white gel pen accents.
I'll be dropping this in the mail for you tomorrow Kathy! Hope you have a wonderful birthday! And I hope everyone else will join in the Linky Party/Challenge this week to wish Kathy a Happy Birthday!!! Have a great week!

Also linking this up with the Paper Issues 50 Shades of Basic Grey Challenge.


Sunday, October 14, 2012

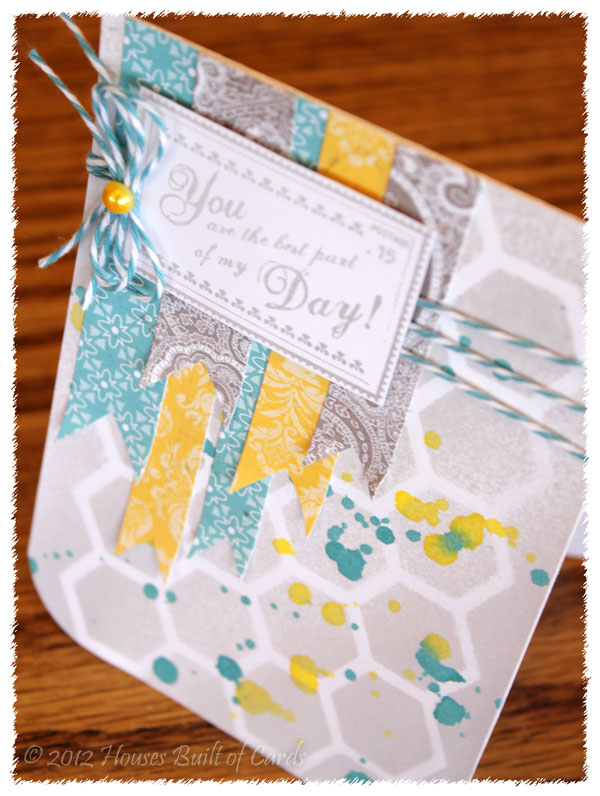
Unity Pennants and Banners September Challenge


Hi there! I took a little time last night to create something for the Unity September Pennants and Banner's Challenge - obviously I chose to use banners! I also did a little something new for me - and I had so much fun! Here is what I made:
To start with, for the background - I just got my first Mr. Huey's mist and one of their overlay's, so I used the overlay and some October Afternoon sprinklers, as well as my one Mister Huey mist to create the background. I started with a gray OA sprinkler sprayed on the overlay placed on white paper, then added some thicker drops of a blue OA sprinkler, and the yellow Mr Huey's mist. 
I trimmed it down and rounded the two bottom corners. Then I used some strips of Lily Bee Design's papers and trimmed them into banners, arranged them how I liked, then stuck them down. (Of course, as I tried to stick them down they all fell apart - so I had to redo that a couple of times, but it finally came together how I liked!) I curled the bottom edges of the banners just slightly for fun too.
The sentiment is from the June 2012 Kit of the month - and I stamped it with gray Versamark ink. 
I wrapped some twine from the Twinery in one of their newest colors - Ocean - around the card before attaching the sentiment with foam adhesive over the top, then added a little bow on the side with a stick on pearl in the center.
I think this is a lot more "mixed media" than I have really done before - but it was so much fun! I have lots of the October Afternoon Sprinklers, and loved the Mister Huey's spray, so I'm sure I will be using them a lot more! Thanks for stopping by today!

Friday, October 12, 2012

WCMD - Unity Fall Card Challenge


And next up I have my Card for the Unity WCMD Fall Card Challenge:
Isn't my favorite card how it came out - things just didn't work out like I had pictured in my head, but...oh well! I stamped three Unity pumpkins over the top of each other, then colored them a bit with Copics. Couldn't resist adding the little birds in front of them!
All my paper is Basic Grey, and I inked with Tim Holtz distress ink, punched the edge with a Martha Stewart edge punch, added some stick on pearls and a rounded top corner, and finished off with some faux stitching.
All right - there's the fall card! Off for the next one!

Sunday, October 7, 2012

Day after WCMD - Unity Challenge #3 and Giveaway still!

Well, I know it is the day after World Card Making Day, but I was so busy all day babysitting and such, that I didn't get started until later in the day, then the light wasn't good to take pictures and post them. So...I am putting up three posts today with the 3 challenge cards I completed on World Card Making Day - so I am extending my giveaway to any of these 3 posts, as well as yesterdays! I will probably draw a winner sometime the middle of next week, so you have plenty of time to leave comments on as many posts as you would like! Scroll to the bottom of this post if you want to see what you could win!

This was definitely out of my usual comfort zone - but I think I might have to try this kind of technique more often! I started by stamping and heat embossing this AMAZING image from Unity Stamps designed by Angie Blom with clear embossing powder on pattern paper from Basic Grey. I then inked it all over with Tim Holtz distress ink to make the image pop out.
I rounded the edges, inked them some more, stamped a sentiment from another Ippity set, then added a few doodles with my white gel pen to help it pop a bit more. 
Mounted it on some more pattern paper from Basic Grey, tucked some lace from Ribbon Carousel behind the front panel, and added a couple of stick on pearls to finish it off...

Now...if you made it all the way to here - here is a picture of what you can win!!! (HERE is my favorite project made with this set - can you see why I LOVE it?!?!?!?!?) I have had this thing lately with Mason Jars - and I just ADORE this stamp set from Unity Stamp, so I got a set to giveaway on my blog! It got packed and lost in the shuffle of moving, so even though I've had it for a while, I just found it recently and thought this was the perfect opportunity to give it away! So...for a chance to win, just leave a comment on any of my posts today - the more you leave, the better your chances of winning! Due to postage, US and Canada only (unless you want to help with shipping costs - then I am happy to send it international as well!) Good luck!