Good morning! I can't tell you how crazy excited I am to be guest designing for
Altenew's January Release Blog Hop! There are 18 stamp sets, 18 die sets, and 12 new ink colors releasing today. I got to see them all in person at CHA last weekend - and they are absolutely FABULOUS! You should have arrived here from the ever so talented
Lydia Evans - if not, make sure and check out the entire blog hop order at the bottom of this post so you don't miss a single stop!
Fair warning - this is a VERY picture heavy post! I have not one, not two, but FIVE cards to share with you today - as well as a bonus peek at a couple more that I will fully share over the next couple days. I got to play with five of the new stamp sets - and just couldn't stop once I got started! Full blog hop order is listed WAY at the bottom of this post, as well as giveaway info.
My first two cards use the beautiful new
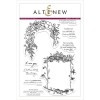
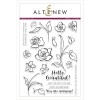
Recollections Stamp Set - beautiful floral frames in this one - I adore this set!
Lately I've been enjoying the color combo of white, spring green, and black - I just think it is a super striking combination. So, for this card I stamped one of the floral frames on some SSS green cardstock, heat embossed in white, then added a bit of coloring with two green shades of Copic markers to accent the image and make it pop a little.
Added some black ink splatters to my white card base, heat embossed a sentiment from the same set on a strip of black cardstock, and adhered them on the cardbase with foam adhesive, putting one edge of the frame under, and one over the sentiment strip. Finished off with a bit of jute twine wrapped and tied around.
My second card uses the other frame from the same stamp set - as well as a sentiment from
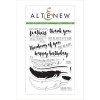
Faithful Feather:
For this one, I heat embossed the frame in black on a piece of white SSS 120 lb Cardstock, then used two colors of Altenew ink - Coral Berry and Ruby Red - to stamp the sentiment in an ombre effect. I also used Frosty Pink to do a bit of ink blending on the top and bottom for a gradient effect.
I then carefully fussy cut it out and tied some black twine around it before attaching it with foam adhesive to a panel of pattern paper that I had added some black ink splatters to, machine stitched around the edges, and adhered to a cardbase. Look at the detail on that frame! Gorgeous!
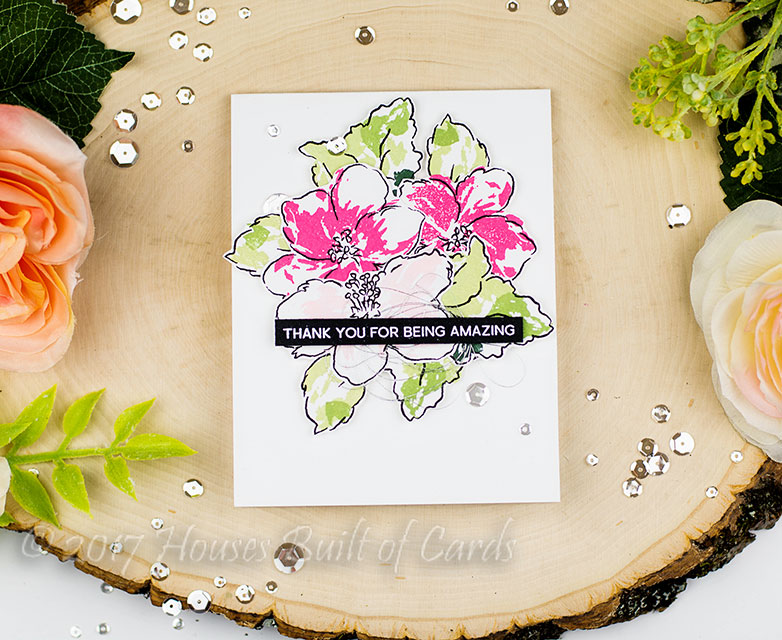
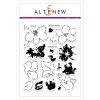
I love the loose sketchy feel to these layering stamps! I used Frosty Pink and Coral Berry for the flowers, and Frayed Leaf, Forest Glades, and Evergreen for the leaves. Once I fussy cut them out and layered them together, I used Press 'N Seal to hold them together, lifted and applied foam adhesive to the back, then re-adhered onto my white card base.
Sentiment was heat embossed in white on a strip of black cardstock, then adhered with foam adhesive over a bundle of silver thread. Finished off with a few Sparkling Clear sequins from Pretty Pink Posh!
And of course, when I saw
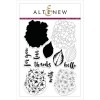
Garden Hydrangea - I couldn't WAIT to get my hands on it! I'm pretty sure this is one of the flowers I requested for a layered stamp set some time ago from Altenew, so I was super excited about it!
I used a few different SSS dye inks to put together the layers of the flowers and leaves, then added a sentiment from
Recollections Stamp Set. Tore the bottom edge of the white cardstock, added some messy machine stitching to the top, and a little bundle of doily tucked into a tiny paper clip with some jute twine tied on it.
Finished off by adhering with foam adhesive to some woodgrain pattern paper.
And finally, a bright and fun watercolor card using
Amazing You!
For this one, I stamped the leaves and stem, the rose, and the sentiment on watercolor paper - then pulled out my long neglected Peerless Watercolors to add a messy but bold watercolor look. Once it dried, I also added some white paint splatters to the background (after a bit of masking over the flower) then used a white gel pen to add a few dots on the flower for interest.
Added some pattern paper from Crate Paper, a doily, and a green clothespin from my stash, then adhered it with foam adhesive to my cardbase, allowing the edges to curl up a bit for some dimension.
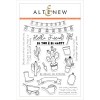
Whew! Are you still with me? Just two more to share! I promise - I'm almost done! Next up, last week at CHA I did a couple of the make-n-takes at the Altenew booth (which was GORGEOUS by the way!) - the front panel of this is from one of those, and I came home, trimmed it up a bit, and added some pattern paper to make it pop a little more. I got to color with the new Altenew Markers - and I ADORE them! I'm super picky about markers, and these definitely passed my test, and I loved that they were in sets of four for easy blending, not to mention a great price point and beautiful colors to match their inks! Anyway - this stamp set is called
Be Strong:

And last up, I just had to share this card that I made with a panel I got to watercolor at the Daniel Smith watercolor booth - with Sandy Allnock! I had been wanting to try these for a while, and I loved them as much as I was afraid I would (which means something else to collect I'm afraid!). But the make-n-takes for that booth were these lovely little square panels stamped with the brand new
Hibiscus Bouquet from Altenew! So I came home, matted it in black cardstock, and added to a little square white cardbase for a quick notecard - so cute!
Your next stop along the hop is the amazing
Ashley Horton - but before you leave, make sure and leave a comment. Altenew has graciously provided a $30 gift certificate for me to give away here on my blog, as well as each stop along the hop - and there are THREE $50 certificates up for grabs on the Altenew Blog! Make sure and leave your comments by Thursday, February 2nd at 11:59 EST to be entered to win.
Here is the entire blog hop lineup in case you get lost along the way:
And finally - all other product links are all below - including affiliate links where possible, which simply means if you use one of the links below that I receive a small commission at no additional cost to you. Thanks so much for stopping by! Have a wonderful day!!!