Friday, November 30, 2018

Watercolor Tree Silhouettes - Simon Says Stamp DieCember

Hello! Happy DieCember with Simon Says Stamp! This month is all about celebrating die cutting - and there is, of course, a fabulous NEW DieCember RELEASE for the occasion as well! You can check that out HERE!

I'm kicking off the month by sharing this set of watercolor cards featuring the beautiful new Tree Frame Wafer Die! Make sure and check back on Sunday for the first day of a 2 day blog hop to celebrate the month - I am SUPER excited to share my cards for that! LOVE how they came out!


For these cards, I created several simple ombre watercolor backgrounds, just using random colors that looked fun as I did each one. No rhyme or reason, just playing with watercolor - so relaxing and fun!


Once those dried, I added some white paint splatters to each panel.


I die cut the Tree Frame Wafer Die 4 times from white cardstock. For two of these cards, I trimmed the panel down with my paper trimmer, and for the other two I used Stitched Squares - the second to the largest size was PERFECT to trim around the edges of this!


I also used that same square die to trim down my watercolor panels, then layered those together, then mounted with foam on white cardbases. I stamped a sentiment on each one using Let Us Rejoice - and they are simple and ready!


Now I did notice something kind of funny when I finished...noticed how the color schemes almost seem to fit and reflect a certain season on each one? Totally unplanned - but I thought it was kind of neat how it worked out!


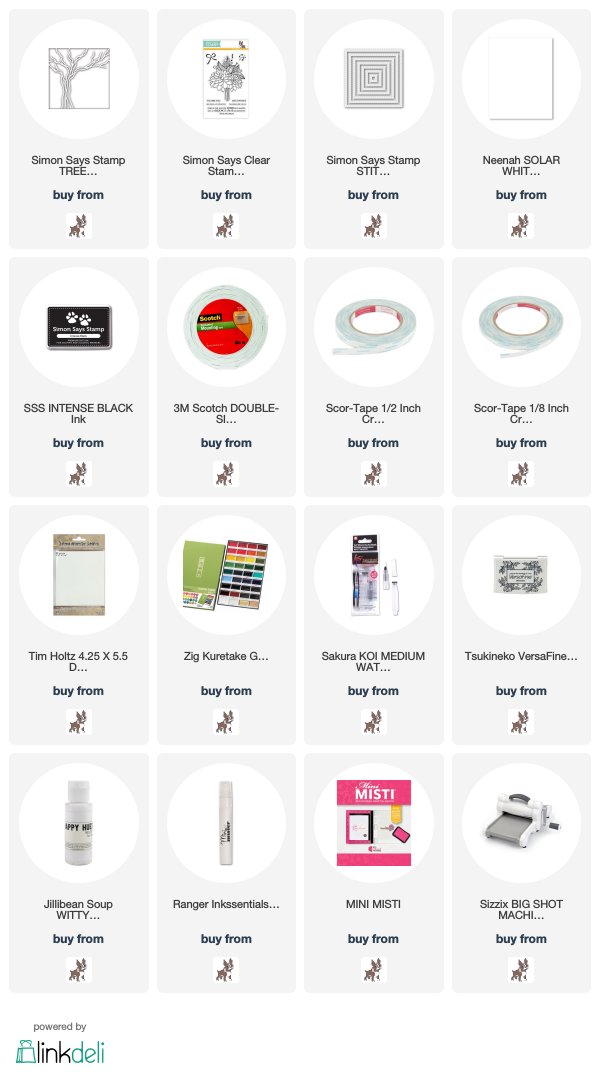
Product links are all below - including affiliate links where possible, which simply means if you use one of the links below that I receive a small commission at no additional cost to you. Thanks so much for stopping by! Have a wonderful day!!!

Winnie and Walter Winter Release - Day 4

Good morning! I'm back one final day with some projects using the BRAND NEW release from Winnie and Walter! It's been a while, but I promise you this release was worth the wait - SOOO fun and fabulous! You can find all the details for each day of the release, how to win it all, and lots more sneak peeks and inspiration over on the Winnie and Walter Blog HERE! And...the new release will be available this evening! Woohoo!!!

I have two cards again today to share - both using some darling new Evelin T. Designs Stamp sets that I LOVE! First up...is there anything cuter than caroling yetis?!?!?


This card uses the DARLING Yetitide Greetings - I even used that sentiment from the set! I stamped and colored up this sweet trio with Copic markers, then die cut them with their coordinating dies.


The background was created by blending some Iced Spruce Distress Oxide ink on my cardstock, then adding a heavy splatter of white paint. Once that dried, I die cut the panel with the fun new Essentials: Tilda Cutaways and stamped my sentiment. Finally, I adhered my singing yetis with foam adhesive, and adhered the front panel with foam adhesive to a white cardbase.


Next up, I have a card featuring Nutcracker Kisses!


Similar to the card above, I stamped and colored my images with Copic markers before die cutting with the coordinating dies. I created the background to my cardbase using Scenery: Pennsylvania Polka Creative Screenings. I stenciled with Tumbled Glass distress oxide ink around the edges, then removed the stencil, and added another soft layer of the same ink color. I love the two tone effect you can achieve with that!


I added a touch of glamour to the background by splattering some gold on with my Starry Colors Palette, then added my sentiment and adhered my images with foam adhesive!


Product links are all below - including affiliate links where possible, which simply means if you use one of the links below that I receive a small commission at no additional cost to you. Thanks so much for stopping by! Have a wonderful day!!!


Technique Tuesday Countdown Day 2 - Beauty in Simple Things

Good morning! Welcome to Day 2 of sneak peeks for the December Release from Technique Tuesday! Woohoo!!! Lots of fun new stamps and dies in this release - make sure and check out the Technique Tuesday Blog to find links to all the Design Team's projects for today!


Today I'm sharing a card using Joyous Juniper - such a lovely image, and so fun to watercolor!


I stamped the image twice on watercolor cardstock, once at the top right corner, and once in the bottom left - channging the angle to make it look like there are more stamps used than there really were! I nestled the sentiment in the little space left between the two.


I colored the image with my Daniel Smith watercolors in a loose messy design. The orange was actually an accidental drip when I was almost finished - so after I panicked that I had ruined it, I just decided to go with it and add more! I think it worked out all right, and I kind of like the tiny pop of color it gave!


I also added some Crystal Glaze to some of the berries. Again, this is another spot I changed from my original plan. I was going to cover all the berries, but thought I would start with singles and let them dry before adding it to the neighboring berries to keep the definition between them. But once it dried, I decided I quite liked the variation of it being on some of them and not others! It added nice depth and variety - fun!


Product links are all below - including affiliate links where possible, which simply means if you use one of the links below, I receive a small commission at no additional cost to you. Thanks so much for stopping by - have a wonderful day!!!


Thursday, November 29, 2018

Pink and Gold Snowflake Cards - Simon Says Stamp

Good morning! I'm stopping by to share a couple of snowy Christmas cards, but with the twist of a slightly different color combo than you'd expect! I used several Simon Says Stamp stamps and dies to create this fun duo!


For both of these cards I used the same 3 Distress Oxide Colors - Tattered Rose, Worn Lipstick, and Aged Mahogany - and slightly different ways of using them to achieve these two different looks. Both card use the recently released Outline Snowflake Background Stamp set.


For this first card, I inked up the stamp with each of the colors, doing uneven lines for an ombre effect, misted with water, then stamped on watercolor paper. Once I stamped it, I also misted it a bit more so that the colors softened and bled slightly for an image that has a hint of the feel of watercolor to it.


This second card, I inked up my stamp with one color at a time, starting with the softest, stamped on watercolor paper, then rotated my stamp a quarter turn and repeated with the next color. When it was all finished, I misted it fairly heavily with water. Everything felt like it was getting muddy at this point, so I grabbed a clean sheet of printer paper, and smooshed it over the top to pull off some of the liquid and color. I was surprised by the beautiful soft effect I got when I peeled that back - so fun! So I left it just like that!


I added some sentiments using Comfort and Joy - the stamp set included in the sold out Limited Edition Card Kit, but still available on it's own. A few gold splatters over the background with my Starry Colors Palette, and some gold bows cut with a die from the December Card Kit (I don't see it for sale on it's own currently, but that may happen down the road if you weren't lucky enough to get your hands on one of these kits that are also now sold out!). Which effect do you like best?


Product links are all below - including affiliate links where possible, which simply means if you use one of the links below that I receive a small commission at no additional cost to you. Thanks so much for stopping by! Have a wonderful day!!!


Winnie and Walter Winter Release - Day 3

Good morning! I'm back yet again today to share some more projects with the BRAND NEW release from Winnie and Walter! It's been a while, but I promise you this release was worth the wait - SOOO fun and fabulous! You can find all the details for each day of the release, how to win it all, and lots more sneak peeks and inspiration over on the Winnie and Walter Blog HERE!

Today's card might quite possibly be my favorite so far of the release! It combines two new stamp sets - Scenery: Dotty and Snowy Holiday with Evelin T Designs:


As I was looking at the images in Scenery: Dotty, I suddenly saw in the largest circle a moon! So, I set out to create a background using it that way. I masked off the bottom of my cardbase, then carefully stamped that largest circle. I used my MISTI to line it up, inked it up first with embossing ink, then Tiara Catherine Pooler ink, stamped it, then heat embossed with clear embossing powder. I then blended distress oxides around it in Hickory Smoke and Black Soot, wiped the excess off the heat embossed image, then added lots of white paint splatters for a snowy feel.


I peeled the mask off the bottom - and had a perfect skyline! At this point, I stamped one of the darling images from Snowy Holiday with Evelin T Designs, colored with Copics, and die cut with the Coordinating Dies, then mounted with foam adhesive. I added a sentiment underneath, then tied around some of the twine that actually came from Winnie and Walter, holding my new stamps together - great way to recycle, right?


Product links are all below - including affiliate links where possible, which simply means if you use one of the links below that I receive a small commission at no additional cost to you. Thanks so much for stopping by! Have a wonderful day!!!


Technique Tuesday Countdown Day 1 - Beaver Friends

Good morning! It's that time again - time to start sharing sneak peek projects for the December Release from Technique Tuesday! YAY!!! Make sure and check out the Technique Tuesday Blog to find links to all the Design Team's projects for today!


Today we are sharing projects with the new Beau and Beatrice Stamp Set! I had tons of fun building a cute scene with several older Animal House critters from Technique Tuesday and pairing them up with one of these new beavers!


I colored up all my images with Copic markers, and die cut with the coordinating dies. The deer and dragonfly are from Dani Deer. The turtle is from Turtle Trio. All the other images are from the new Beau and Beatrice Stamp Set.


I blended some Bundled Sage distress oxide ink on the bottom of my white cardbase, and then arranged all my critters to build my scene. I picked them up with some Press 'n Seal to hold them all in arrangement, turned the whole thing over and added foam adhesive, then pressed in place on my cardbase - pulling off the Press 'n Seal. I stamped a sentiment that seemed perfect with all these little friends together to finish this card off! 


Product links are all below - including affiliate links where possible, which simply means if you use one of the links below, I receive a small commission at no additional cost to you. Thanks so much for stopping by - have a wonderful day!!!


Wednesday, November 28, 2018

Winnie and Walter Winter Release - Day 2

Good morning! I'm back today to share some more projects with the BRAND NEW release from Winnie and Walter! It's been a while, but I promise you this release was worth the wait - SOOO fun and fabulous! You can find all the details for each day of the release, how to win it all, and lots more sneak peeks and inspiration over on the Winnie and Walter Blog HERE!

Once again today, I have two more cards to share with you - beginning with this bright festive card:


For this card I used the fabulous new Cover Model: Peppermint Zone Cutaway, die cut from red cardstock. I used my finger to smear some Glossy Accents in the center of it in a random pattern, then sprinkled on some chunky glitter to add a bit of frosty sparkle in the center.


Next, I added my sentiment using In a Word: Grand Merry and In a Word: Grand Merry Coordinating Cutaways - heat embossed on black cardstock, then mounted with foam adhesive. I used some liquid adhesive in the center of the red die cut panel to adhere it to my cardbase, leaving the outside edges floating free for a bit of a whimsical feel!


Next up, a super simple one layer card, using the fun new You Are a Blessing - which is also the new free with purchase stamp set with this release!


I love this line of mini stamp sets from Winnie and Walter - with the options to stamp the words in the center of the main image for a multicolor but one layer image. Or the option to use it without, or, just use the words on their own! So clever!


I used 3 colors of Catherine Pooler ink to stamp out the image - Aquatini, Orange Twist, and Flirty Fuchsia.


As a finishing touch, I added a touch of gold splatter with my Starry Colors Palette. See the fun shine?


Product links are all below - including affiliate links where possible, which simply means if you use one of the links below that I receive a small commission at no additional cost to you. Thanks so much for stopping by! Have a wonderful day!!!


Triangle Christmas Tree - Reverse Confetti Wednesday in the Works

Hello! I have a new edition of Wednesday in the Works on the Reverse Confetti Blog and YouTube Channel this morning - this week my project features a unique way to make a Christmas Tree using Tall Triangles Confetti Cuts and some Lime Green and Avocado Cardstock! I also used Stitched Rays Cover Panel for the background, Christmas Bear Coordinating Dies for the star, and Triangle Trees for the sentiment. 


Thanks so much for stopping by - have a great day!

Tuesday, November 27, 2018

Winnie and Walter Winter Release - Day 1

Good morning! I'm super excited today to begin sharing projects with a BRAND NEW release from Winnie and Walter! It's been a while, but I promise you this release was worth the wait - SOOO fun and fabulous! You can find all the details for each day of the release, how to win it all, and lots more sneak peeks and inspiration over on the Winnie and Walter Blog HERE!

I have two cards to share with you today - let's start off with this bright and happy card using one of my favorite Christmas color combos - red and teal!


This card features the new In A Word: Jolly Cutaway, paired up with a sentiment from a set we will be seeing more of in a couple days.


I layered together some pattern paper, adding a torn edge to the red, and layered the big "jolly" cut out of white cardstock over the top with foam adhesive. The sentiment was heat embossed on a strip of black and adhered over the top.


The next card features a new stencil, stamp set, and two new die sets:


The new Scenery: Pennsylvania Polka Creative Screenings is just a perfect classic polka dot stencil. For this card, I used it over watercolor paper with distress ink, then misted with water before peeling the stencil away. Almost as an afterthought, I turned the stencil over and used it to "ink smoosh" over the top of the other polka dots. See the layers of dots and reverse dots? I love the texture this gave!


I die cut that panel with another new die that we will be seeing more of tomorrow - and then die cut one of the big "thanks" from the new In a Word: Thanks Coordinating Cutaways from black cardstock, attached it with a row of machine stitching, and stamped an additional sentiment underneath from In a Word: Thanks. I added some gold splatters with my Starry Colors Palette, then adhered that panel with foam adhesive over my pattern paper base.


Product links are all below - including affiliate links where possible, which simply means if you use one of the links below that I receive a small commission at no additional cost to you. Thanks so much for stopping by! Have a wonderful day!!!