Thursday, June 30, 2022

You Make Life Fun - Simon Says Stamp

 Good morning! I'm stopping by this morning to share a one of my favorite cards ever! I'm using a favorite stamp set from Simon Says Stamp paired up with a new die that I got specifically for my nieces. One of their favorite things has been to tap me on the nose and say "boop" - so I knew that this die would be perfect for them! And...anyone else, but isn't that something you want to do to balloons as well? Just me? Okay then! Haha! Anyway, I can't wait to give them this card - I seriously love it!  


I used Time to Party stamp set to stamp the balloons, using a new favorite color combo of Simon Says Stamp Pawsitively Saturated inks - Guava, Cantaloupe, and Tidepool. These stamps are perfect for stamping these solid images with great coverage. I also added strings on the balloons with that set, and the little additional sparkles in the same ink colors - ending up with little clusters of balloons and sparkles in clusters of 3 - with a total of 3 clusters. Love how odd numbers are pleasing to the eye!


I die cut the "boop" from Tonic Gold Pearl cardstock, and the shadow layer from vellum. The vellum allows me not to lose too much detail of the balloon strings behind the large word. I also die cut the front layer two additional times from plain white cardstock. I layered these two together behind the vellum layer for simple easy dimension that hides perfectly behind the front layers!


I added the additional stamped sentiment using So Talkative stamp set - isn't it the perfect addition? Finished off with a few sparkly white jewels on the stamped sparkles, then popped the panel up with foam adhesive on an ivory cardbase for some soft contrast.


Product links are all below - including affiliate links where possible, which simply means that if you use one of the links below, I receive a small commission at no additional cost to you. Thanks so much for supporting my blog, and stopping by! Have a wonderful day!!!


Wednesday, June 29, 2022

Hello Sunshine Beach Chair - Simon Says Stamp

Good morning! I'm stopping by today to share a bright and summery card using some recently release and a bit older supplies from Simon Says Stamp that I played with the other day and had so much fun combining onto one project!  


I loved the adorable Adirondack Chair from the most recent release, and wanted to create a bright and simple scene with it. I love white on white with pops of color - so I decided to go with that idea!


I added a background by stamping the sunburst from Hello Sunshine stamp set in Citrine ink, and that little row of dots in Surf, I then assembled the chair, and popped it up with foam over those two images.


I added a stamped sentiment from the same stamp set, and a few sparkly Sunshine jewels from Pinkfresh Studio to add a touch of sparkle. Finally, I rounded off the top corner of that panel, and mounted with foam on a Sea Glass cardbase, with the same corner rounded off as well!


Product links are all below - including affiliate links where possible, which simply means that if you use one of the links below, I receive a small commission at no additional cost to you. Thanks so much for supporting my blog, and stopping by! Have a wonderful day!!!


Simple Summer Trio - Simon Says Stamp July 2022 Card Kit

Good morning! I'm popping in to share a few final cards using the BRAND NEW July 2022 Simon Says Stamp Card Kit - You Shine! This month's kit a fun mix of juicy and fresh, and yet with a bit of a vintage flair! The included stamp set by the same name has some fresh fun images and great sentiments, there is a fun little stencil/die cut combo, of course some sweet pattern paperFoundry wax...that's all not to mention the cardstock, envelope, and more!

Today I'm sharing a simple trio of cards, featuring some of the pattern paper in the kit - one of my favorite ways to create quick cards!


There were a couple pattern papers that had rectangular card designs - all ready to go! I chose a few, and trimmed them down to use for the front of my cards.


Next, I used the reverse side of some of those, as well as some other pieces of pattern paper to cut similar size layers, and adhere them together in fun wonky layers.


I punched a tiny hole through all the layers, and used that to thread a twine loop through, then tuck a bow inside the look, and tighten if from the back, tying and taping it in place. Simple bow - and it stays put! 


Then it was simply a matter of adhering those all onto white cardbases with foam adhesive! Nice and easy, and you have 3 or more cards in no time at all!


Here is a closer look at the entire kit contents - you can see it all HERE:


Product links are all below - including affiliate links where possible, which simply means if you use one of the links below that I receive a small commission at no additional cost to you. Thanks so much for stopping by! Have a wonderful day!!!


Tuesday, June 28, 2022

Folk Floral Traditional Colors - Pinkfresh Studio Instagram Release Hop

 Hello! Today I am part of a fun Instagram hop to celebrate the new Pinkfresh Studio release! I have had so much fun creating with this release - yesterday was the blog hop, and I shared several cards for that! I have a card with a fun and different color combo I'm sharing today that I created on last week's YouTube Live for Pinkfresh Studio as a sneak peek with Lea Lawson - our new usual plan is to do one sneak peek on release weeks, so we can show one suite of products two different ways. You can watch that video HERE if you want to see more details!


I decided to go with fairly traditional folk art colors, but switch up what you would normally expect, and use red for the greenery, and blue for the flowers. Someone also pointed out that it was perfect patriotic colors as well - just in time for the 4th of July. I didn't plan it that way - but fun how it worked out. And I really love this color combo too! I even stamped it in a deep blue ink - Stargazer.


I love how detailed this cuts out - isn't it stunning? I added some texture to my background by layering up the Dotted Scallop coverplate, and then the Ornate Circle, trimmed in half and added to the top and bottom of that panel. I used white on white to keep it from getting too busy, and I love how it gives lots of lovely texture without getting too busy!


I mounted that entire panel on a blue cardbase, and then finished off with a sentiment from the newest prefoiled sentiments - Foiled Sentiments 3. I also added a few of the fun new Clear Drops: Iridescent that are so very irresistible - I seriously want to add them to all of my projects right now! 


Product links are all below - including affiliate links where possible, which simply means if you use one of the links below that I receive a small commission at no additional cost to you. Thanks so much for stopping by! Have a wonderful day!!!


Monday, June 27, 2022

Dress Up - on the Unity Stamp Company Blog

 Good morning! I'm back with another card for my series on the Unity Stamp Company Blog this morning! I'm so excited to be featuring the amazing Kit of the Month on Monday's on the Unity Stamp Company Blog! Since the Kit of the Month was the first thing I purchased from Unity, and what got me hooked to begin with, they hold a special place in my heart, so I'm super excited about this opportunity to give these kits some love! You can check out all the details HERE for today's project!


Thanks for stopping by today - have a WONDERFUL day!!!


Pinkfresh Studio June 2022 Stamp, Die, Stencil, and Hot Foil Release

 Good morning! Today is the blog hop to celebrate Pinkfresh Studio's June 2022 Stamp, Die, Stencil, and Hot Foil Release! Several of the items in this month's release were part of the Create and Connect event we did in May - and there are a few new surprises as well! You aren't going to want to miss a stop along the way - TONS of inspiration and prizes up for grabs! YAY! You can find links to all of the new release items I used on today's cards at the bottom of this post! 


I don't have as many cards to share today as usual - time was a bit shorter by the time my package arrived, and my nephew's wedding was this past weekend, so I was a bit busy there as well! But...this first card I am in love with enough that it may as well be several cards! I had so much fun with the color combo on this one!


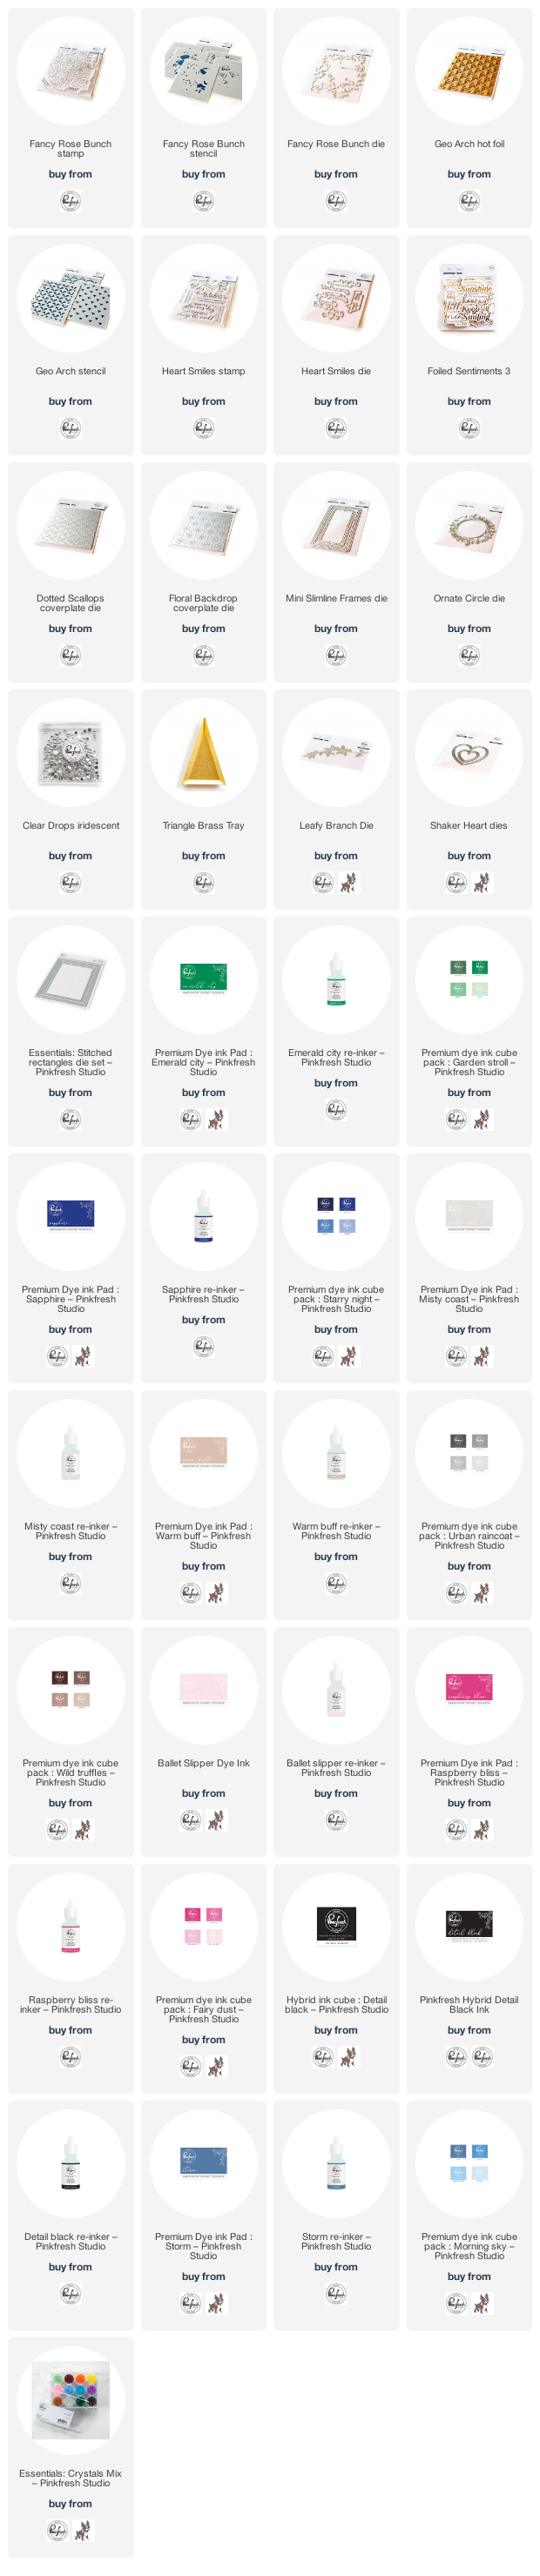
I used the Fancy Rose Bunch set, heat embossing in gold, then actually skipped some of the stencil layers for this one - leaving the base layer of some of the florals as white for some variation. And one of my favorite techniques lately has been mixing ink colors. I tried a new mix of blues and greens for the leaves on this card - Emerald City and Sapphire - and I love the way they blended together! I used the same ink colors for both layers of the leaves, just varying the blending to get a lighter and deeper shade.


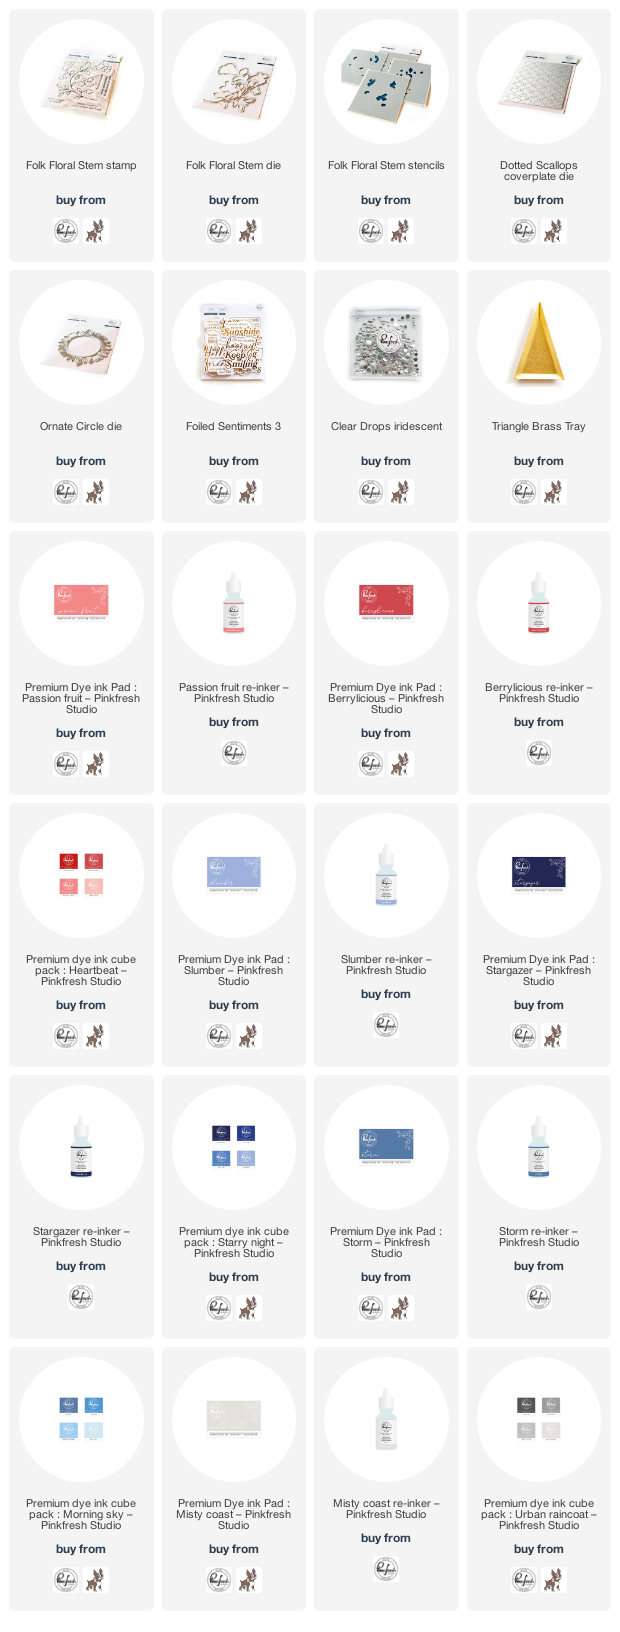
Once I did the leaves, I knew I wanted to keep the florals soft to allow those leaves to shine. So I used a mix of soft brown and gray, and I'm not gonna lie, I love that too! I decided with those colors, a mint colored background was perfect. I die cut the background with the gorgeous new Dotted Scallops coverplate die for some fun texture.


I also added a die cut frame using the stunning new Ornate Circle die, die cut from gold cardstock. I adhered it sideways, and just trimmed off the bit that overlapped the edges. I cut the florals in half (I know - scary! But worth it!) and tucked them on coming from the top and bottom of the card. I added a sentiment from the new Foiled Sentiments 3, and a few of the new Clear Drops: Iridescent to some of the flower centers. I mean, this whole color combo just feels happy and relaxing to me - how about you?


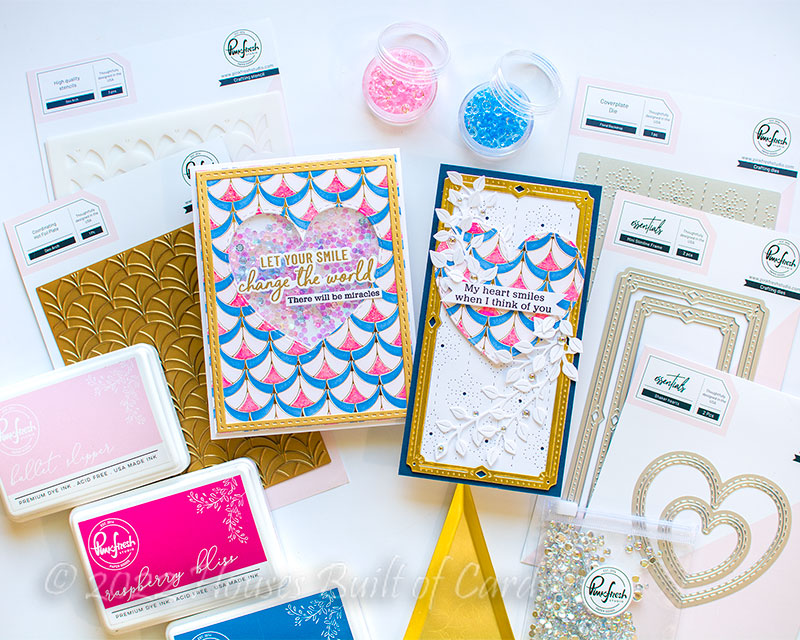
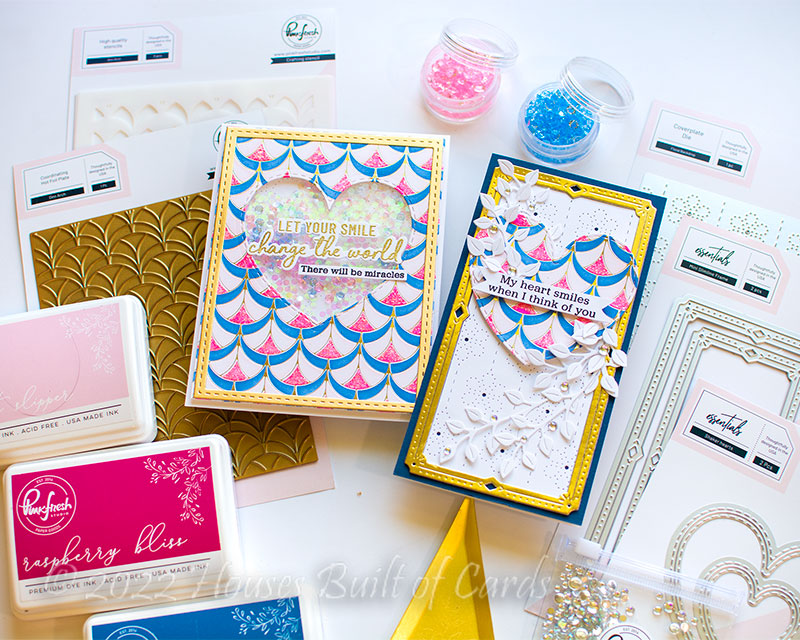
The next two cards especially feature the new Arches hot foil plate (from the Create and Connect event) and the newly releasing coordinating Layering Stencils for it! I love the stunning background this makes - and because the colors don't overlap, you can mix and match colors to your hearts content! I used Ballet Slipper, Storm, and Raspberry Bliss, and added a layer of glitter paste over the deep pink layer for extra sparkle.


Once all that had dried, I die cut a heart out of the center of the panel using Shaker Hearts die. This now gave me the ability to get a two for one design! Love that!


The first card with the negative panel, I turned into a shaker card! I filled it with some of the smallest size pink and blue crystals from Essentials: Crystals Mix, and some tiny circle confetti from Pretty Pink Posh that I love!


I added a gold frame using basic Stitched Rectangles to set it off, and added a sentiment using a mix of Heart Smiles stamp and die set, and a smaller sentiment from Folk Floral Stem stamp set.


For the second card, I decided to create a mini slimline design! I used Mini Slimline Frames die, and also used a die cut white portion with Floral Backdrop coverplate die. I mounted all that on a navy cardbase, and then added the heart with foam adhesive.


I added a sentiment from Heart Smiles, stamped in detail black, and trimmed into a banner shape. I also added some white leaves die cut from Leafy Branch die, and tucked around to add some movement. A few of those lovely Clear Drops: Iridescent are the perfect sparkly finishing touch!


I love when I can use one panel and get two cards - how about you?!?


GIVEAWAY INFO:

Make sure and leave a comment before you leave for a chance to win one of 10 $25 gift certificate to Pinkfresh Studio chosen from comments left across the hop! All winners will be chosen and posted on the Pinkfresh Blog on Tuesday, July 5, 2022 - so make sure and check back to see if you were a winner! Winners must check that page and claim their prize within 2 weeks.

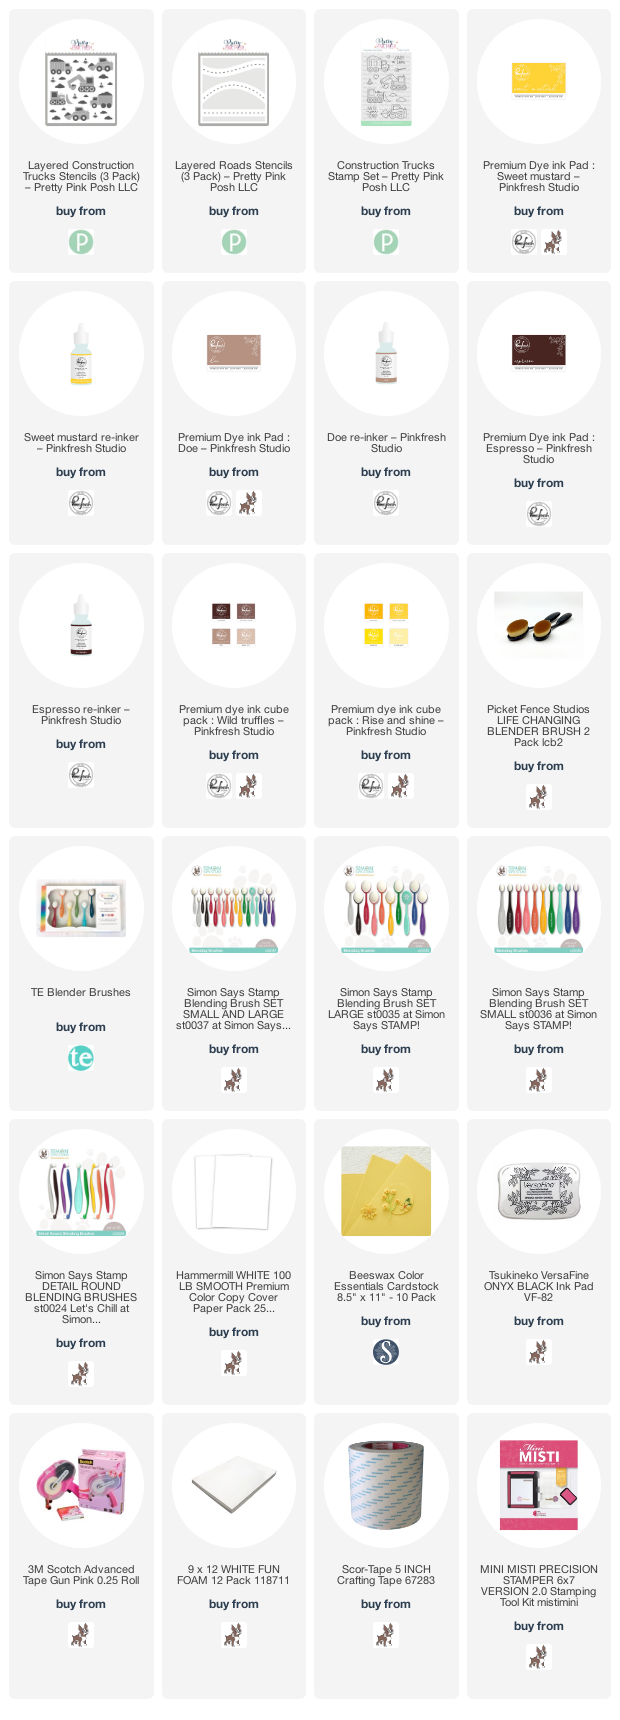
Here is the entire blog hop line-up so you don't miss a single stop - and product links are below - including affiliate links where possible, which simply means if you use one of the links below that I receive a small commission at no additional cost to you. Thanks so much for stopping by! Have a wonderful day!!!

You are invited to the Inlinkz link party!

Click here to enter

Wednesday, June 22, 2022

Miss You Tons - Pretty Pink Posh June Release Instagram Hop

Good morning! Today I'm celebrating the new June Release from Pretty Pink Posh by joining Day 2 of the Instagram Release Hop! You can head over to Instagram to join that hop, and enter to win today's giveaways, and you can find the new release HERE. I thought I would share more details here on my blog on my card - since it is always tough to put enough info in an Instagram post! 

I love all the fun boy theme products in this release - I have lots of little nephews that I am going to have "tons of fun" making cards for (see what I did there?!? hahaha!).


I started off by creating the stenciled trucks using Layered Construction Trucks stencils. I did some masking on my panel so that I only stenciled 3 of the trucks, and also masked off the cones, so I could just add some extra dirt piles.


Once I had the trucks done, I stenciled on the hill at the bottom using Layered Roads stencil. I just used the one with the background to create the hills, turning it around and adjusting it as necessary to create the layered hills effect.


Finally, I used Construction Trucks stamp set to add my sentiment and the few random hearts stamped around the background. Finished off by mounting that panel with foam on a coordinating yellow cardbase! SOOO fun!


Product links are all below - including affiliate links where possible, which simply means that if you use one of the links below, I receive a small commission at no additional cost to you. Thanks so much for supporting my blog, and stopping by! Have a wonderful day!!!


Tuesday, June 21, 2022

Soak up the Sunshine - Simon Says Stamp July 2022 Card Kit

 Good morning! I'm popping in to share another card using the BRAND NEW July 2022 Simon Says Stamp Card Kit - You Shine! This month's kit a fun mix of juicy and fresh, and yet with a bit of a vintage flair! The included stamp set by the same name has some fresh fun images and great sentiments, there is a fun little stencil/die cut combo, of course some sweet pattern paperFoundry wax...that's all not to mention the cardstock, envelope, and more!

Today's card is a very simple card, mostly featuring some of the beautiful pattern paper in the kit!


I love how striking the black envelope is - and how it sets off the lovely layers of pattern paper with this card.


I tore the edges of one of the pattern papers for texture, and layered it over one of the more solid papers.


I also created a fun little bow element using some scrap strips of pattern paper, one piece adhered down flat, then another piece formed into a loop and attached with mini staples. Such a simple and fun embellishment!


Here is a closer look at the entire kit contents - you can see it all HERE:


Product links are all below - including affiliate links where possible, which simply means if you use one of the links below that I receive a small commission at no additional cost to you. Thanks so much for stopping by! Have a wonderful day!!!