Good morning! Popping in with another card using some of the newest Unity Stamp Company releases - this one a super clean and simple card, using an old technique called Second Generation Stamping.
Here is a video demonstrating:
I love a good clean and simple card - and this image is so lovely and intricate, not to mention the perfect sentiment as well!
Product links are all below - includingaffiliate links where possible, which simply means if you use one of the links below that I receive a small commission at no additional cost to you. Thanks so much for stopping by! Have a wonderful day!!!
Good morning! A few months back I got an email from Michelle, the owner of Pink and Main asking if I would be interested in working with some of their products at some point. At the time, life was crazy, so we waited until this fall. She sent me some of the newest release, then my life got crazy again, and it took me a little while to break it out and play with it. I'm so glad I finally had time to have some fun with them - they were so cute and darling! Here is the first card I made using some soft autumn colors - how fun is that sentiment?!?!?
For this one I used Autumn Blessings and the coordinating Autumn Blessings Dies paired up with some gorgeous pattern paper from Pumpkin Spice 6x6 Paper Pad. I love layering up pattern paper, and these color combos were perfect for that! I also tucked a doily, some jute twine, and a few flat sequins from Pretty Pink Posh on there. Check out all the yummy texture and dimension:
And then I also got to play with the fun Happy Dies. One thing I noticed that was unique with these dies (aside from the fact that they are PINK which is super fun!) is that they were all cut apart already with no sharp edges at all. Easy to use right out of the package!
I layered up the die cuts on a piece of torn edge Pumpkin Spice pattern paper with a sentiment from Autumn Blessings heat embossed on vellum, then covered the "happy" with Glossy Accents for some shine. Mounted that with foam adhesive over the pattern paper, and then on a kraft card base.
Product links are all below - includingaffiliate links where possible, which simply means if you use one of the links below that I receive a small commission at no additional cost to you. Thanks so much for stopping by! Have a wonderful day!!!
Good evening! It's that fun time when the Unity Stamp Company Design Team has their monthly Hip Hop! I've used one of the gorgeous new release for my card to share tonight!
Here is the Quick Tip video showing how I added some tiny seed beads as an embellishment after watercoloring the image:
Isn't that a fun sparkly 3D effect? I love how it came out!
As always, there is a prize up for grabs - so make sure and leave a comment before you hop along!
All the new releases - plus more! - are all on sale too, so make sure and check all that out as well!
Here are links to the products I used on this including affiliate links where possible - and below that the rest of the stops along the hop - make sure and visit them all! Thanks so much for stopping by! Have a wonderful evening!
Hello! Today was my youngest daughter's 13th birthday! Naturally, being last minute as usual, I sat down in the morning to put together a card for her! (I hope I'm not the only one who does that!) I always find it hardest to make cards specifically for a person - for some reason I feel like I have to get it just right to fit them - especially when it is one of my kids. I ended up pulling out a new paper pad that I hadn't used and some Reverse Confetti stamps and dies - and couldn't be happier with how it ended up! Fits her to perfection! She is not your typical girly girl - so no pink or glitter. She loves the outdoors, trees, natural colors, and archery - so this is what I put together:
I started off with my pattern paper actually - a new one I hadn't yet broken into to use but loved - American Crafts Creekside. I used Boho Vibes and coordinating Confetti Cuts to stamp and die cut a couple of arrows and colored the feathers with a Copic marker and added some white gel pen accents. I stamped and die cut the sentiment using Circle Wishes and coordinating Confetti Cuts on some of the pattern paper from the pad. I also used more pattern paper to die cut the Sunburst Tag Layer.
I added some white paint splatters to my background pattern paper, then once it dried a bit, layered everything else on it adding foam adhesive behind the circle, and some clear foam adhesive to pop up the arrows. I added a white frame from All Framed Up, some jute twine on the tag, and a wood veneer star from my stash on the center of the arrows. As a final embellishment, I added a few Gold Confetti from Pretty Pink Posh and filled in the center with white Nuvo Drops (which gave me a touch of gold shimmer, but without too much to offend the non-girly birthday girl!).
Links to the Reverse Confetti products I used on this card are below - click on any of the photos for a closer look:
Product links are all below - includingaffiliate links where possible, which simply means if you use one of the links below that I receive a small commission at no additional cost to you. Thanks so much for stopping by! Have a wonderful day!!!
Good morning! I have been following along without any consistency withKathy Racoosin's 30 Day Coloring Challenge, sometimes getting coloring in that goes with DT stuff I can't share, sometimes life is crazy and I don't get anything done, and sometimes I work on something like this for a few days here and there, and then get around to sharing it! Haha!
For some reason I seem to struggle with using colored pencils. Or at least, being happy with the results. This is one of the first times I have truly liked the finished card! I twisted things up a bit by stamping theses lovely Altenew florals from Adore You on kraft cardstock, then slowly coloring them with my Chameleon Dual Tones Pencils - mostly in the car waiting for a daughter at music lessons or some such thing.
I then carefully fussy cut them out, and arranged them as you can see here, using Jennifer McGuire's Press-and-Seal technique to pick it up, add foam adhesive to the back, and then adhere on my Rustic White cardbase. I heat embossed a sentiment from Altenew's Heartfelt Sentiments in Platinum ink on black cardstock and added that, then filled the centers of the flowers with Glossy Accents to adhere some sparkling Pretty Pink Posh seed beads. I also added a few soft sequins and a few more seed beads around the flower cluster - although they are difficult to see in the photos. Finished off by rounding one corner of the card!
I'm also playing along with the current Altenew Challenge - the colors are a bit different, but I was inspired by the cluster of florals, and the kraft in the background inspired my stamping the flowers on kraft cardstock:
Product links are all below - includingaffiliate links where possible, which simply means if you use one of the links below that I receive a small commission at no additional cost to you. Thanks so much for stopping by! Have a wonderful day!!!
Good morning! Have you seen this month's Unity Kit of the Month? It is gorgeous as always - you can check it out HERE! As we are nearing the end of September, there are only a couple more days to get it as your starting kit - the new October kit will be out before we know it!
I made a Quick tip video for this card sharing how I used some mini distress inks and water to create a simple frame for this adorable squirrel and lovely sentiment:
I then adhered that panel to a white cardbase, then used a leftover negative piece of pattern paper from a frame I die cut for a different card last week. Easy peasy, flat, and mailable!
Product links are all below - includingaffiliate links where possible, which simply means if you use one of the links below that I receive a small commission at no additional cost to you. Thanks so much for stopping by! Have a wonderful day!!!
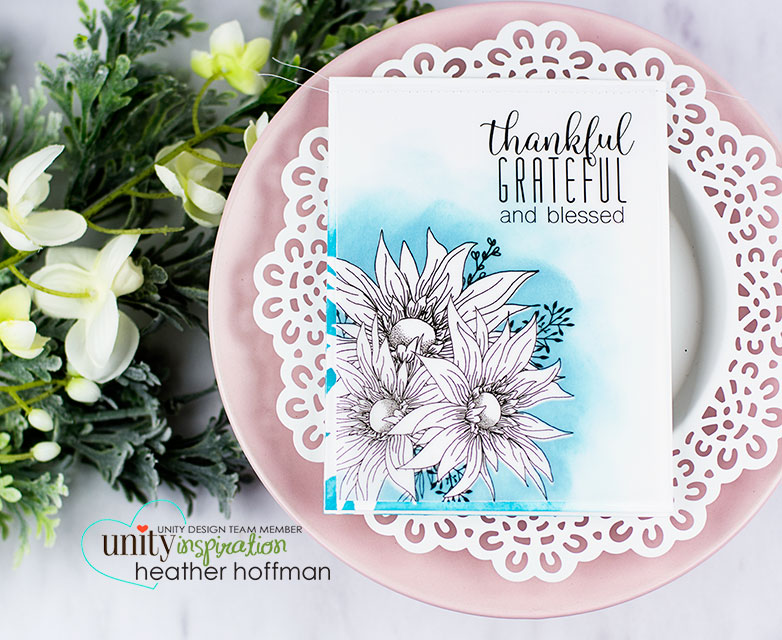
Good morning! Dropping by this morning to share a few cards I made with the current Unity Stamp Company Sentiment Kit - Abundant Blessings! One of the kits I love most at Unity are the sentiment kits - they are awesome on their own like these cards, but the sentiments are great to use along with all your other Unity sets, and I find they are so helpful to stretch my stamp images!
Here is a video showing how I put these cards together using distress inking, masking, and vellum - as well as a tip to make your masks last a little longer than one card (which is nice on one so intricate to cut out!):
And here is the card I showed being made in the video using Spun Sugar and Lipstick Distress Inks:
Love the softness that the vellum adds!
And then this color combo is Cracked Pistachio and Evergreen Bough:
Machine stitching the vellum is an easy way to attach it with no adhesive showing.
Next up is Tumbled Glass and Broken China:
See what I mean about these gorgeous sentiments?
And finally, another one with the same color combo as the first. I actually created this one first before the video - to make sure my idea actually worked! Haha!
You may notice that I was able to use one sheet of vellum to create these - and the flowers are all in a different corner of the cards. And easy way to create a set but make sure they are each slightly different!
And the three colors all together again. Which is your favorite?
Product links are all below - includingaffiliate links where possible, which simply means if you use one of the links below that I receive a small commission at no additional cost to you. Thanks so much for stopping by! Have a wonderful day!!!
Good morning! Dropping by today with a cute little Reverse Confetti Card using some fun new dies and stamps from the latest release! These little monsters make me think of cute little cartoon aliens actually - so cute!
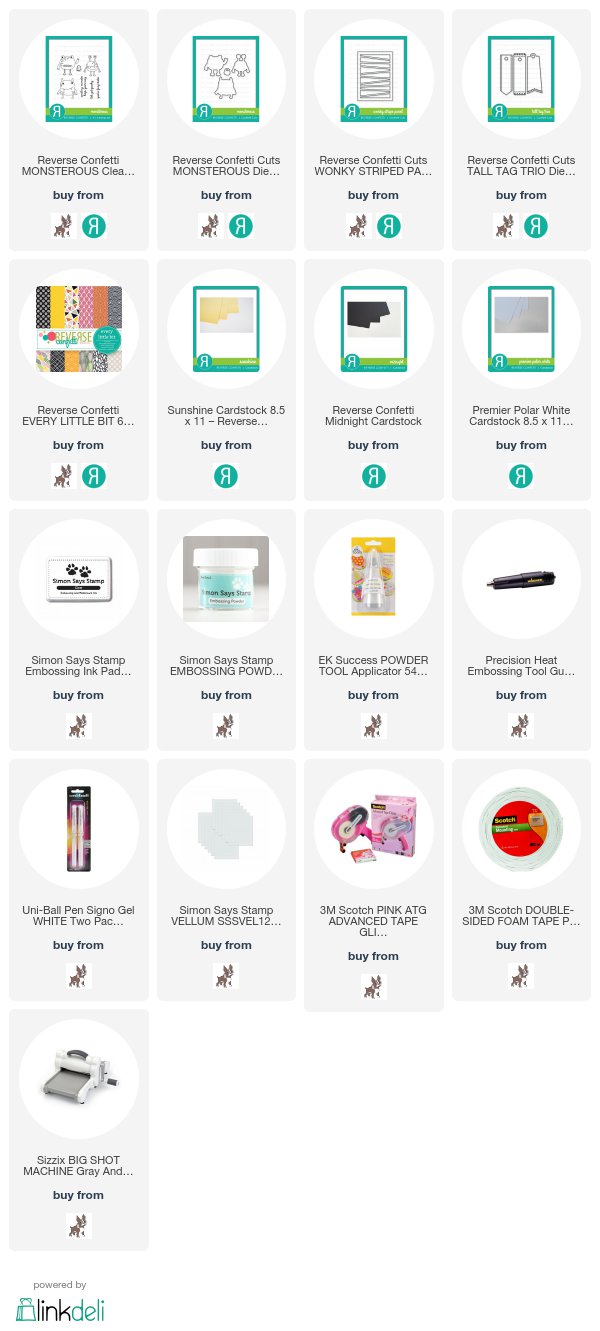
Links to the Reverse Confetti products I used on this card are below - click on any of the photos for a closer look:
Product links are all below - includingaffiliate links where possible, which simply means if you use one of the links below that I receive a small commission at no additional cost to you. Thanks so much for stopping by! Have a wonderful day!!!