Monday, February 28, 2022

Blooms with Happiness - on the Unity Stamp Company Blog

 Good morning! I'm back with another card for my series on the Unity Stamp Company Blog this morning! I'm so excited to be featuring the amazing Kit of the Month on Monday's on the Unity Stamp Company Blog! Since the Kit of the Month was the first thing I purchased from Unity, and what got me hooked to begin with, they hold a special place in my heart, so I'm super excited about this opportunity to give these kits some love! You can check out all the details HERE for today's project!


Thanks for stopping by today - have a WONDERFUL day!!!


Pinkfresh Studio February 2022 Stamp, Die, Stencil, and Hot Foil Release

  Good morning! Today is an amazing blog hop to celebrate Pinkfresh Studio's February Stamp, Die, Stencil, and Hot Foil Release! This release was supposed to happen earlier this month, but shipping delays pushed it to the very last minute this time around! Hopefully you find it worth the wait! You aren't going to want to miss a stop along the way - TONS of inspiration and prizes up for grabs! YAY! You can find links to all of the new release items I used on today's cards at the bottom of this post!


As usual, I have quite a few cards to share with you. Most of them were created prior to the crazy events of last week - but if you scroll to the bottom, I have a few cards that are super special to me, and are also part of a fundraising card auction today to support the people in and/or from the Ukraine. Details below for more info - but first up, some of the first cards I created with this release!


This first card uses the gorgeous new Lily Frame stamp - with it's coordinating layering stencils and dies. I heat embossed the image in gold, then moved on to adding color with the layering stencils.


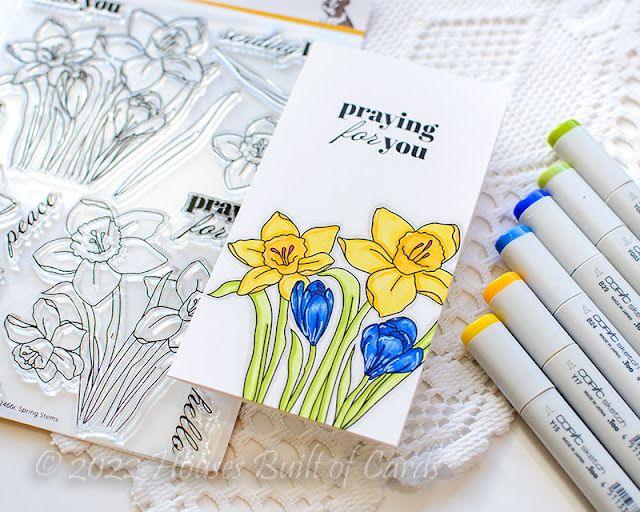
For the colors on this, I used yellow and green tones, and also added a touch of Warm Buff over the top of each one to slightly mute the colors. It just gave an entirely different look to the tones, and I love the slightly softer tone to them.


Once I die cut with the coordinating die, I added panel die cut with the new Tulip Love coverplate behind it. I trimmed off one panel on the top and side, and it fit PERFECTLY behind the frame. The perfect bit of texture, and I love how the hearts show the cardstock color underneath, helping them pop a bit more.


Sentiment was created with this stamp set - there are two main words with coordinating dies, and then I added the secondary sentiment on a strip of white cardstock stretched across the cardfront.


The frame is popped up on foam adhesive for dimension, and the center part adhered directly on the yellow cardbase. I also popped both sentiments up with foam adhesive.


Finally, a few Metallic Gold pearls in a trio on each side of the sentiment strip to finish it off!


Next up, another GORGEOUS and HUGE new floral slimline set!


The beautiful Chrysanthemum Slimline set is stunning - and the coordinating stencils and dies makes it even more beautiful!


I stamped in detail black ink, and let it dry overnight to add my stencil layers. I used oranges and pinks to blend the flower layers, and then mint greens for the greenery, before die cutting with the coordinating dies.


The background uses the new Hearts and Stars coverplate. Part of the fun of these new coverplate dies, is that they have no outer border die cut. Sooo...I was able to cut this twice, lining up and overlapping one row of the images, and create a longer slimline die cut panel. So fun!


Then the sentiment was added, again, using the stamp set that also includes two larger sentiments with coordinating dies, and heat embossing the secondary sentiment.


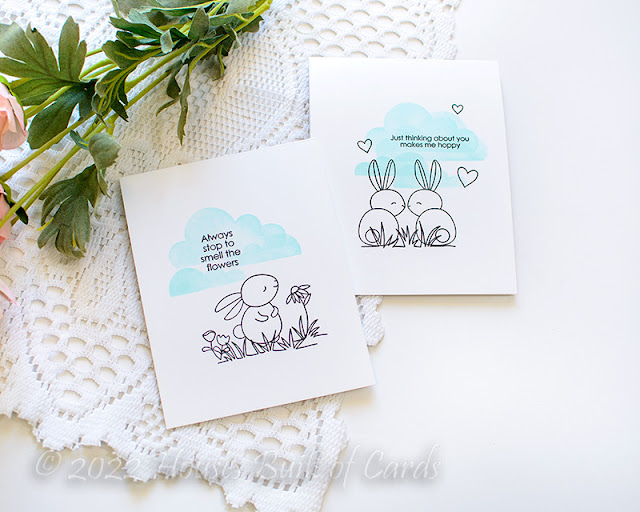
The next two cards use the same new sets - paired up with some older items, and in completely different color combos:


This first color combo was a happy accident - but I absolutely love the way it came out! I started off by stamping the beautiful new Delicate Floral print stamp set in Candy Apple ink, then set out to add color with the layering stencils.


I started by blending the flowers with Coral Reef and Passion Fruit inks - and they were lovely with the tone on tone effect. Then, I planned to blend Ocean Breeze on the leaves, but underestimated the amount of time I should have let the Candy Apple ink dry. They merged together and created this lovely purple color - which surprisingly, I love! The last layer of the leaves was added with Aquamarine ink, and retained a bit more of it's aqua color. I feel like it was a very modern look when finished!


I added a frame with Stitched Scallop Rectangles die, die cutting from soft pink cardstock, then again from white, and color blocking the frame together. The sentiment was added using Perfect Sentiments stamp set, and a secondary sentiment from Lily Frame stamp set.


Finished off with a gray cardbase, and a few sparkly purple Essentials: Crystals Mix for a bit of extra sparkle!


And then, as promised, a very similar card, but with an entirely different color combo!


This color combo is sweet and soft -makes me think of cotton candy! I stamped in Sapphire ink for this one, and blended pinks and soft blues on the layers.


I also added a frame on this one, but you may notice that I reversed the colors on this frame - pink on the outside, white in the center.


I added a corner embellishment with some coordinating colors of Essential: Crystals Mix - kind of enhances the frame effect on these.


Finally, the sentiment created with a hot foiled Perfect Sentiments, as well as a heat embossed sentiment from Lily Frame stamp set.


Finally, the last few cards created with this release - and you may be able to guess what the theme of these ones are. These cards are up for an auction fundraiser today to support Ukraine and it's people in their struggle, and the combination of the colors of the Ukrainian flag, as well as the encouraging sentiments, all work together to support this idea:


For these cards, I used the new Geo Tiles sets in different ways to create these cards. For this first one, I used the Hot Foil plate with Matte Gold foil, then used two layers of the coordinating stencils, leaving one layer white for contrast. Sentiment added with Phrase Builder: Sending, and secondary sentiment from Charming Floral Border, stamped with Stargazer ink.


This second card was created much like the last one, but uses Matte Silver hot foil, and a different combination of two of the coordinating layering stencils. Secondary sentiment on this one is from Simply Sentiments: Thank You.


And this final one uses the Layering stencils, then the Geo Tiles die cut from blue cardstock over the top. I trimmed the entire piece down to take off the edges, and form a larger matted area on my white cardbase. And secondary sentiment on this one is from Floral Vase - and I love this sentiment so very much on this one!


Foam adhesive on all main panels, and secondary sentiments on these cards for dimension.


And all the larger sentiments are die cut from matte gold or silver cardstock for the main layers, and vellum for the shadow layers.


GIVEAWAY INFO:

Make sure and leave a comment before you leave for a chance to win one of 10 $25 gift certificate to Pinkfresh Studio chosen from comments left across the hop! All winners will be chosen and posted on the Pinkfresh Blog on Tuesday, March 8, 2022 - so make sure and check back to see if you were a winner! Winners must check that page and claim their prize within 2 weeks.

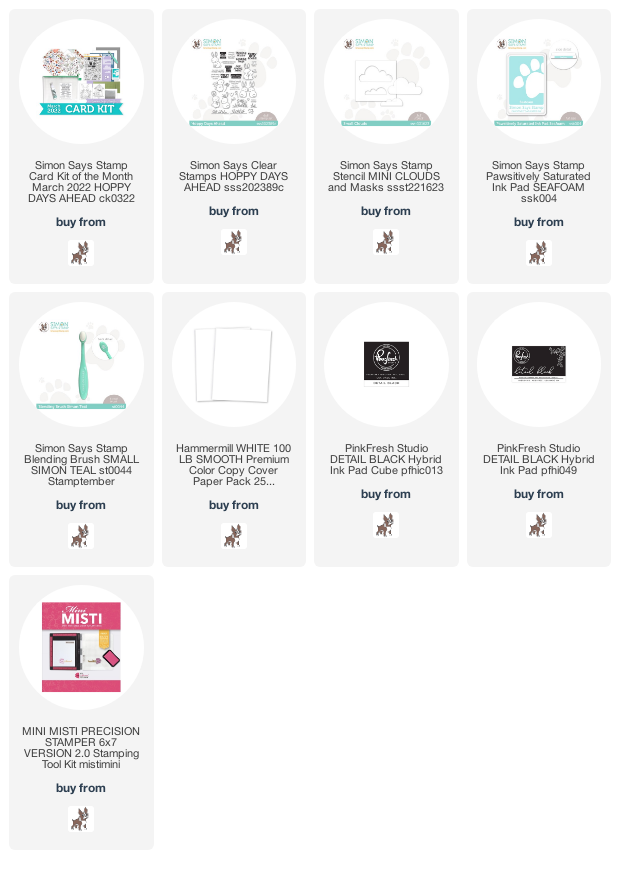
Here is the entire blog hop line-up so you don't miss a single stop - and product links are below - including affiliate links where possible, which simply means if you use one of the links below that I receive a small commission at no additional cost to you. Thanks so much for stopping by! Have a wonderful day!!!

You are invited to the Inlinkz link party!

Click here to enter

Sunday, February 27, 2022

Praying for You Spring Flowers - Simon Says Stamp

 Hello my friends - I'm back with another card heavily featuring blue and yellow - the colors of the Ukrainian flag. My mind has been so focused there - and these lovely flowers are some that our friend Yana had recently used on some cards she shared recently - before everything changed last week. Making cards is something I've often referred to as my therapy - and this is especially true right now, as I find my emotions straying onto my cardmaking more often than not. You can read more, and see my first cards HERE if you want more details.

This card is a mini slimline design, and a rare, truly one layer card for me.

I used the beautiful new Spring Stems stamp set from Simon Says Stamp's recent Good Luck Charm release - one I hadn't had a chance to ink up yet. I stamped the image and sentiment in Copic friendly black ink directly on my white 3 1/4" by 6 1/4" mini slimline cardbase, leaving the florals slightly offset along the bottom.


Next, I colored the image up with simple Copic marker colors. Sometimes it is super fun to color an image with Copics. I am a bit impatient lately, and don't spend much time doing that. But I found I was able to use this time to pray for Yana, the Ukraine, and the Russian people that are caught in the middle of it all with no wish to be.


Once I had the image colored, I also added some detail accents with a white gel pen.


Something about the florals in this set - daffodil and crocus - are such symbols of spring, and therefore hope, to me. So they seemed especially fitting. While it is heavy, and horrible, and hard, there is always hope for tomorrow - for me, found in the Lord, and brought closer the more time I spend in prayer.


Product links are all below - including affiliate links where possible, which simply means that if you use one of the links below, I receive a small commission at no additional cost to you. Thanks so much for supporting my blog, and stopping by! Have a wonderful day!!!


Friday, February 25, 2022

Praying for Ukraine - Simon Says Stamp

Hello friends. Yesterday I woke up with the beginnings of a migraine - first one I've had in a long time, and it took a while for the worst to wear off. And as the day wore on and I watched the news, all I felt was heaviness. I'm sure many of you felt the same way - watching in horror the events unfolding in Eastern Europe, and feeling helpless. Many of us were thinking of our beautiful friend Yana Smakula - a very real person and face of someone living through these events. Her story HERE is such a small, real, and raw window into what it is like over there right now. I just can't even imagine. At all.

Between the migraine hangover, and the heaviness on my heart, praying for Yana and all of the Ukraine, as I finally was able to get to my craft desk, it seemed fitting to let those emotions flow out onto my cardmaking. First of all - the colors, obviously inspired by the colors of the Ukrainian flag. Then the heart and sentiments reflecting what I wish I could communicate to Yana and others. And finally, even the technique with this 3D embossing folder is something I learned from Yana recently, misting the paper with water on both sides before embossing to get a more detailed image (you can see her post about this HERE). This yellow panel is one I had tested out shortly after seeing her genius in action. I caught my eye in my pile of projects to be finished, and the rest just came together so perfectly for today.


As I often do, I was able to use leftovers from my first planned card for a second version. Oddly enough, I may even like the second version best. But I really almost feel like these go together as a set.


As I mentioned, that yellow panel was created with the Exotic Vines embossing folder. I die cut a window in it, and then added a panel behind on which I had blended Blueprint Sketch distress ink and added some white splatters. I added some white splatters to the yellow panel as well, then popped it up with foam adhesive, and I also added the detail die cut from Deco Heart die on white cardstock.


The piece I die cut out, I wanted to use for another card - you can get a slim white heart frame if you die cut the outer heart from Deco Heart, and then the inner from the center of it. I adhered that around the yellow heart to help it pop, then added it with foam on a blue background die cut with Stitched Rectangles die.


Sentiments for both cards were added with the new CZ Design Well Wishes stamp set. The first card I stamped it simply in black on a thin strip of white cardstock. 


The second card I heat embossed the main sentiment on the blue background, then stamped and trimmed the smaller sentiment down by hand into a banner shape.


I finished off both cards with a few Sparkling Clear sequins from Pretty Pink Posh.


Product links are all below - including affiliate links where possible, which simply means if you use one of the links below that I receive a small commission at no additional cost to you. Thanks so much for stopping by! Have a wonderful day!!!


Wednesday, February 23, 2022

Bunnies and Clouds - Simon Says Stamp March Card Kit

  Good morning! I'm popping in today to share a couple more simple cards using BRAND NEW March 2022 Simon Says Stamp Card Kit - Hoppy Days Ahead! This month's kit is filled with adorable bunnies and spring florals! The included stamp set by the same name has some super cute bunnies and scene building elements, there is an adorable cloud mini stencil, of course some sweet pattern paper, a mini blender brush and new ink pad...that's all not to mention the cardstock, envelopes, and more!

Today I'm sharing this pair of very simple stamped and stenciled cards!


I wanted to create some cute little scenes with the sweet stamp set in the kit, but I didn't want to take the time to do any masking or anything - and oddly enough, I think it worked just fine to stamp them carefully and get the effect without so much work!


For both cards, I first used the adorable Mini Cloud stencil with the Seafoam Pawsitively Saturated Ink pad in the kit - along with the adorable little blending brush! I used the different sizes, layering different sizes, and cleaning and flipping over the stencil to get different placement and arrangements.


Next, I stamped my little scenes, one stamp at a time, and added sentiments. I carefully positioned my images so that it wouldn't be very noticeable that I hadn't masked the images. I love how well it seemed to work!


And I even resisted the urge to add layers or embellishments - making these super flat and easy to mail!


Here is a closer look at the entire kit contents - you can see it all HERE:


Product links are all below - including affiliate links where possible, which simply means if you use one of the links below that I receive a small commission at no additional cost to you. Thanks so much for stopping by! Have a wonderful day!!!