Saturday, April 30, 2022

You Are Capable - Pinkfresh Studio Instagram Release Hop

Hello! Today I am part of a fun Instagram hop to celebrate the new Pinkfresh Studio release! I have had so much fun creating with this release - yesterday was the blog hop, and I shared several cards for that! I have a floral card I'm sharing today that I created on last week's YouTube Live for Pinkfresh Studio as a sneak peek with Lea Lawson - our new usual plan is to do one sneak peek on release weeks, so we can show one suite of products two different ways. You can watch that video HERE if you want to see more details!


The new Magnolia set is SOOO beautiful! I love all the ways you can create with it. Lea heat embossed her image, and I started off with the layering stencils before stamping over with black ink. It even looked lovely without the stamped image, and just the layered stencils!


I used a mix of two different color families for my florals - pink and purple. I love how certain colors just work together like this!


I also used the new Floral Tiles coverplate die as a background. Such a pretty design - and so easy with no tiny pieces to punch out!


I stamped the sentiment on the smaller Ornate Banner, die cut from white cardstock, and then arranged my florals around the other side of it. Used some foam adhesive, and some liquid glue to adhere everything down.


Finished off with a few pretty and sparkly Crystals! LOVE this gorgeous floral cluster, and how easy it is to create with one piece stamps, dies, and layering stencils!


Product links are all below - including affiliate links where possible, which simply means if you use one of the links below that I receive a small commission at no additional cost to you. Thanks so much for stopping by! Have a wonderful day!!!


Friday, April 29, 2022

Pinkfresh Studio April 2022 Stamp, Die, Stencil, and Hot Foil Release

 Good morning! Today is an amazing blog hop to celebrate Pinkfresh Studio's April, Stamp, Die, Stencil, and Hot Foil Release! This release was supposed to happen earlier this month, but shipping delays pushed it to the very last minute this time around! Hopefully you find it worth the wait! You aren't going to want to miss a stop along the way - TONS of inspiration and prizes up for grabs! YAY! You can find links to all of the new release items I used on today's cards at the bottom of this post!


I have several cards to share today using this fun new release!


First up, you know I can't resist some good hot foil plates - and while you wouldn't necessarily think that a star and floral design would be the first thing you would think to combine, I love how well they work together!


The star was created by hot foiling the new Nested Stars hot foil plate, then using the reverse foil with the solid foil plate. When you die cut them out with the Nested Stars dies, you get a star with a gold border on each side, and white in the center. So fun!


I also hot foiled the beautiful Simplest Gestures hot foil plate, and colored it with the Simplest Gestures layering stencils in soft colors - Lemon Whip, Peach Fuzz, Coral Reef, and Mint. I kept it soft and delicate for fun!


The Simplest Gestures layering stencils has some lovely large stenciled sentiments, and the Simplest Gestures dies have coordinating dies for them. So fun, and a great way to utilize the extra space on those stencils, and add some great sentiments! I love the font on these!


The background was created using the new Intricate Stitched Ovals coverplate die. I love the beautiful pattern it cuts, but doesn't have any tiny pieces that have to be punched out. Super simple, and lots of fun detail! 


I finished off with a secondary sentiment from Simplest Gestures stamp set, and a few coordinating Jewels!


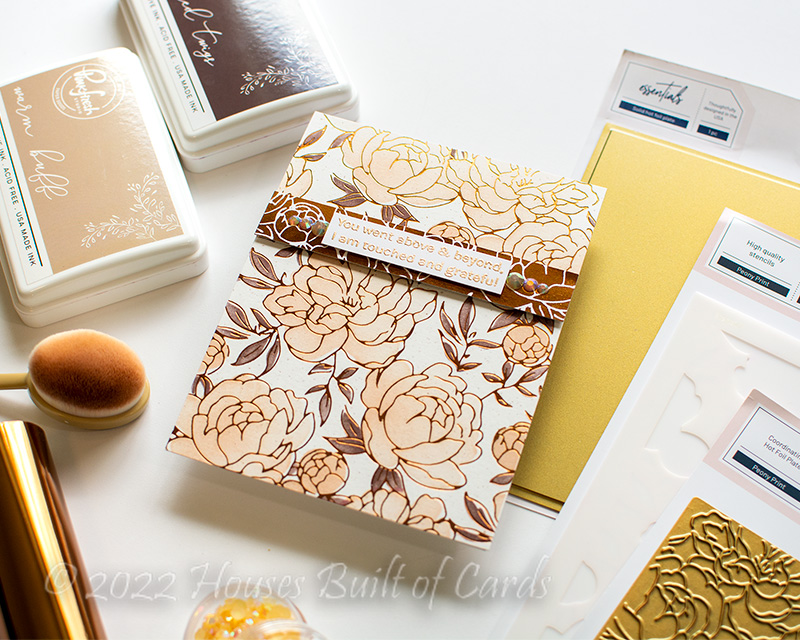
Next up...of course - more hot foiling!


The beautiful 
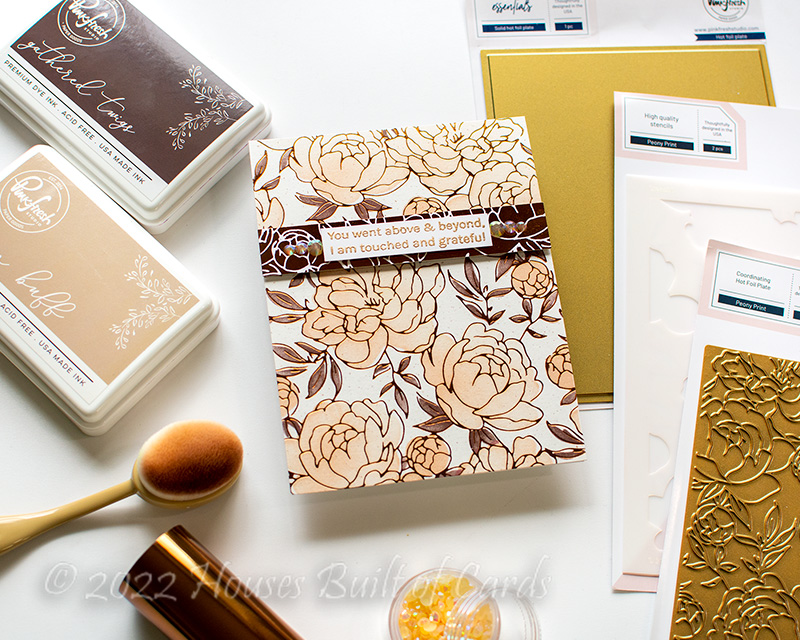
Peony Print hot foil plate is GORGEOUS on it's own. I used Copper foil for this one on some Altenew Spicy Yogurt cardstock, and it was SOOO beautiful! I almost left it plain...but - I had to try out the stencils.


Now, to be honest, I was a bit skeptical of the Peony Print layering stencils for this. They are only two layers, and I just couldn't picture them. I thought it would be a bit too simple. But...then I stenciled them - and I am in love! It is simple, but SOOO effective! Also would be great for mass producing, and still being able to add fun color. I used Warm Buff and Gathered Twigs for a neutral effect, and stenciled with varying pressure to add interest to the design.


I also hot foiled the reverse image using the Solid Foil Plate, and trimmed a thin strip to layer onto the original one. It adds a great focal point, and still doesn't disrupt the design.


Sentiment for this one is from Simplest Gestures stamp set, heat embossed in antique gold embossing ink to match the background.


Those layers were attached with foam adhesive (too much dimension? Is that possible?!?) - and then I added a few Peach Fuzz jewels on each side of the sentiment. They are subtle, but add a great bit of interest to the design.


And finally - back to the stars!


For this card I used a mix of the normal hot foiled Nested Stars, one of the reverse foiled stars (the tiny one on the bottom), and then one of the pieces from between the different sizes of the stars when I cut them all out (the top right corner). LOVE that I was able to put them all to use, and get a lot of variety in my stars!


The sentiment is another one from the Simplest Gestures layering stencils, cut out with the coordinating Simplest Gestures die set. This one was blended with a mix of Peach Fuzz and Coral Reef ink.


I layered everything on a background cut with another of the new coverplate dies - Floral Tiles coverplate die. Another great texture one!


I popped up the largest star on foam adhesive, and the others were adhered with liquid glue. Then added the sentiment with foam in the center of the large star.


Finished off by mounting the entire panel with foam adhesive on a soft pink cardbase, and then added several Metallic Gold Pearls sprinkled around the background!


GIVEAWAY INFO:

Make sure and leave a comment before you leave for a chance to win one of 10 $25 gift certificate to Pinkfresh Studio chosen from comments left across the hop! All winners will be chosen and posted on the Pinkfresh Blog on Tuesday, May 10, 2022 - so make sure and check back to see if you were a winner! Winners must check that page and claim their prize within 2 weeks.

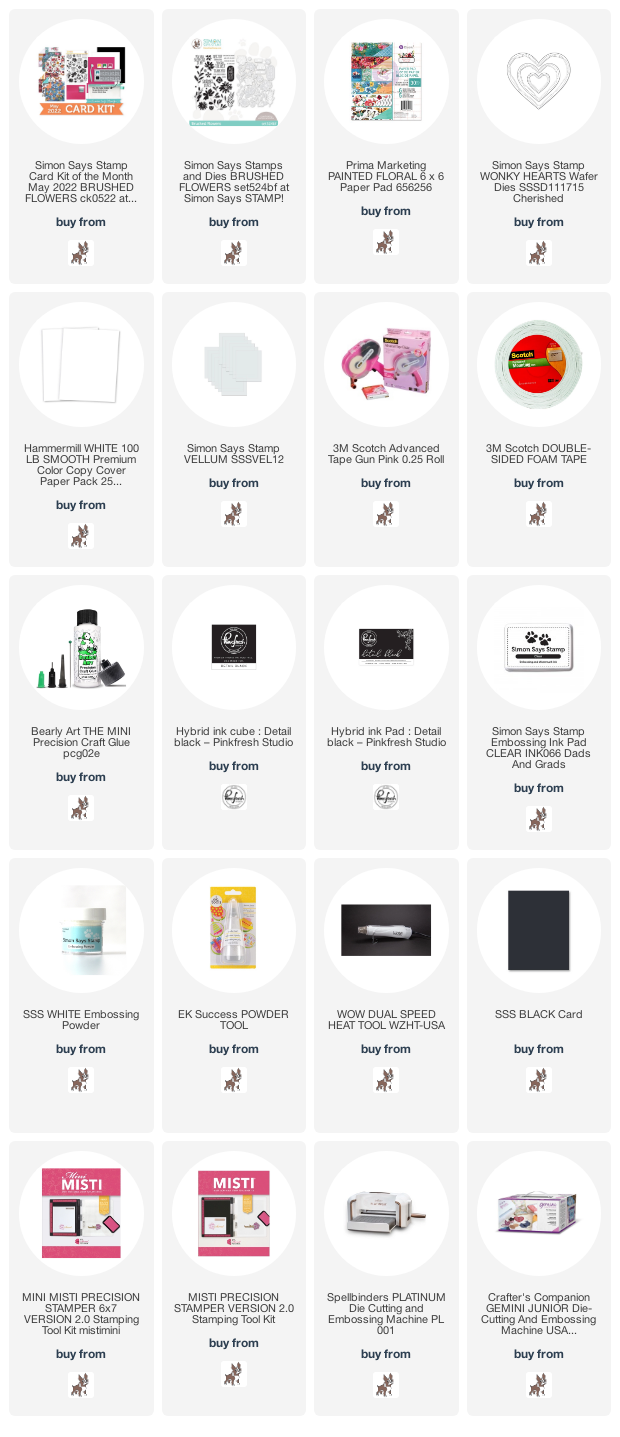
Here is the entire blog hop line-up so you don't miss a single stop - and product links are below - including affiliate links where possible, which simply means if you use one of the links below that I receive a small commission at no additional cost to you. Thanks so much for stopping by! Have a wonderful day!!!

You are invited to the Inlinkz link party!

Click here to enter

Wednesday, April 27, 2022

Bold Butterfly Friendship Card - Simon Says Stamp May 2022 Card Kit

  Hello! I'm popping in to share one last card using the BRAND NEW May 2022 Simon Says Stamp Card Kit - Brushed Flowers! This month's kit bright, happy, and so fun for spring! The included stamp set by the same name has some whimsical flower images and great sentiments, there is a fun mini ink cube pack, of course some sweet pattern paper, clear embossing powder...that's all not to mention the cardstock, envelope, and more!

Today's card is yet another focusing on the gorgeous pattern papers in the kit - and a bit of stamping and die cutting for the sentiment. :)


I mean, that butterfly paper - how can you not love it, am I right? Of course I had to make a card with it! It made the base of my card, with a couple more pieces, adding a torn edge to one for texture, and popping it up on foam adhesive.


I die cut the smallest heart from Wonky Hearts from black cardstock, and heat embossed the larger sentiment on it in white.


I adhered that heart with liquid glue in the center, leaving the top and bottom to float slightly free for a bit of dimension, then added the secondary sentiment, stamped in black and trimmed into a super thin strip, then mounted with foam adhesive.


Here is a closer look at the entire kit contents - you can see it all HERE:

I'd love to hear what your favorite pattern paper in the kit was!


Product links are all below - including affiliate links where possible, which simply means if you use one of the links below that I receive a small commission at no additional cost to you. Thanks so much for stopping by! Have a wonderful day!!!


Tuesday, April 26, 2022

Birthday Card Trio - Simon Says Stamp Happy and Joyful Release

 Hello! I'm stopping to share a few more cards using a super fun stamp set from the newest release at Simon Says Stamp - Happy and Joyful! It's kind of funny, because when I first saw this stamp set, it wasn't my favorite. I mean, I was happy I got a birthday stamp set - since I always need lots of birthday cards...but I didn't think I would love it. Then...I started stamping it out - and WOW! It is definitely a favorite now - so much fun to create quick and graphic cards! Obviously. Since I made 3 - haha!

 (actually...I made 3 each of these 3 designs - so 9 cards total. Gotta build that stash when you can, right? And this made it so easy to do!)


I mixed and matched, but besides black ink, I only used the 4 mini ink cube colors that came in the most recent Simon Says Stamp Card Kit - they were so bright and vibrant and fun - just perfect for these cards! The Time to Party stamp set comes with coordinating dies, but they made for super fun stamping and layering without the dies.


For each card, I stamped the layers of one element in the four ink colors (or most of them, since some only needed 3 layers).


I stamped sentiments in black, slightly overlapping the images, and added a couple extra details in black ink as well.


I die cut each element with a Basic Circle, and mounted those with foam on the cardbases. 


I also added a rounded corner to each cardbase to add a bit of interest to the clean and simple designs.


A few Glacier jewels from Pinkfresh Studio add a touch of sparkle to finish these cards off!


Product links are all below - including affiliate links where possible, which simply means if you use one of the links below that I receive a small commission at no additional cost to you. Thanks so much for stopping by! Have a wonderful day!!!


Monday, April 25, 2022

Hey There Pretty Lady - on the Unity Stamp Company Blog

  Good morning! I'm back with another card for my series on the Unity Stamp Company Blog this morning! I'm so excited to be featuring the amazing Kit of the Month on Monday's on the Unity Stamp Company Blog! Since the Kit of the Month was the first thing I purchased from Unity, and what got me hooked to begin with, they hold a special place in my heart, so I'm super excited about this opportunity to give these kits some love! You can check out all the details HERE for today's project!


Thanks for stopping by today - have a WONDERFUL day!!!


Sunday, April 24, 2022

Square Layered Strawberry Cards - Pinkfresh Studio Facebook Live Card

Good morning! Dropping by today to share a card I made a couple weeks ago for Pinkfresh Studio's Facebook Live. These cards are full of fun layers, hot foiling, die cuts, and washi tape, not to mention happy pink! I love how they came out! You can watch the replay HERE if you want to see more details.


For these cards, I created circle frames to begin with using the new Nested Circles hot foil plates and coordinating dies and Aura hot foil. I also used the reverse piece of foil with the Solid Hot Foil plate to create the second frame. I was super excited to be able to use the pretty Inverted Stitched Scallop circle to add a lacy edge to the center of the circles, and a bit of interest!


I hot foiled sentiments for the cards using Fancy Script Words, only I used a different color of foil - Pink! I love mixing and matching foils on projects. It's such a fun way to add different colors and keep the foil texture to coordinate everything together! I also die cut those with the coordinating dies, and trimmed my white panels down to square shapes to mat onto my pink square 5" cardbases.


Next, I rolled out the Blossoms and Berries washi tape, and die cut it with the coordinating dies. I also had some more pieces die cut just in case I needed more. I arranged those around the frames, also tucking in die cut pieces from Artistic Blossoms. Die cut in white, they add a great bit of textures and interest, while not too much color.


Once those were arranged and attached wither with foam adhesive or liquid glue - or a mix! - I added the sentiments in the center, popped up with foam adhesive. Finally, a little trio of coordinating jewels in a couple corners of each card finish them off!


These cards are so fun, layered, and lush! That washi is some of my favorite - gives me Strawberry Shortcake vibes from my childhood! :)


Product links are all below - including affiliate links where possible, which simply means that if you use one of the links below, I receive a small commission at no additional cost to you. Thanks so much for supporting my blog, and stopping by! Have a wonderful day!!!