Showing posts with label Tulle. Show all posts

Saturday, February 9, 2013

Paper Smooches SPARKS Challenge

Hello! I'm a couple days later getting this posted than I was getting it done - but I totally had to play along with this weeks Paper Smooches SPARKS Challenge:
I loved the idea of the polka dots - but I also couldn't resist pulling out the pink and the sheer ribbon:
I cut some vellum with a Lifestyle Crafts Doily die for the background, then cut a circle of the pink polka dot paper with a Spellbinder's Die. Paper pieced the little piece, used Copic markers to color in the hearts and the the peas, then added Glossy Accents to them both.
I stamped the sentiment with PTI ink, curving it on my clear block so that it rounded and fit the shape of my circle. 
Layered those together, used some My Mind's Eye woodgrain paper from an older 6x6 paper pad, tied some tulle around, then mounted the doily shape with foam adhesive over the top. Added a couple of stick pins in the bow, and mounted that entire panel on a white cardbase with more foam adhesive.
Thanks for visiting today! Hope your weekend is off to a great start!

Thursday, January 17, 2013

Jar Full of Joy

Well - my project to share today has a VERY long story attached to it! If you want to read it all, you can head over to my other blog HERE and read it. If you just want to see the crafty side - then you don't have to!

The short story is that I had been struggling for a while with our move here and missing everyone back home. Pretty much wallowing in self-pity and not seeing all the ways that God has blessed me. So I made this as a way to focus on those reminders!

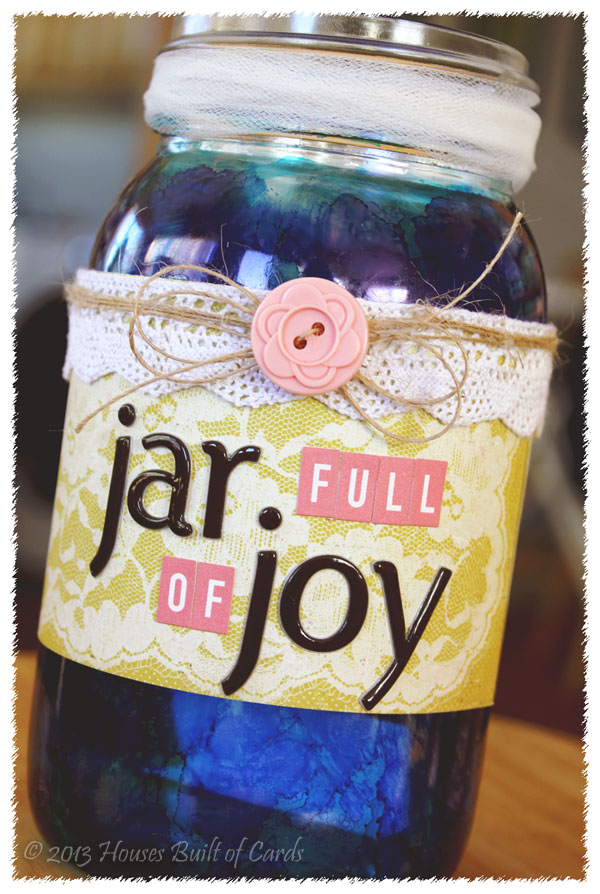
I had a jar in my stash, that for some reason I kept trying to can with, and realized after it was full that none of my lids fit it - it was made in Canada, so I assume it is metric! So...I pulled out some new alcohol inks that I had been wanted to use, and colored up the jar pretty. I love how fast they dried! I used two different colors so they would kind of mottle together.
Next, I trimmed some paper from a 6x6 Crate Paper pad in half, then wrapped around each half - the two halves perfectly fit around the jar. I taped them together, then added some lace trim glued around the top, then wrapped some jute twine, tied in a bow, and attached an October Afternoon Button.
Finally, I used some Thickers, and some OA alphas to add my sentiment. The top of the jar looked empty, so I wrapped some tulle around it to finish off the top, since I didn't have a lid that fit it!
So now, I am filling it with little pieces of paper on which I am writing the many blessing I notice each day. Some days I might have more than one, some days I may not have any. But when I feel like I have nothing to add, I know I can pull out a couple of papers and quickly be reminded!

Have a wonderful day!!!

Friday, December 21, 2012

Beautiful Silver - Unity FWF

(((If you're looking for the Peachy Keen Fond Farewell Blog Hop, click HERE, or scroll down to find it)))

Good morning! I can't believe how fast this week has flown - and that it is already Friday!!! But, that means it's time for Unity Friends With Flair - so that's good news! Here is what I made this week:
I made a card last week (that I still haven't posted yet!) for the Kit of the Month Sketch Challenge...the only problem was that I forgot to use a Kit of the Month! So...this is my second try - and this time I remembered to use my Kit of the Month! Here is this months sketch:


This also fits for the Unity December Challenge - to make a Seasonal Card with Non-Traditional colors. I had so much fun with these colors! It all started because I got my first Zing Embossing Powder in Metallic Silver - and WOW!!! I'm in LOVE! Can't believe how pretty it is - and can't wait to collect a few more!
I started off using a background stamp called Tea Time Pattern and embossing it with the Zing powder. I then inked the edges with Tim Holtz distress ink in Spun Sugar. I cut a circle with a Spellbinder's die, then stamped a snowflake pattern from the September KOTM in the distress ink, then stamped the snowflake from the October KOTM and embossed them with the Zing powder as well. 
The sentiment - also heat embossed - is also from the September KOTM. Didn't it get all that detail beautifully? 
Next, I distressed all the edges with my Tim Holtz distress tool, matted with a couple different papers - the gray chevron is from My Mind's Eye - an older pad in my stash. Finished off with a bit of bling, some tulle, and a button by Crate Paper. For the center, I used some Baker's Twine, and pulled out the white part of the twist, so I just had the pink that I wanted.
So glad you stopped by again today! Hope all your Christmas preparations are going well - and you are looking forward to a peaceful and special day! Merry Christmas!


Wednesday, August 22, 2012

Mother's Day Teacup #2


Hello and welcome back! Here is the second teacup I made for Mother's Day - this one was for my Mom:
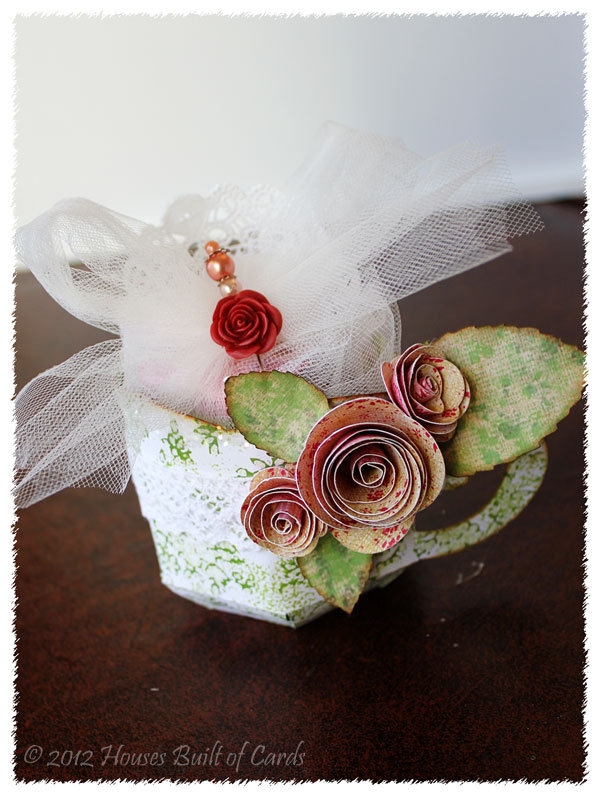
Pretty similar information I guess - the teacup, flowers, and leaves were cut with my Silhouette Cameo, and cut files from the Silhouette store. 
Inked the edges of the leaves and teacup with Tim Holtz distress ink, then added Glossy Accents and Martha Stewart chunky glitter along the rim of the teacup for some sparkle and shine! 
Wrapped up chocolate in tulle, tucked it inside the teacup with a doily behind it, tied a big bow and added a stick pin and a resin flower to the center of the bow.
And I don't know if I added yesterday or not - but I also put some American Crafts white lace around the teacup - just because it felt like it needed it!

Anyway - thanks for stopping by again! 

Tuesday, August 21, 2012

Mother's Day Teacup #1 (A little past due in posting!)


I know...this is WELL past the time I should have posted it - but life happened and I never got around to it! But...it is nice to have this to share while we are moving and I don't have time to craft - so I guess it's okay anyway! This actually the one I made for my mom-in-law - I'll share the other one that I made for my mom tomorrow!
I used my Silhouette Cameo, and a cut file from the Silhouette store for the teacup, and for the flowers and leaves. 
Inked the edges of each leaf and the teacup with Tim Holtz distress ink, then used some Glossy Accents and Martha Stewart coarse glitter along the top edge to add a little glam and glitter!
Finished off by wrapping some chocolates in some tulle, tucking them inside the teacup with a doily behind them (you can barely see it in the picture above) and added a stick pin and resin flower in the center of the tulle bow. 
Okay - I'll see you back here tomorrow with the second one!