Friday, August 30, 2024

Birthday Love Flower Vases - Simon Says Stamp

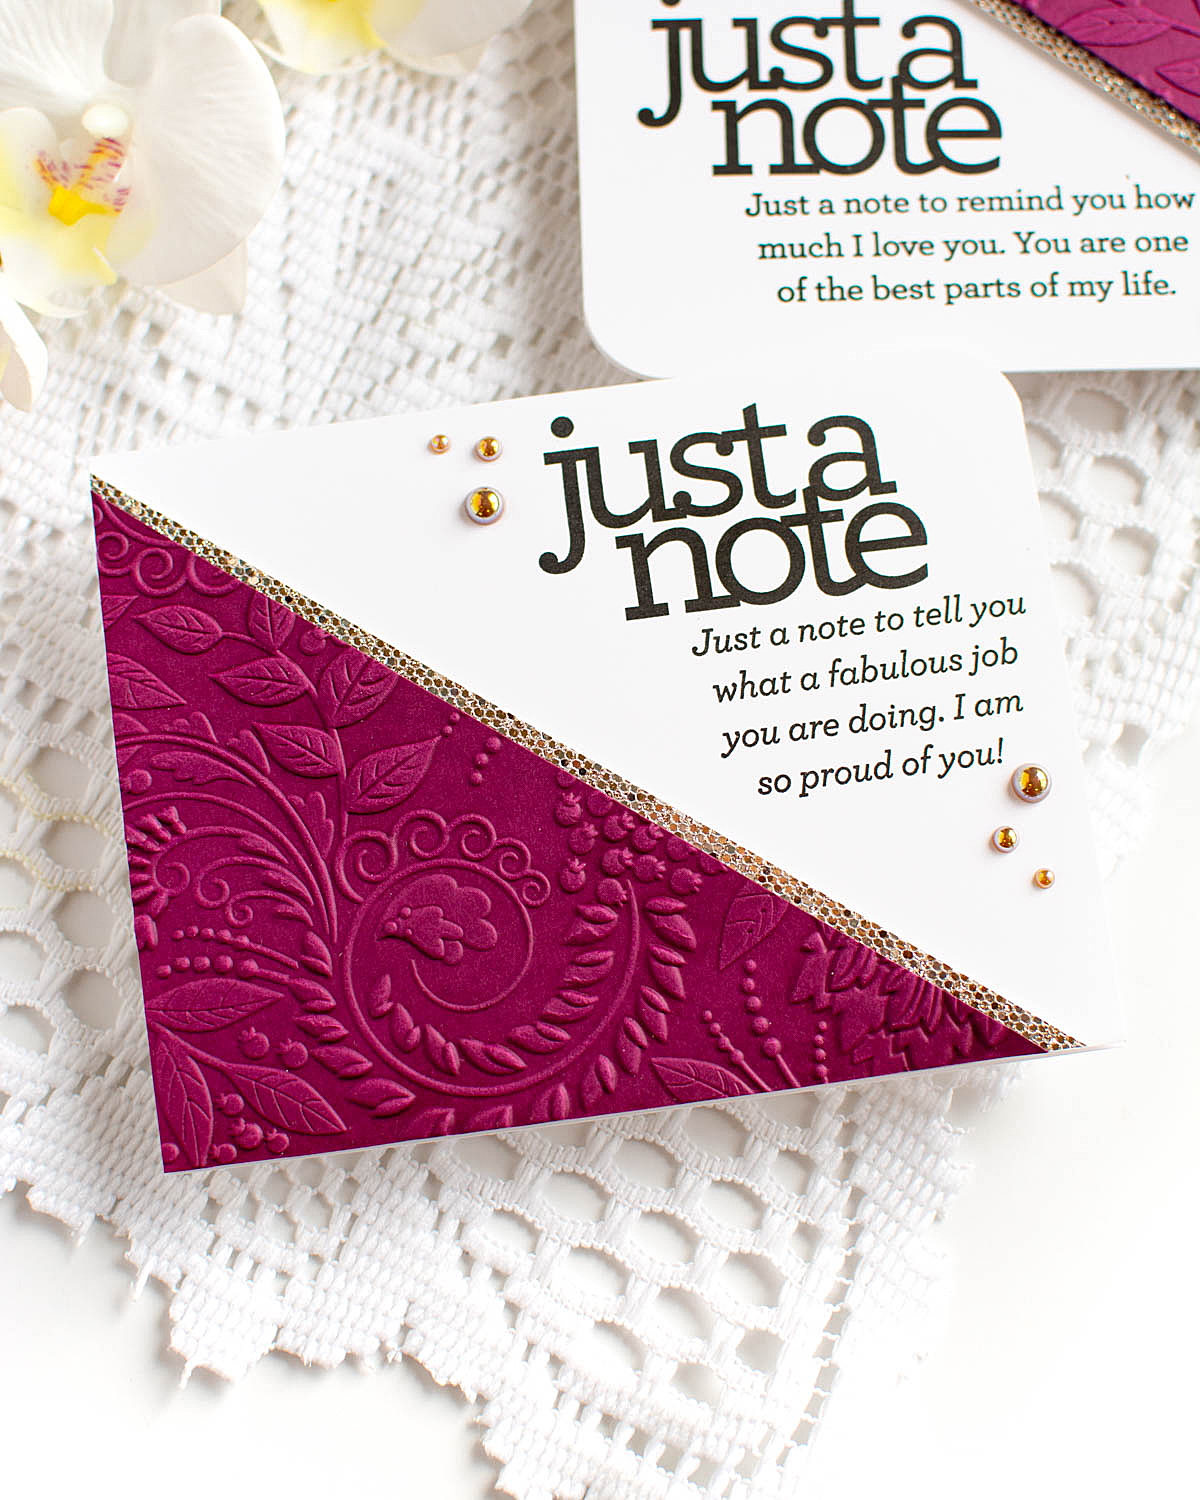
 Good morning! I'm back with another little card for the month using some supplies from Simon Says Stamp - I had fun with some inky watercolor blending, a bit of Glossy Accents, and glitter for some 3 dimensional effects!

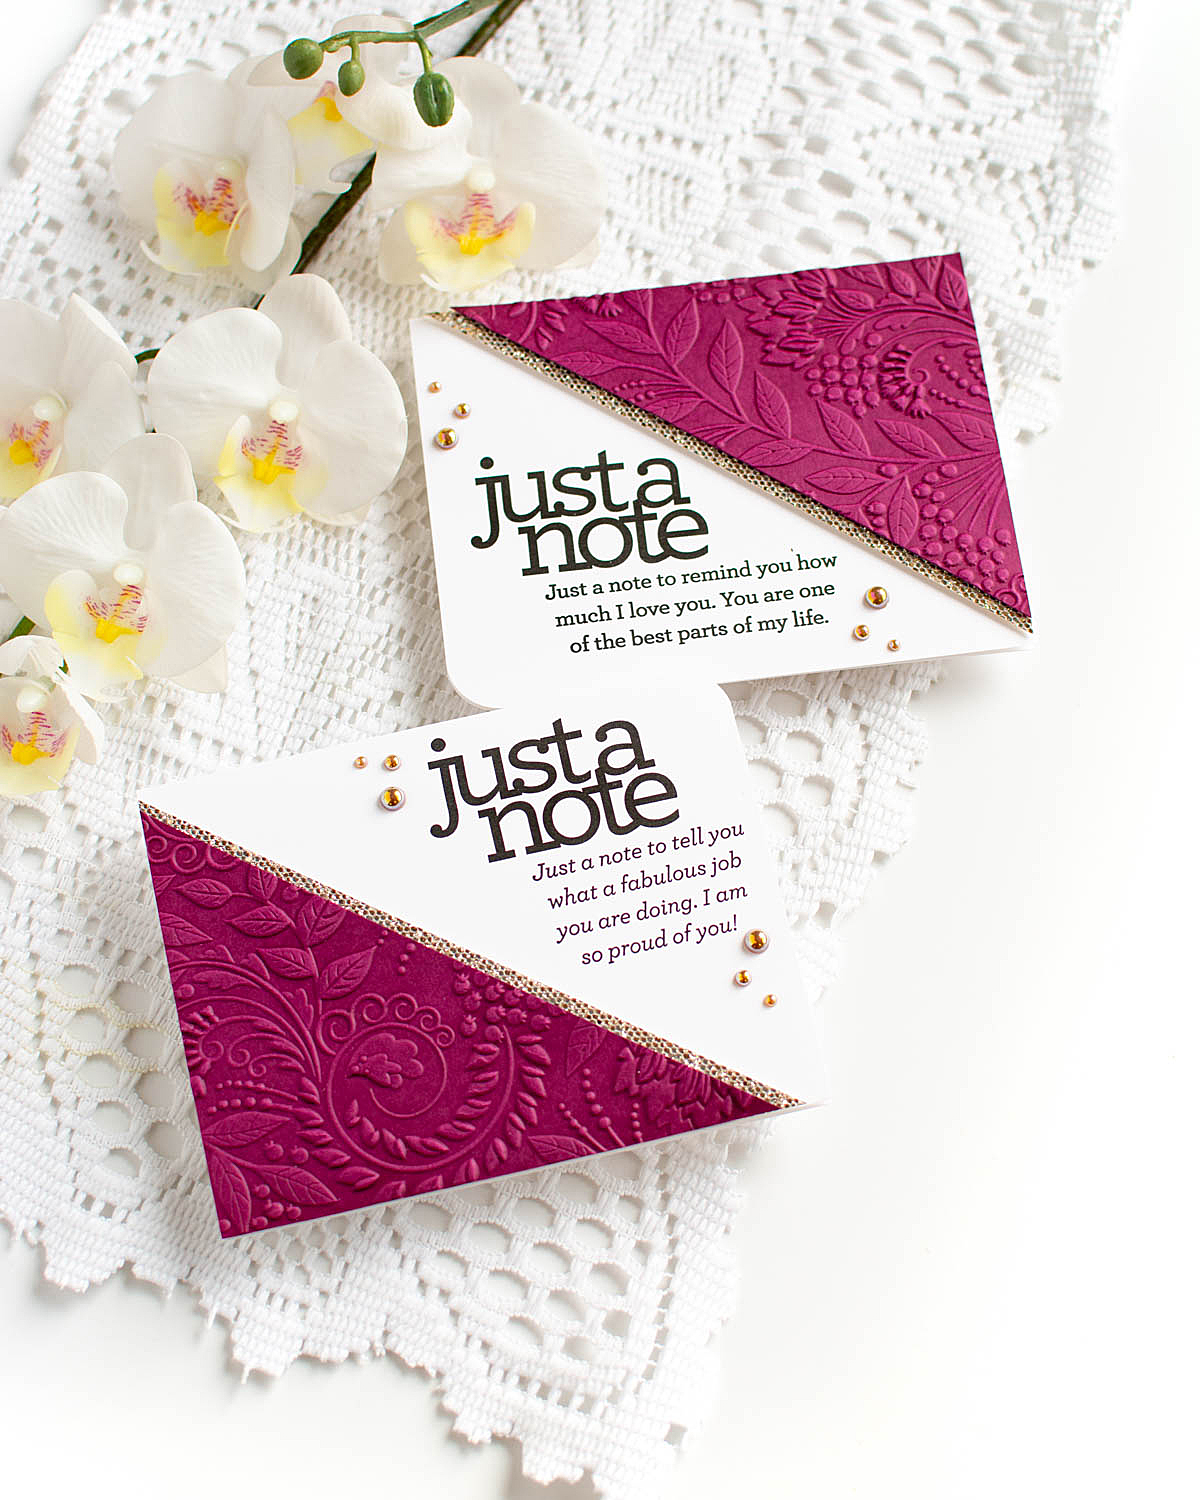
For today's card, I started off by stamping my images from Garden Fresh stamp set on watercolor paper, and added a sentiment from the Big Old Birthday stamp set. I then did some ink blending around the edges before misting with water. This gave a fun and simple pop of color to the panel - and I love the sort of faux watercolor effect it gives! I wanted to add some extra texture, so I covered each of the vases with a good solid coat of Glossy Accents, then sprinkled on some fine Rock Candy distress glitter along the right and bottom edge of the vases. This leaves part of the vases shiny and glossy, and then part of them looking a little frosted. It was hard to capture it in photos - but the first photo below shows it best! Scroll down to see them all:


Product links are all below - including affiliate links where possible, which simply means if you use one of the links below that I receive a small commission at no additional cost to you. Thanks so much for stopping by! Have a wonderful day!!!


Tuesday, August 27, 2024

Sunny Sunflower card - Simon Says Stamp

 Hello! I'm back with a sunny sunflower card using some supplies from Simon Says Stamp - I love how this monochromatic design came out! I'm trying to hold onto summer for just a little bit longer - and today I'm also on my way to Kansas to visit a very dear friend for a week - sunflowers just happen to be the state flower of Kansas, so this card is perfectly appropriate!


I started off with a piece of Concord and 9th cardstock - I loved this pretty tone of yellow. I stamped the beautiful Sunflower Garden stamp in Honey Pawsitively Saturated inks for a tone on tone effect - and turned the cardstock to landscape instead of portrait, leaving the design hanging off the side. I wrapped some jute string around the other side a few times, and tied it in a bow at the top. For the sentiment, I grabbed Sunshine and Smiles stamp set, and stamped the main sentiment in that same Honey ink as the florals, then die cut with the coordinating dies. I popped that up with foam adhesive, then added a secondary sentiment from the Sunflower Garden stamp set, stamped in black, and trimmed to a banner shape. Here are more photos of this card all finished:


Product links are all below - including affiliate links where possible, which simply means if you use one of the links below that I receive a small commission at no additional cost to you. Thanks so much for stopping by! Have a wonderful day!!!


Friday, August 23, 2024

Elegant Just a Note cards - Simon Says Stamp

 Good morning! Stopping by today with a couple cards using some supplies from Simon Says Stamp - I actually have had this embossed cardstock panel sitting near my desk for quite a while - so I was happy to finally put it to good use!

This Exotic Vines 3D embossing folder may be one of my very favorite ones - it's just so pretty! I used some rich toned Concord and 9th cardstock, and dampened both sides when I ran it through my die cut machine. This helped get a nice and deep impression. Like I said above - I had done this some time ago, and hadn't gotten around to using it on a card, so it was nice to finally use it! I cut the panel in half diagonally, then added some Luxe Glitter cardstock along the edge for a glamorous touch - I love that champagne tone on this! I mounted that with some thin foam adhesive for just a touch of dimension, then stamped sentiments from the Just a Note Notes stamp set, rounded off one corner of the card, and finished off with a few Sparkling Champagne pearls to finish. Here are more photos of these two cards: 


Product links are all below - including affiliate links where possible, which simply means if you use one of the links below that I receive a small commission at no additional cost to you. Thanks so much for stopping by! Have a wonderful day!!!


Wednesday, August 21, 2024

Butterfly Thankful Card - Simon Says Stamp September Card Kit

 Hello! I'm popping in to share another card using the newest September 2024 Simon Says Stamp Card Kit - Chunky Thankful Greetings! This month's kit has a fun mix of products! The included stamp set by the same name features some fabulous sentiments, and some cute little floral elements (there is also a coordinating die for this set available separately HERE). There are some beautiful pattern papers included, a fun embossing folder, butterfly diea sparkly embellishment mix...that's all not to mention the cardstock, acetate, and more! 

The monthly card kit has even more perks now when you sign up for the new Subscription service! There is a video HERE you can watch to learn more!


For this card, I started with a base of the beautiful pattern paper in the kit. I heat embossed the sentiment from the stamp set in the kit in white on vellum, then die cut them with the separately available die set. I used the butterfly that was the cut out from the card I shared a couple days ago (love not wasting something!), and then added a secondary stamped and die cut sentiment. Finished off with a few of the sparkly confetti from the kit! Here are more photos of this finished card:


Here is a closer look at the entire kit contents - you can see it all HERE:


Product links are all below - including affiliate links where possible, which simply means that if you use one of the links below, I receive a small commission at no additional cost to you. Thanks so much for supporting my blog, and stopping by! Have a wonderful day!!!


Monday, August 19, 2024

Masculine Birthday Cards - Your Paper Insider

Hello! I'm stopping by today to share a couple cards with you using some fun papers that I recently received from a company I hadn't heard of until recently called Your Paper Insider. They are subscription based, and offer quarterly curated boxes of unique papers ranging from cardstock, to textured paper, to handmade, to glitter, to metallics. So many fun options - I mixed and matched different papers on these cards from the most recent box that shipped in July. Theses ones were perfect for a set of masculine cards!


I used several different shades and textures of cardstock from the kit, and trimmed some strips in varying widths. I layered those diagonally on a panel of white cardstock, then die cut a circle out of the center with a Nested Circle die. This is where the two for one came in - because I was able to use both of these to make two cards! I used on of them to pop up a window on a white card, and used that to stamp my sentiment. For both cards I used the Simon Says Stamp Best Year Yet stamp set. For the die cut circle, I stamped my sentiment at the top, then added a strip of woodgrain cardstock from the kit along one side of the card. I popped the circle up with foam adhesive, and then finished off both cards with a few Pinkfresh enamel dots from my stash. Kept them fairly simple, so they worked for masculine cards! Here is a closer look at both of these finished cards:


Product links are all below - including affiliate links where possible, which simply means that if you use one of the links below, I receive a small commission at no additional cost to you. Thanks so much for supporting my blog, and stopping by! Have a wonderful day!!!


Thursday, August 15, 2024

Butterfly Shaker Card - Simon Says Stamp September Card Kit

 Hello! I'm popping in to share my first card using the newest September 2024 Simon Says Stamp Card Kit - Chunky Thankful Greetings! This month's kit has a fun mix of products! The included stamp set by the same name features some fabulous sentiments, and some cute little floral elements (there is also a coordinating die for this set available separately HERE). There are some beautiful pattern papers included, a fun embossing folder, butterfly die, a sparkly embellishment mix...that's all not to mention the cardstock, acetate, and more! 

The monthly card kit has even more perks now when you sign up for the new Subscription service! There is a video HERE you can watch to learn more!

This kit was PERFECT for creating a shaker card - I just loved that butterfly and it was the perfect fit! I started by cutting it from a panel of white cardstock (and saved the detail cut for the next card I'll share in a day or two) - then used that to build my shaker. I used the Cotton Candy cardstock in the kit for my cardbase, and filled it with the Northern Lights Embellishment mix in the kit. I then die cut the butterfly again from the Metallic Confections kraft cardstock in the kit - mine was pink, but I think there are different colors that will be included in the kits. I used a bit of liquid glue to secure that over the acetate in just the center, as well as the detail on the wings. This left the edges of the wings floating free for some fabulous dimension! Finished off with a sentiment from the stamp set in the kit! Here are more photos and close ups of this card:


Here is a closer look at the entire kit contents - you can see it all HERE:


Product links are all below - including affiliate links where possible, which simply means that if you use one of the links below, I receive a small commission at no additional cost to you. Thanks so much for supporting my blog, and stopping by! Have a wonderful day!!!


Friday, August 9, 2024

Floral You Card Duo - Simon Says Stamp Cheering For You Release IG Hop

 Good morning! Today I'm joining a fun Instagram hop to celebrate the Cheering For You release from Simon Says Stamp! Lots of inspiration to be found, and some great prizes as well! Head over to my Instagram HERE to check it out! But as always with an Insta hop, there are only so many details you can get in that tiny caption, so I always like to do a full blog post with ALL the details! 


I went with two shades of Concord and 9th pink cardstock, used the new Tumbling Flowers 3D embossing folder, then cut those panels at an angle, trimming a couple extra thin strips for interest. Over that, I layered the new Pointelle Rings die cut from white cardstock, and then layered up the new CZ Design You die, again with white cardstock, and a vellum shadow layer to help it pop off the background a bit. I stamped secondary sentiments from the coordinating stamp set, and finished off with a small sprinkling of Blush Glitter Drops for a bit of sparkle! Here are more photos of this finished card:


Product links are all below - including affiliate links where possible, which simply means if you use one of the links below that I receive a small commission at no additional cost to you. Thanks so much for stopping by! Have a wonderful day!!!