
Hello! Today I am part of a fun Instagram hop to celebrate the new Pinkfresh Studio release! I have had so much fun creating with this release - yesterday was the blog hop, and I shared MANY cards for that! Today I'm sharing a card I created on last week's Facebook Live for Pinkfresh Studio as a sneak peek. I used both the stamp/die/stencil combo AND the washi tape in one product suite to create 2 completely different cards! You can watch that video HERE if you want to see more details!

I also have added the video here if you want to watch here:
For the first card, I used the beautiful Enchanting Flora stamp, die, and stencil combo. I heat embossed it in gold, then used the layering stencils to color.

One very important detail on this layering stencil set - it was designed with a unique transparent layering effect. For that to work, you need to use the same color of ink for BOTH of the flower layers, and light colors are going to work best for this design. I couldn't wrap my brain around it until I tried it to be honest - but it really made all the difference on this set!

I die cut all the beautiful images using the coordinating one piece die - and I had so many lovely pieces to work with! I only used some of the smaller images, so I still have plenty to put to use on another card soon.

I used Stitched Diamonds coverplate for my background, and die cut the beautiful Gazebo die from Gold cardstock to tuck my florals into.

I layered the florals in the Gazebo, using bits of foam adhesive to pop up the top of them. I also used some of the new beautiful glitter drops to embellish - they are so sparkly and fun!

After the live, it felt like something was missing, so I grabbed some sheer white ribbon and tied it in a bow at the top of the card!

And then...we had just a few spare minutes, so I was able to squeeze in a simple card using the washi tape as well!

I had some pieces die cut in advance to make it easy, and decided to make a cute little square card - perfectly sized for that one beautiful half moon wreath.
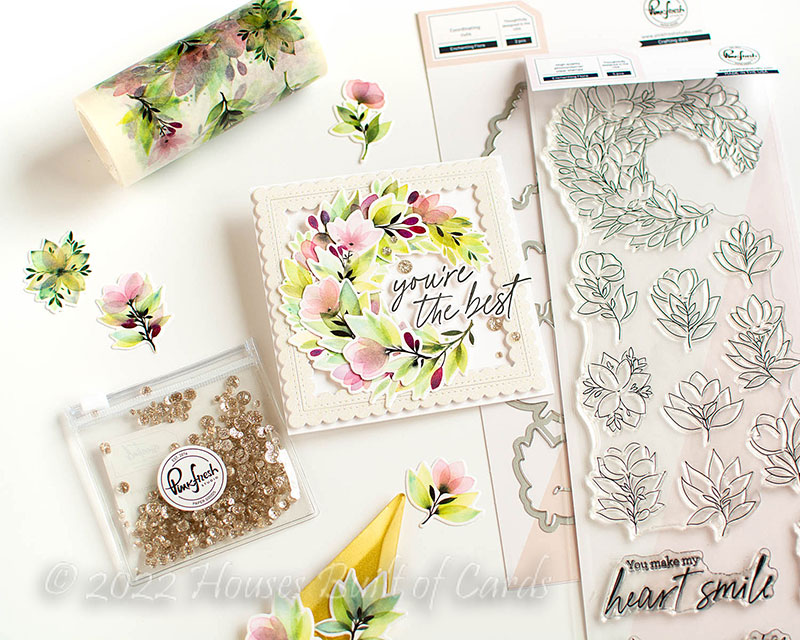
My card size was 4 1/4" by 4 1/4", and I cut the largest of the Stitched Scallop Squares from Champagne Glitter cardstock from Simon Says Stamp.

I popped the frame up with foam adhesive on my cardbase, then started adding my washi tape pieces!

I absolutely LOVE this washi tape - it is so dreamy and magical! I used the main half moon wreath image, popped up with foam adhesive, and then added a few of the smaller images with liquid adhesive to add some fullness to the wreath.

I finished off with a sentiment from the stamp set that also has a coordinating die - and then embellished with a few of the new Champagne Glitter Drops to finish off!

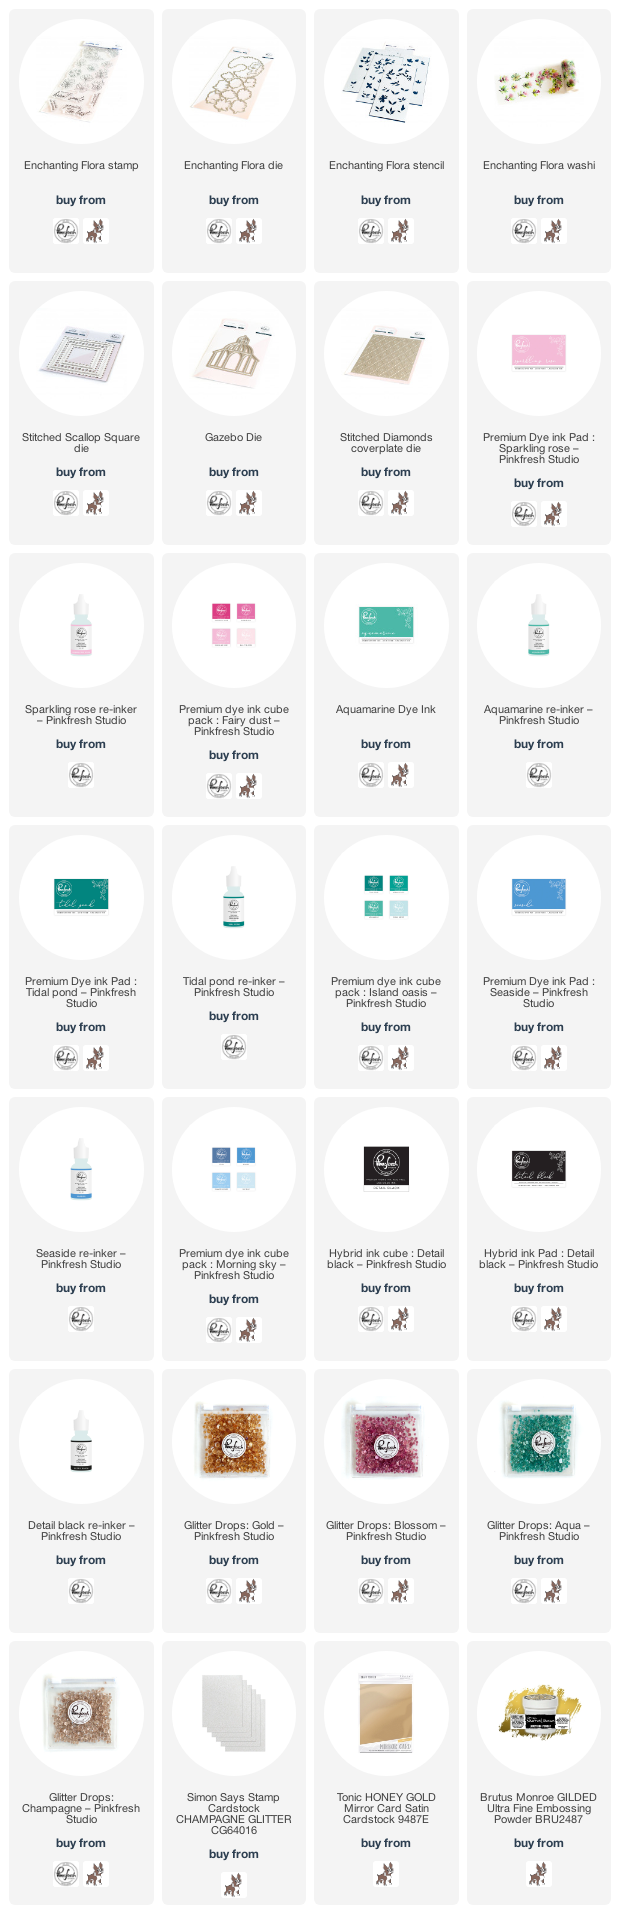
Product links are all below - including affiliate links where possible, which simply means if you use one of the links below that I receive a small commission at no additional cost to you. Thanks so much for stopping by! Have a wonderful day!!!
Beautiful cards. I love the Gazebo in the first card.
ReplyDelete