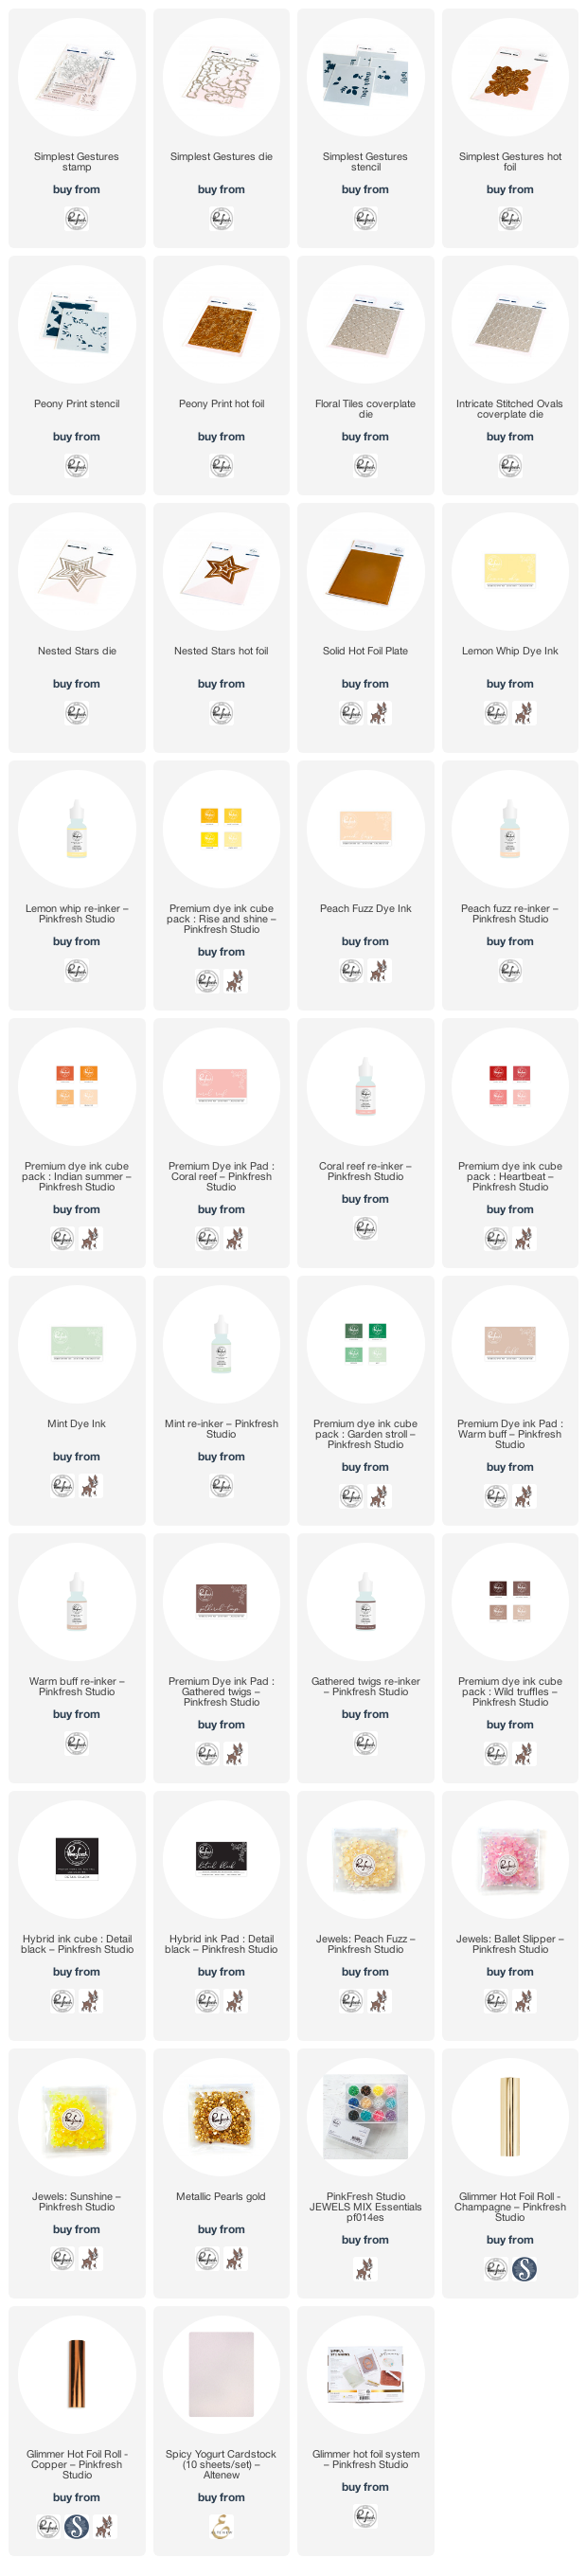
Good morning! Today is an amazing blog hop to celebrate Pinkfresh Studio's April, Stamp, Die, Stencil, and Hot Foil Release! This release was supposed to happen earlier this month, but shipping delays pushed it to the very last minute this time around! Hopefully you find it worth the wait! You aren't going to want to miss a stop along the way - TONS of inspiration and prizes up for grabs! YAY! You can find links to all of the new release items I used on today's cards at the bottom of this post!

I have several cards to share today using this fun new release!

First up, you know I can't resist some good hot foil plates - and while you wouldn't necessarily think that a star and floral design would be the first thing you would think to combine, I love how well they work together!

The star was created by hot foiling the new Nested Stars hot foil plate, then using the reverse foil with the solid foil plate. When you die cut them out with the Nested Stars dies, you get a star with a gold border on each side, and white in the center. So fun!

I also hot foiled the beautiful Simplest Gestures hot foil plate, and colored it with the Simplest Gestures layering stencils in soft colors - Lemon Whip, Peach Fuzz, Coral Reef, and Mint. I kept it soft and delicate for fun!

The Simplest Gestures layering stencils has some lovely large stenciled sentiments, and the Simplest Gestures dies have coordinating dies for them. So fun, and a great way to utilize the extra space on those stencils, and add some great sentiments! I love the font on these!

The background was created using the new Intricate Stitched Ovals coverplate die. I love the beautiful pattern it cuts, but doesn't have any tiny pieces that have to be punched out. Super simple, and lots of fun detail!

I finished off with a secondary sentiment from Simplest Gestures stamp set, and a few coordinating Jewels!

Next up...of course - more hot foiling!
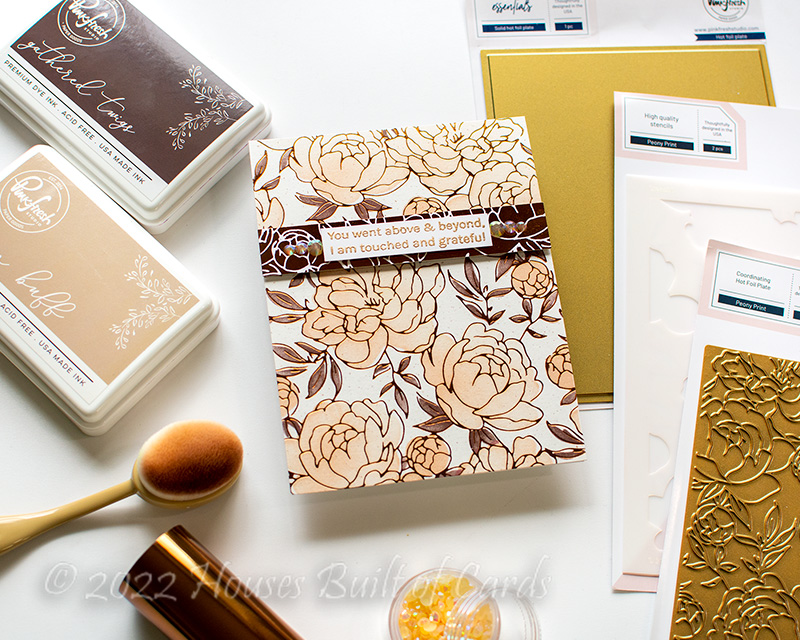
The beautiful Peony Print hot foil plate is GORGEOUS on it's own. I used Copper foil for this one on some Altenew Spicy Yogurt cardstock, and it was SOOO beautiful! I almost left it plain...but - I had to try out the stencils.
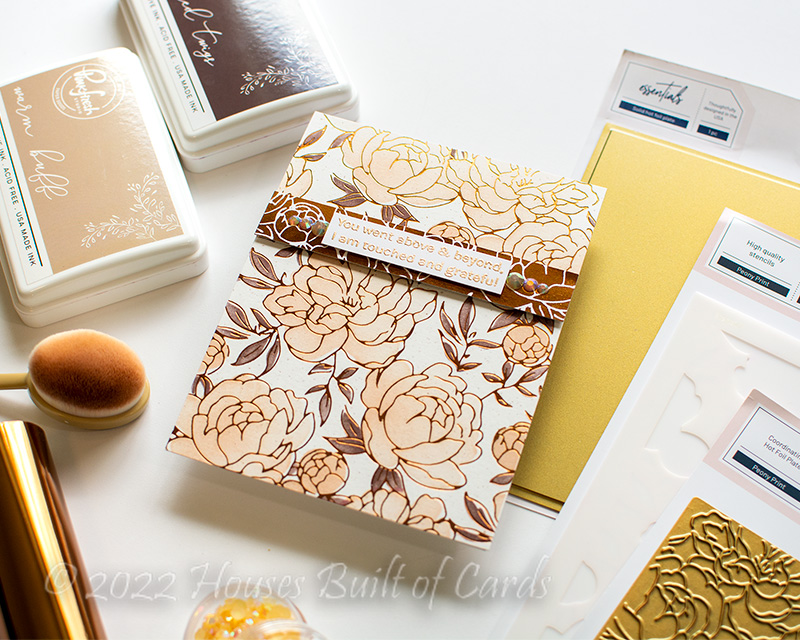
Now, to be honest, I was a bit skeptical of the Peony Print layering stencils for this. They are only two layers, and I just couldn't picture them. I thought it would be a bit too simple. But...then I stenciled them - and I am in love! It is simple, but SOOO effective! Also would be great for mass producing, and still being able to add fun color. I used Warm Buff and Gathered Twigs for a neutral effect, and stenciled with varying pressure to add interest to the design.

I also hot foiled the reverse image using the Solid Foil Plate, and trimmed a thin strip to layer onto the original one. It adds a great focal point, and still doesn't disrupt the design.

Sentiment for this one is from Simplest Gestures stamp set, heat embossed in antique gold embossing ink to match the background.

Those layers were attached with foam adhesive (too much dimension? Is that possible?!?) - and then I added a few Peach Fuzz jewels on each side of the sentiment. They are subtle, but add a great bit of interest to the design.

And finally - back to the stars!

For this card I used a mix of the normal hot foiled Nested Stars, one of the reverse foiled stars (the tiny one on the bottom), and then one of the pieces from between the different sizes of the stars when I cut them all out (the top right corner). LOVE that I was able to put them all to use, and get a lot of variety in my stars!

The sentiment is another one from the Simplest Gestures layering stencils, cut out with the coordinating Simplest Gestures die set. This one was blended with a mix of Peach Fuzz and Coral Reef ink.

I layered everything on a background cut with another of the new coverplate dies - Floral Tiles coverplate die. Another great texture one!

I popped up the largest star on foam adhesive, and the others were adhered with liquid glue. Then added the sentiment with foam in the center of the large star.

Finished off by mounting the entire panel with foam adhesive on a soft pink cardbase, and then added several Metallic Gold Pearls sprinkled around the background!

GIVEAWAY INFO:
Make sure and leave a comment before you leave for a chance to win one of 10 $25 gift certificate to Pinkfresh Studio chosen from comments left across the hop! All winners will be chosen and posted on the Pinkfresh Blog on Tuesday, May 10, 2022 - so make sure and check back to see if you were a winner! Winners must check that page and claim their prize within 2 weeks.
Here is the entire blog hop line-up so you don't miss a single stop - and product links are below - including affiliate links where possible, which simply means if you use one of the links below that I receive a small commission at no additional cost to you. Thanks so much for stopping by! Have a wonderful day!!!