Wednesday, September 30, 2015

Whoooo we have in life...

Good morning! Dropping this morning to share a card I made a bit ago for Unity Stamp Company and hadn't gotten around to posting - using my new favorite owl stamp! Seriously can't get over the cuteness!!! I also have a Quick Tip video for this one, showing how I tore and attached the vellum on this card:


Here is the video:


And here is that little owl - Going to be OWL-Right:


I watercolored him with Gansai Tambai watercolors on a panel cut with an Avery Elle die. Pattern paper is also by Avery Elle. Jute twine is the finishing touch!


I'm also linking this up with the new Simon Says Wednesday Challenge - Anything Goes:


Thanks for stopping by - have a wonderful day!

Tuesday, September 29, 2015

Unity Hop - Pink Courage with Quick Tip Video

Good evening!!! Tonight it's hop night with Unity Stamp Company - and we are revisiting some of the new release from last week tonight! I'm a big fan of these subway style art stamps, and this one is no exception - Survivor can be customized in so many different colors. Since October is right around the corner is Breast Cancer Awareness Month, I went with a pink color scheme. I also have a Quick Tip video below showing how I accomplished this look:


Here is that quick video:


Here is the stamp set I used - called Survivor:


Once everything dried, I added a line of simple machine stitching around the outside, then attached with strong adhesive to my card base with some older Basic Grey pattern paper from my stash to back it.


And of course in addition to all these fun releases, there are some great sales going on this week - make sure and check them all out!


Here is this weeks giveaway - leave some love along the hop, and link up your own Unity creation for a chance to win:


Here is the rest of the links for the Design Team - make sure and visit everyone to see the new stamps in action - and don't forget that tonight is the new "Friends with Flair" - so make sure and link up along with us! Can't wait to see what you make!!! 

Fall cards with Top Dog Dies

Good morning! I'm delighted to be guest designing again today for Top Dog Dies! Fall is one of my favorite seasons - and I love these beautiful dies! I had so much fun that I made 3 cards with them - first up a cute fall scene:


For this one, I used the newly released Pocket Page Fall Die Set and some Pink Paislee pattern paper and mixed together an un-traditional color combo. Used some embossing paste and a chevron stencil behind the leaves and squirrel for some texture, a sentiment from Unity Stamp Company, and tucked a doily, some May Arts linen look ribbon, and some jute twine behind it.

Supply List: 
Pattern Paper: Pink Paislee Cedar Lane 6x6 paper pad
May Arts: Linen Ribbon and Jute Twine
Embossing Paste: Wendy Vecchi White Embossing Paste


Next up, I went with a more elegant looking card - and really featuring that beautiful maple leaf!


I used the same pattern paper pad, and another sentiment from Unity Stamp Company, this time heat embossed on vellum with some torn edges. I added some machine stitching, and some jute twine behind the leaf.

Supply List:
Pattern Paper: Pink Paislee Cedar Lane 6x6 paper pad
May Arts: Jute Twine
Embossing Powder: Ranger Platinum


And finally - this lovely new leaf background die! SOOOO pretty!


For this one, I die cut the Leaf Mosaic Die from kraft, and then colored over the leaves with a gold Wink of Stella pen. I wish you could see the pretty sparkle! I then added, once again, a Unity Stamp Company sentiment - heat embossed in gold on vellum, and tucked some gold thread behind the die cut, before adhering to some super soft blue pattern paper from the same paper pad.

Supply List:
Pattern Paper: Pink Paislee Cedar Lane 6x6 paper pad
Thread: Gold Sulky thread


Thanks so much for stopping by today - and thanks to Top Dog Dies for having me again! Have a wonderful day!

Monday, September 28, 2015

Crinkled Tissue Paper Backgrounds

Good morning! Sharing a bit more Unity Stamps release fun - with the cute new Lulu stamps. She is the CUTEST! I also have a Quick Tip video below on that crinkled tissue paper background:


Here is the video - it's really easy peasy, but I had to share it!


I used a MFT die for the background, some watercolors and watercolor paper, some Crate Paper pattern paper, and a few enamel dots.


I also made another card with the same technique, and another of the Lulu stamps:


Pretty much the same supplies - they are so easy and fun to color! 


These are part of the new releases at Unity Stamps - cute little Lulu:


Here is Aw Shucks, Lulu:


Thanks for stopping by today! Have a wonderful day!

Saturday, September 26, 2015

A Real Woman

Good morning once more! I'm loving the new release from Unity Stamps so very much! Isn't this stamp a beauty? Angie Bloom has done such a beautiful job yet again! I made this card and a Quick Tip video on coloring on Kraft cardstock:


Here is that video:


And here is this lovely set - Rebuild Herself:


The front panel was cut with a Mama Elephant Die, and I added some Simple Stories paper, folded a corner down, and used a staple to hold on a twine bow - as well as hold the fold down. Added a few enamel dots, some woodgrain paper from the same pad, and curled up some paper edges for some beautiful dimension.


Thanks so much for stopping by - have a wonderful day and weekend!

Friday, September 25, 2015

Guest Designing for the Twinery

Good morning! I'm excited to be guest designing this morning over at the Twinery and sharing a couple cards using some beautiful Baker's Twine! Since we are at that beautiful time of year, heading into the fall and winter seasons, I created a couple of seasonally inspired cards to share - first up, a simple fall note card. This would be easy to personalize with a sentiment, or just send a note to someone special to let them know you're thinking of them!


For this card, I used probably my favorite (and most USED) spool of twine - Charcoal! I used some woodgrain cardstock for my cardbase, added a simple white doily, and that lovely die cut leaf (a tiny peek of a soon to be released die from Lil' Inker Designs!) I die cut it from white cardstock, added two shades of red die ink, then added a few splatters of gold Heidi Swapp Color Shine. Then - I wrapped m twine around the entire card several times, and added a bow. The finishing touch is a wood veneer heart, colored over with a gold Wink of Stella pen, then coated with Glossy Accents. You can see the shine better in this next photo: 


Next up - I wanted to create a very simple holiday card, that would be easy to reproduce in multiples if needed. I also LOVED that beautiful gold shimmer twine the moment I saw it and just knew I needed to make use of that one!


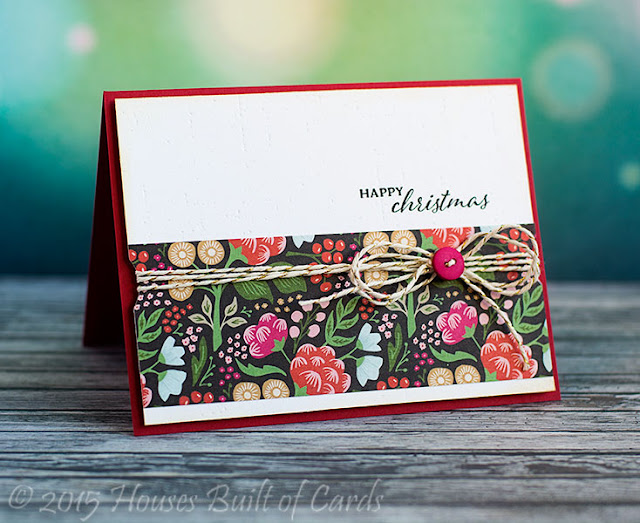
I used my PTI Linen Impression Plate to create the texture on my white cardstock, and added my strip of pattern paper on the bottom. Used a bit of distress ink to soften the white edges, and stamped my sentient from Winnie and Walter. I used a round circle punch to add the little notches on the sides to hold the twine in place, then wrapped it around again, and added a bow with a bright fun button in the center. Finished off by mounting with foam adhesive on a red card base. 


Thanks so much for stopping by today - and to the Twinery for having me! Have a wonderful day!

Beautiful Feather - and Quick Tip Video

Good morning! Dropping by again this morning to share another card with one of the new releases at Unity Stamp Company from last night - this feather is absolutely STUNNING!!! Designed by the amazing Angie Bloom - LOVE it! I thought I would do it super simple and let it shine in it's simplicity! :) I even made another Quick Tip video to go along with it!


Here is the Quick Tip video - showing how I used white colored pencil to color this image on kraft cardstock:


I used a Wplus9 die, and added a few ink splatters with some white Mister Huey's mist, then added the sentiment on vellum, wrapped and tucked behind. So incredibly easy!


Here is a peek at that entire kit - Beautiful is Never Perfect


Thanks for dropping by again today! Have a wonderful day!

Thursday, September 24, 2015

Unity Hop - Thank You Very Moose!

Good evening!!! Tonight is another fun release night and hop with Unity Stamps - so many fun new releases to fall in love with! There was so much stuff to get ready, that instead of the normal Tuesday hop this week, we had to postpone a couple days until tonight. I promise it was worth it though! Wait until you see what everyone else has been working on! This is one AMAZING team!

I have made several cards with the new releases, and a few more Quick Tip videos - but had to start off by sharing this CUTE little moose! I have always loved moose, and loved how often we got to see them when we lived in Wyoming. Have definitely missed seeing them since we moved! Here is my card with this fun new release:


Here is the Quick Tip video - sharing how I created "snow" using Glossy Accents and Tinsel Glitter - love the sparkle!


I colored him with Copics, used Lil' Inker's Border Builder's Die Set to cut a fun edge on the bottom, the punched a couple holes to tie some twine on, before attaching the entire panel over some Basic Grey pattern paper with foam adhesive. I also added Glossy Accents to his eyes! LOVE!


Here is this new release - Very Merry Christmoose:


And of course in addition to all these fun releases, there are some great sales going on this weekend - make sure and check them all out, along with the new releases!


Here is this weeks giveaway - leave some love along the hop, and link up your own Unity creation for a chance to win:


Here is the rest of the links for the Design Team - make sure and visit everyone to see the new stamps in action - and don't forget that tonight is the new "Friends with Flair" - so make sure and link up along with us! Can't wait to see what you make!!! 


All the Happiness

Good morning! Swinging by this morning with a card I made recently - I was excited to get my hands on my first of the We R Memory Keepers Next Level embossing folders - I had been wanting to try them for a while, and discovered them at Impress Rubber Stamps in Seattle (was excited to stop by when taking my friends to the airport late last month!) I paired it up with some cuteness from Pretty Pink Posh and Wplus 9 to make this card:


I am joining in with the current Get Sketchy challenge at Wplus9


Also linking up with the current challenge at Simon Says Stamp - No Designer Paper:


I did some very simple coloring on the bunnies from Wplus9's Wishing You, then covered them VERY heavy with Wink of Stella and fussy cut them out. Did some torn vellum wrapped around the embossed panel with my sentiment from Wishing You Sentiments heat embossed on there. Added a faux twine bow using Pretty Pink Posh's Twine and Bows Die - such a clever and fun die! Added some silver star sequins and silver shimmer beads - attached with tiny dots of Glossy Accents, then finished off with a bit of white Mister Huey's mist splattered on there.


Thanks for dropping by today! Have a wonderful day!!!

Wednesday, September 23, 2015

Most Wonderful Time of the Year - Reverse Ink Smooshing

Good morning! Stopping by with another card and video using some of the newly released stamps from Unity Stamp Company - and a fun new technique with a a Quick Tip video - Reverse Ink Smooshing:


Here is that video - basically your typical ink smooshing, only instead of spraying water on the ink on your clear panel, you spray the paper, and then smoosh the dry ink into the paper. Gives you a bit more control - you can see it best in this video:


I also used the current colors for the Be Inspired Challenge - aren't they so bright and fun?!?!?


My panel on the front was cut with Lil' Inker's Side Stitched Rectangle Mats, and the sentiment is from the new Unity Sentiment kit, Believe in the Magic. I also added some Glossy Accents with a fine tip applicator to the larger words in the sentiment and the snowflakes. This photo shows it best:


Thanks so much for stopping by today! Have a wonderful day!

Tuesday, September 22, 2015

O Holy Night - with Quick Tip Video

Good morning! Just wanted to drop by this morning with a card and another Quick Tip Video - this one on one way to attach thread bundles to cards - something that I think gives such a fun and whimsical effect! Here is my card:


And here is that video:


Here is this month's sentiment kit that I used for this card - Believe in the Magic:


I used Lil' Inker's Side Stitched Rectangles for my front panel. I used an ink smooshing technique, but with Heidi Swapp Color Shine in Gold for tons of sparkle. Backed it with some pattern paper and glitter washi tape - then mounted that front panel with foam adhesive after attaching my wood veneer and thread bundle (as shown in the video!)


Thanks so much for stopping by - have a wonderful day!