Wednesday, October 24, 2018

Autumn Shaker Tag - on the Reverse Confetti Blog

Hello! I have a new edition of Wednesday in the Works on the Reverse Confetti Blog and YouTube Channel this morning - this week my project features some fun and simple treat packaging using Bitty Window Bags to hold my goodies, and a shaker tag created with Topped Off Tag Confetti Cuts, Sunburst Tag Layer Confetti Cuts, Bumblebee and Tangerine Dye Ink, and Autumn Blessings Stamp Set!


Thanks so much for stopping by - have a great day!

Tuesday, October 23, 2018

LID October Release Day 1 - Ornaments and Mittens

Hello! The day is finally here to start sharing projects with the BRAND NEW October release at Lil' Inker Designs! There is such a fun mix of products in this release - there is just a bit of fun fall mixed in with lots of great Christmas and winter theme items! You can find the entire new release HERE!


You should have arrived here from Chrissy Larson - if you stopped by here you can refer to the entire blog hop at the bottom so you don't miss a stop or a chance to win the amazing giveaway. I also have links to all the new products I used on today's cards!

I have two cards to share with you today - first up, using the fabulous new layering stamp set - Merry Ornaments!


This is such a fun stamp set - the layering possibilities are so unique! I used some of my favorite non-traditional Christmas colors - blues and reds!


I also added some black splatters to the background with my Pinkfresh Licorice Liquid watercolor, and then mounted on some festive red pattern paper to finish it off.


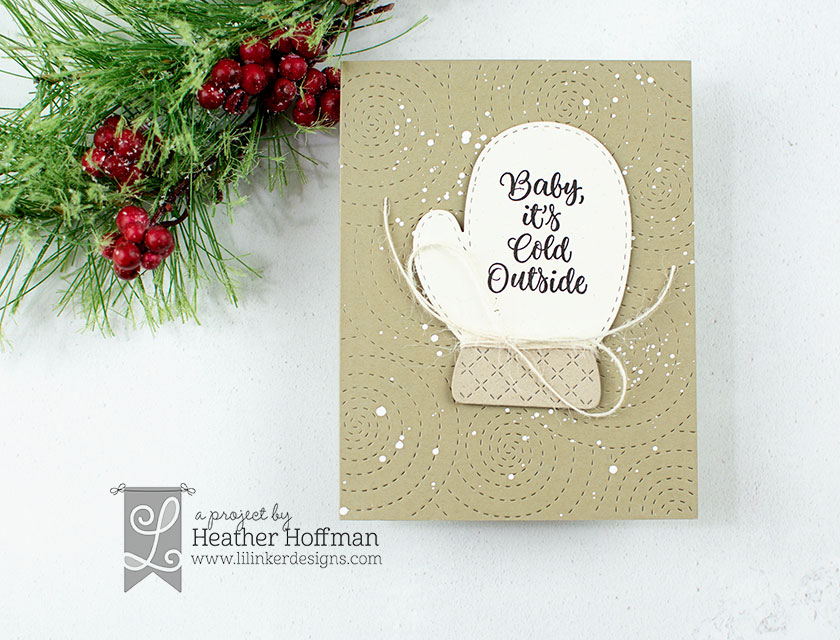
Next up, a cute and simple card featuring the sweet Mitten Shaker Die and Ready, Set, Snow stamp set:


For this card, I started by die cutting the main piece of the mitten from some rustic white cardstock, then added the bottom part with Neenah Desert Storm cardstock. I stamped the sentiment in the center of the mitten, and tied on some jute string.


For the cardbase, I used Reverse Confetti Sand cardstock and die cut it with Quilted Stitched Spirals Cover Die and added some white paint splatters. Once that dried, I mounted the mitten over the top with foam adhesive for a nice clean and simple card!


Your next stop along the blog hop is Jennifer Carter - head over there next to finish the hop before you go shopping. See you tomorrow with more projects and fun!

Now...how would you like to win the ENTIRE new release?!?!?!? WOW - some lucky winner is going to be VERY happy! Make sure and leave a comment here before hopping along to the next stop - and leave comments at each stop for a chance to win!


Here is the entire Blog Hop line-up - make sure and check out each stop and leave your comments:

Heather Hoffman (you are HERE)

Product links are all below - including affiliate links where possible, which simply means if you use one of the links below that I receive a small commission at no additional cost to you. Thanks so much for stopping by! Have a wonderful day!!!

Monday, October 22, 2018

Diagonal Masked Watercolor Card - on the Unity Stamp Company Blog

Good morning! Popping in to share a peek of this little card that I have up on the Unity Stamp Company blog this morning! You can check out the details and video HERE! :)


Thanks for coming by - have a wonderful day!


Friday, October 19, 2018

Pretty Pink Posh and Glue Dots Collab Hop

A very big crafty hello! Welcome to Day 2 of our very special blog hop collaboration with Pretty Pink Posh and Glue Dots Adhesives


This is Day 2 of a fun blog hop with PRIZES from both companies up for grabs, along with inspiration and videos. The talented crafters along the hop will be bringing you an array of projects, coloring inspiration, and a variety of ways to have fun with both Pretty Pink Posh and Glue Dots collectively!

The entire list of stops along the blog hop are listed at the bottom of this post - as well as info on the prizes up for grabs, so keep reading! 


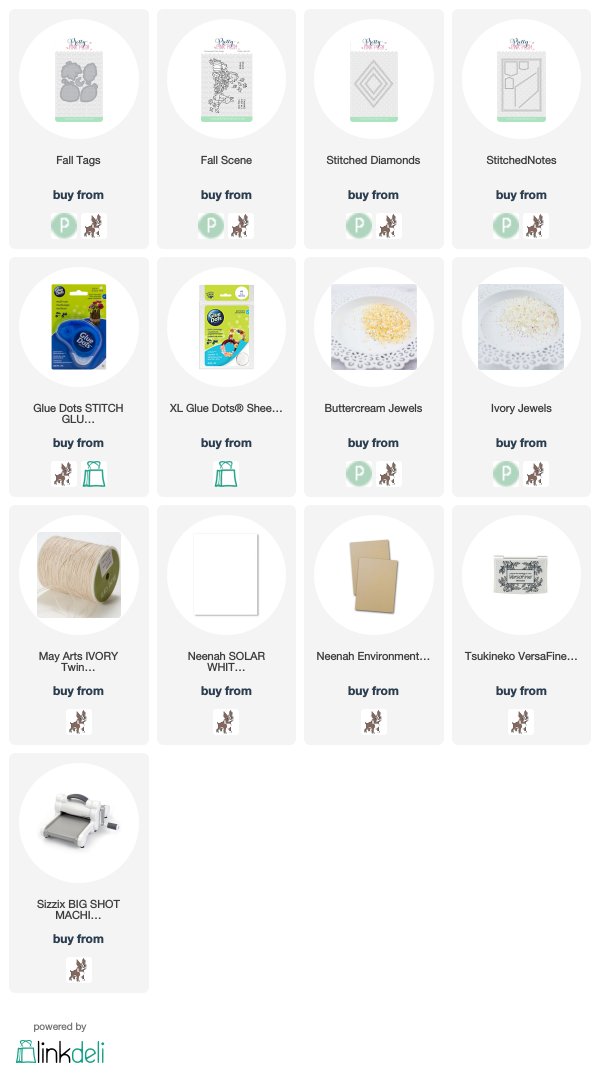
For my cards, I pulled out some felt and my Pretty Pink Posh Fall Tags Dies - and put that super sturdy adhesive to good use!


I used some felt from my stash, and was just crazy enough to pull out my needle and thread and hand stitch around each leaf! I used the cuts from the dies as a guide - because even though they didn't show up well alone on the felt, they still cut through nice and clean and clear.


Once each one was stitched, I die cut a Stitched Diamond, gathered them into a cluster, and then used the XL Glue Dots sheets to attach them down. Worked like a dream!


I also die cut a rectangle from Stitched Notes Dies, then used the Glue Dots Stitch Glue Squares tape runner to attach the layers all together.


I bundled some twine through the holes at the bottoms of the tags, and tied in a pretty bow, and stamped a sentiment from Fall Scene at the bottom of each.


Finished off with a sprinkling of jewels - Buttercream on the card with brighter spring colored leaves, and Ivory on the more traditional fall colored one.

GIVEAWAY INFO:

No blog hop is complete without some prizes - are you ready for some awesome giveaways? Each company has a prize pack to give away! Here are the two prizes up for grabs:

*Glue Dots Prize Pack - An assortment of adhesives valued at $100
*Pretty Pink Posh Prize Pack - An assortment of goodies up to the value of $75

To win one of these prizes - leave a comment on each stop along the hop! Winners will be chosen at random fro comments left on all blogs along the hop by 6:00 AM PST on October 23rd. Winners will be announced on the Pretty Pink Posh Blog and Glue Dots Blog.

Here is the entire blog hop line-up so you don't get lost along the way:

Heather (you are here)

Product links are all below - including affiliate links where possible, which simply means if you use one of the links below that I receive a small commission at no additional cost to you. Thanks so much for stopping by! Have a wonderful day!!!


Thursday, October 18, 2018

Glittery Layered Folklore Die - Pinkfresh Studio

Good morning! Today I'm sharing a super glittery and sparkly card - with a tutorial video created for Pinkfresh Studios! You can find the video in HD over on the Pinkfresh YouTube Channel HERE, or watch it below in this post. I had tons of fun combining the gorgeous new Pinkfresh Folklore Die and fabulous new sentiment stamp set - My Favorite Things to Say - from Pinkfresh Studio for my card today!


Glitter cardstock was the perfect way to get all this sparkly, without also having to worry about glitter falling off every time I touched it - and I love the fun color combo!


Here is the video with all the details:


I said this in the video as well - but just know that die cutting this glitter paper is a bit of a labor of love! I used a shim, and got a clean cut, but the pieces don't automatically fall out for the most part - I did have to do a bit of poking and prodding to get them cleared out. The good news is, that allowed me more easily to do what I did with the green layer, leaving some of the pieces popped in place!


I simply love the sentiments in My Favorite Things to Say - so perfect for so many occasions! I also kind of love heat embossing sentiments in black to place on cards - seems like whatever the card, it always fits on well that way.


I simply can't get over how detailed and intricate this Folklore die is! So pretty!


Have you ever die cut with glitter? What color combo would you use?


Product links are all below - including affiliate links where possible, which simply means if you use one of the links below, I receive a small commission at no additional cost to you. Thanks so much for stopping by - have a wonderful day!!!


Wednesday, October 17, 2018

Joyous Holiday Season - Spellbinders

Good morning! I recently was sent some super cute Spellbinders Dies from A Charming Christmas Collection by Becca Feeken - they were so beautiful and intricate! So I used them together to create this soft and detailed holiday card:


The two sets I got to play with were Snowflake Toppers Etched Dies and Cinch and Go Poinsettia Etched Dies


I started off by cutting the border on my panel of white cardstock - isn't the detail on that amazing?


Next, I cut all the layers of the poinsettia from white cardstock, and blended on Distress ink to add color. Do you see how the ink blending reveals the etching detail on them?


Next, I blended some distress ink from the top edge of my die cut panel, and stamped my sentiment on there as well.


I layered up the flower, adding a white jewel in the center of it, and adhered it next to my sentiment.


Finished off by adhering that panel to my white cardbase, adding some gold splatters with my Starry Colors palette, and wrapping and tying some twine around the front in a loose bow.


Product links are all below - including affiliate links where possible, which simply means if you use one of the links below that I receive a small commission at no additional cost to you. Thanks so much for stopping by! Have a wonderful day!!!


Autumn Blessings Scene - on the Reverse Confetti Blog

Hello! I have a new edition of Wednesday in the Works on the Reverse Confetti Blog and YouTube Channel this morning - this week my card features a little fall scene with a bit of an unexpected color combo, and uses Autumn Blessings (for the pile of leaves and flowers), Nuts About You (the darling squirrel), the Triangles Cover Panel with some Bellini Dye Ink blended behind it, and the sentiment stamped on a simple banner created with Tall Tag Trio Confetti Cuts!


Thanks so much for stopping by - have a great day!